Tetra Egnyte Connector
Egnyte is a service that offers secure file sharing. Tetra Data Platform has a built-in integration that allows users to pull raw data files from their secure Egnyte storage and into the Tetra Data Lake.
How Does the Egnyte Connector Work
TetraScience leverages Egnyte's API to constantly detect file change events in your Egnyte account and upload the files into our Data Lake and then trigger Data Pipelines.
Our Egnyte Connector currently tracks file creation events, including different versions of the same file. If you remove your file from Egnyte, TetraScience Data Lake will not mirror that and will not delete the files we collected.
Egnyte integration will track (listen) to three types of events in your Egnyte account:
- File has been uploaded (create event)
- File has been changed (update event)
- File has been copied from another Egnyte location (copy event)
The integration will detect the file creation in Egnyte every minute.
Current limitation
You can only have one Egnyte integration created by one Egnyte user in your organization. This is due to the rate limit of the Egnyte API and TetraScience is working on improvements to address this limitation.
How to configure the connector
NOTE:
For each environment, there should be one Egnyte application in Egnyte. One Egnyte application cannot be shared between different environments.
Set up your Egnyte account
First, create a dedicated API user for this integration. For production usage, the best practice is to create an API user (standard user) dedicated for this integration. Recommend you name it: [email protected].
After the user is created, share the Egnyte folder that you would like the integration to track with the API user with viewer permission.
Organize your Egnyte folder
It is always a good idea to leverage the folder structure to organize your data, the best practice is to include your study number, project name/id, instrument name/id and etc in the folder path. For example:
Shared/instruments-data/plate-reader-1
Shared/instruments-data/plate-reader-2If you are organizing data from your CRO, you can consider something like the following:
Shared/study-1/CRO-A/assay-x
Shared/study-1/CRO-A/assay-y
Shared/study-1/CRO-A/assay-z
Create and configure an Egnyte Connector.

To begin, click the "hamburger" menu icon on the top left to open the sidebar menu
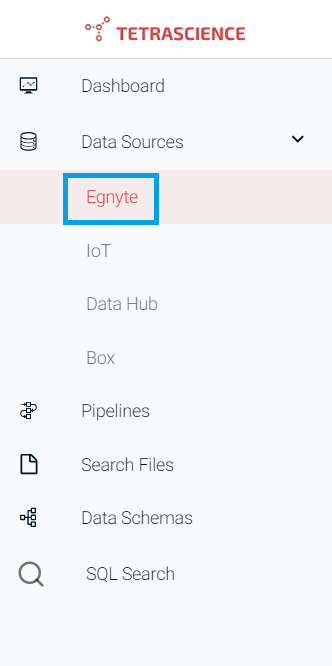
Select the Egynte item from the "Data Sources" list.

From the Egnyte Soure Management page click on the "Add Your Egynte Account" link.
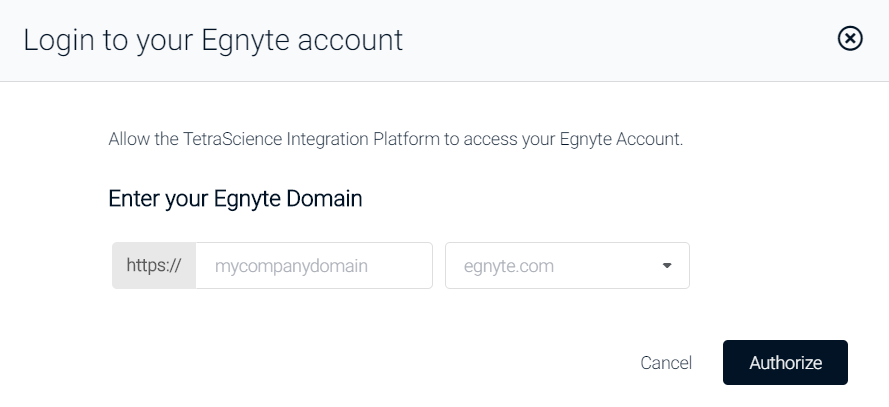
Enter the URL of your organization's Egnyte instance, and click Authorize to log into Egnyte. You will need to enter your Egnyte credentials (username and password). If you are already logged into Egnyte in your browser, you just need to click "Allow Access" and you will be redirected back without entering your credentials again.

Your account will be added and you will return to the Egynte Source Management page. From here you need to click on "Add source", which will request details on the specific folders you wish to integrate.
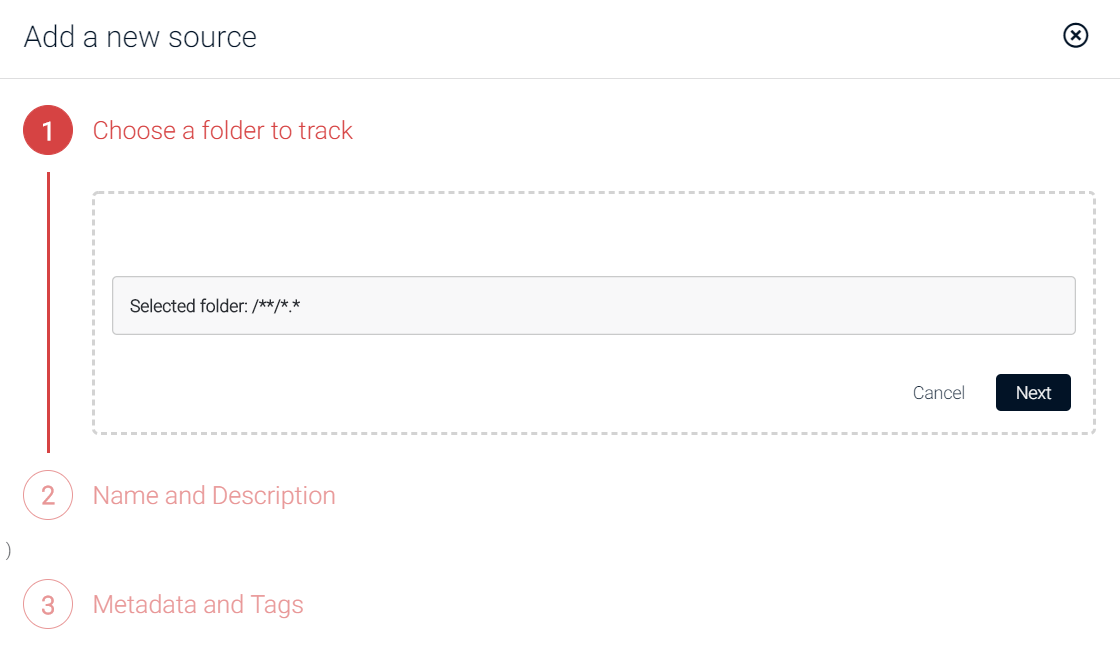
Now select the folder or folders in Egnyte you wish to track.
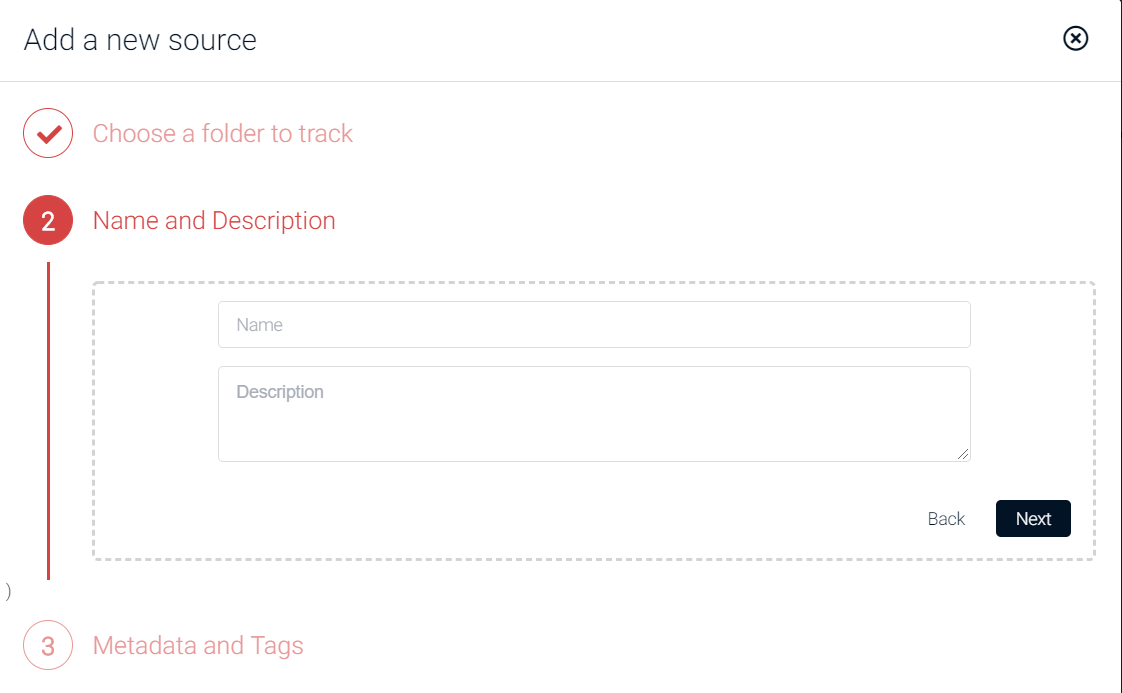
After selecting a folder to track you will need to give it a name and an optional description.
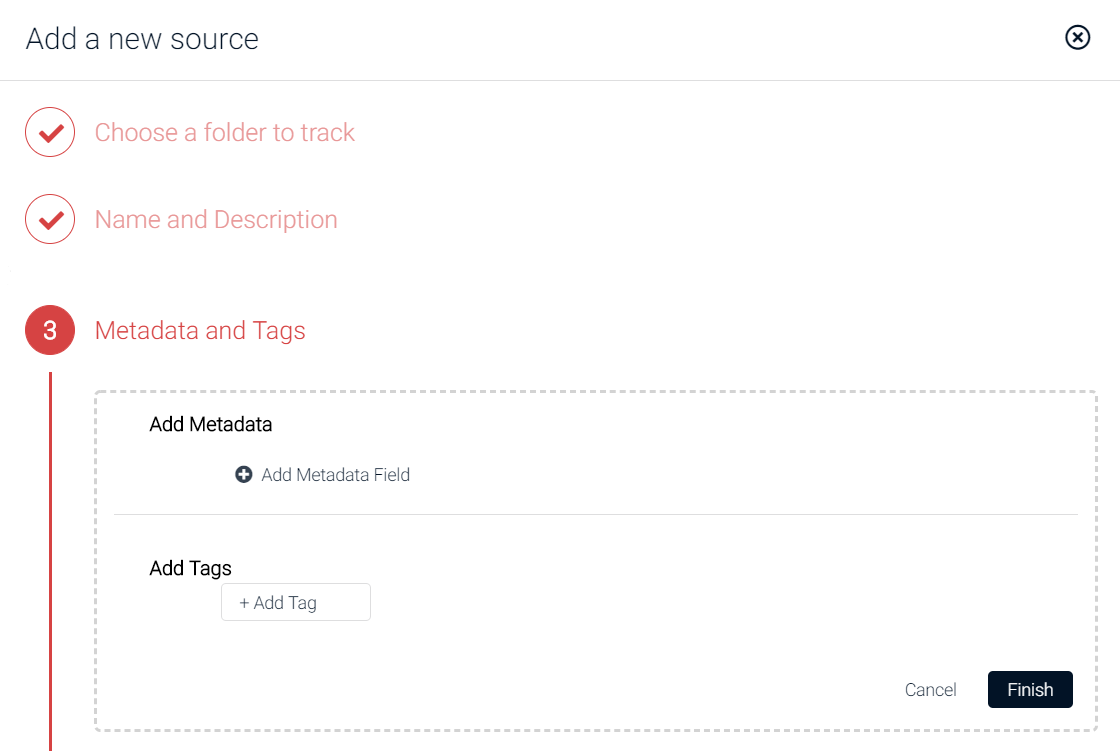
Finally, you can choose specific metadata fields and tags to be associated with all files coming from this integration. Clicking on "Add Metadata Field" and "Add Tag" will let you add specific Metadata and user-created tags, respectively.
Click Finish to complete the integration setup.

Returning to the Egnyte Source Management page, you will now see your integration and can make modifications via the hamburger menus on the right.
Updated over 1 year ago
