Projects
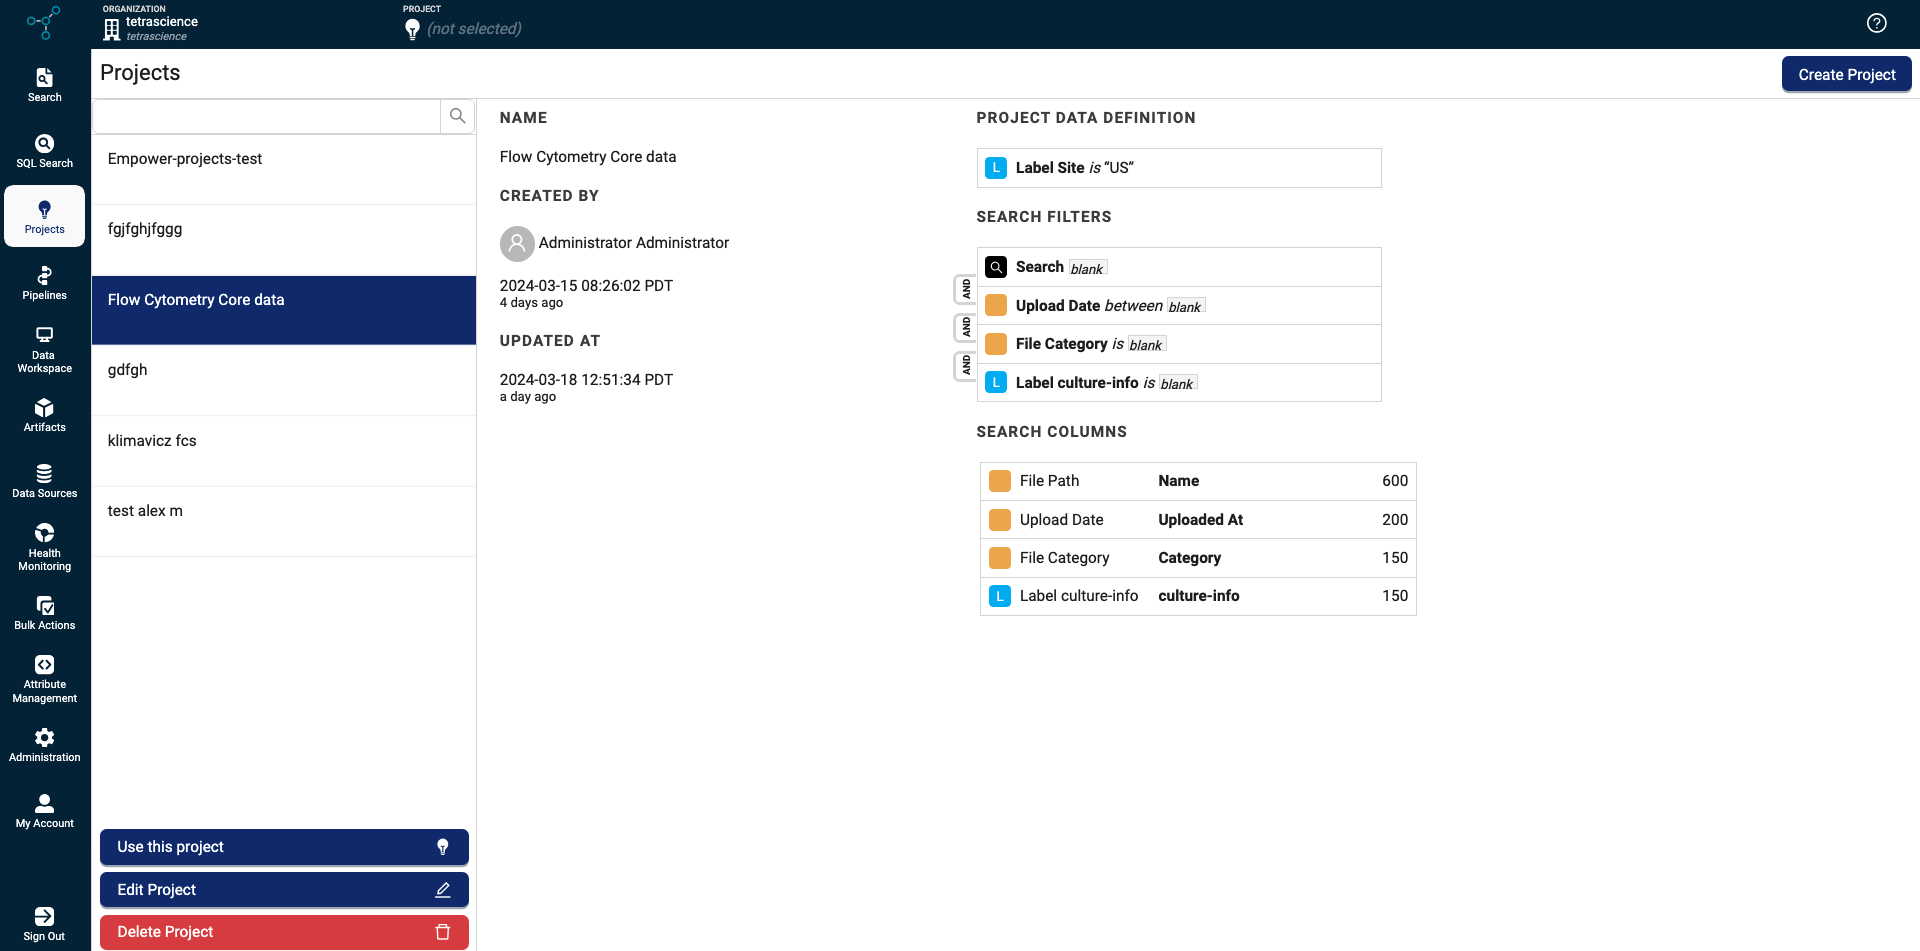
The Projects page helps scientists quickly organize and access data that’s associated with specific labs, experiments, instruments, or any other type of project. Projects are organized by user-defined attributes, and are updated with new data automatically when files that contain those attributes are uploaded to the TDP.
Access the Projects Page
To access the Projects page, do the following:
- Sign in to the TDP.
- In the left navigation menu, choose Projects. The Projects page appears.

Create a New Project
To create a new project, do the following:
- Open the Projects page.
- Select Create Project. The Create Project dialog appears.
- In the Properties section, enter the following:
- For NAME, enter a name for the project.
- For DESCRIPTION, enter a project description.
- Choose Next. The Project Data Definition section appears. The project data definition prefilters the data that appears in the search results so that only results that match the project data definition appear. This allows users to navigate directly to data related to the project.
- In the Project Data Definition section, define the data set that the project will use by entering the following:
- (Optional) To add the most commonly used filters (Upload Date and File Category), select the upper right Add the most commonly used filters filter icon.
- To add a filter, select the upper right plus (+) icon. For more information about configuring search filters, see Filter Options for Search.
- Choose Next. The Search Filters section appears. The search filters you set here appear by default in the Search page when a user is in the project.
- In the Search Filters section, define the default search filters for the project. For more information, see Filter Options for Search.
- Choose Next. The Search Columns section appears.
- In the Search Columns section, edit the column names and how they display in the project's search results by following the instructions in Edit Column Names and Create Custom Columns.
- Choose Finish. The new project appears on the left of the Projects page.
View Data in an Existing Project
To open and use an existing project, do one of the following.
Open a Project from Any Page by Using the Project Switcher
To open a project from any page in the TDP, do the following:
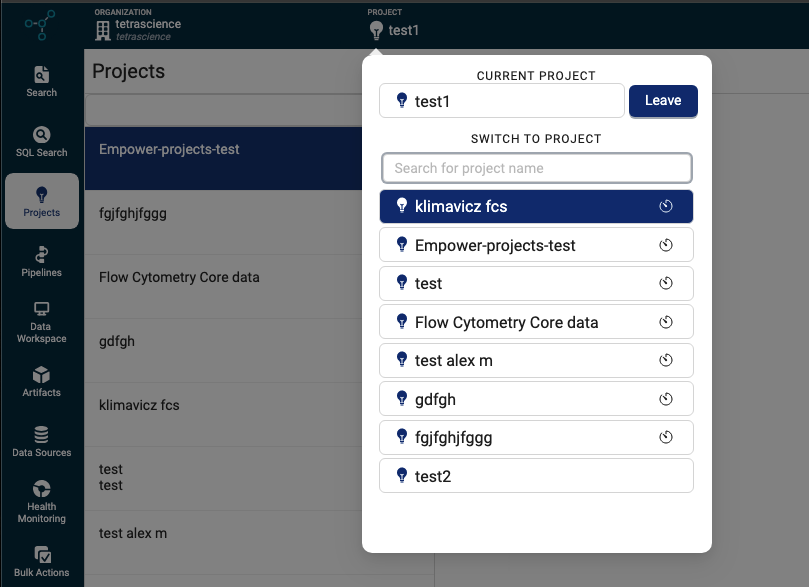
- Select the project name that appears at the top left of the screen, below PROJECT. If you're not currently in a project, the name displays as (not selected). The project switcher dialog appears.

- In the Search for project name field, enter the name of the project that you want to switch to. The project list filters itself based on the text you enter.
- From the list of projects, select the project that you want to switch to. The project settings are applied to your TDP Search session, and the project name appears at the top of the page, under PROJECT.
Open a Project from the Projects Page
To open a project from the Projects page, do the following:
- Open the Projects page.
- In the list of projects on the left, select the project that you want to open.
- Choose Use Project. The project settings are applied to your TDP Search session, and the project name appears at the top of the page, under PROJECT.
Edit a Project
To edit an existing project, do the following:
- Open the Projects page.
- Select the project that you want to edit from the list of projects on the left.
- Choose Edit Project. The Edit Project dialog appears.
- Edit the project by following the instructions in Create a New Project.
- Choose Finish to commit the changes.
Delete a Project
IMPORTANTYou can't recover a project's settings after it's deleted.
To delete a project, do the following:
- Open the Projects page.
- Select the project that you want to delete from the list of projects on the left.
- Choose Delete Project. A dialog appears that asks you to confirm if you want to delete the project.
- Choose Delete. The project is deleted and removed from the Projects page.
Updated 5 months ago
