Create and Manage Organizations
IMPORTANT
The following procedures apply to customer hosted Tetra Data Platform (TDP) deployments only. To create and manage organizations in a Tetra hosted TDP deployment, you must contact your customer success manager (CSM).
When using the ts-admin role in a customer hosted TDP deployment, you can use the Manage Organizations page to do any of the following:
- Create a new organization
- Create a new tenant (parent group) to group multiple organizations
- Search for a specific organization
- Switch between organizations
- Make sure that your organization can communicate with AWS
Create a New Organization
To create a new organization, do the following:
- Sign in to the TDP with the ts-admin role.
- In the left navigation pane, select the hamburger menu icon. Then, choose Administration.
- Choose Manage Organizations. The Manage Organizations page appears.
- Choose Create Organization. The Create Organization dialog appears.
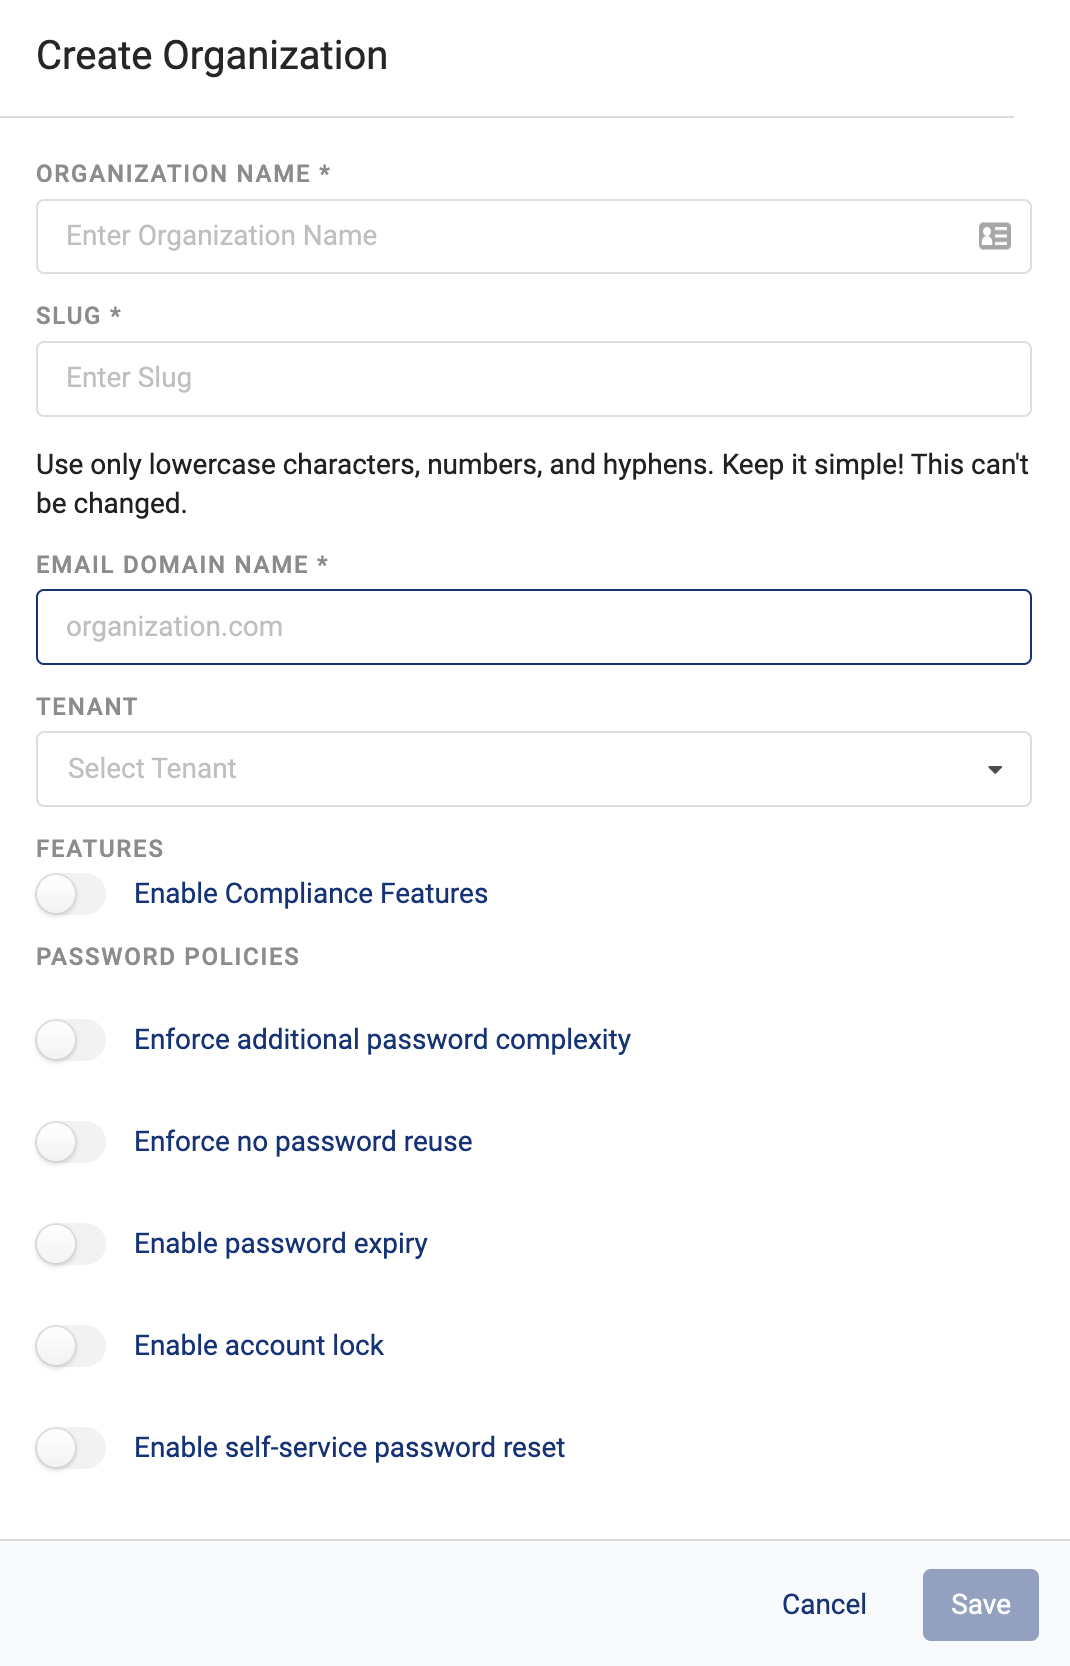
- Enter the organization name, slug, and email domain name. If you have a Tetra-Managed or Customer-Hosted and Tetra-Managed deployment, you can select an existing tenant to add the new organization to.
Slug and Email Domain
- After you enter a slug and email domain for the organization and then save the new organization, you cannot change these values.
- Make sure that you use only lowercase characters, numbers, and hyphens for the slug and email domain name.

Create Organization dialog
- (Optional) To enforce more rigorous password requirements, you can toggle the following password settings based on your organization's security policies :
- Enable Compliance Features: If you have purchased the GxP package, you can enable compliance features when you create an organization. You can't add compliance features to an existing organization that has already processed files. You can only enable compliance to a newly created organization or one that has not processed any files. However, you can disable the feature after you create it. Once the feature is disabled, however, it can't be activated again. This feature is available in both multi-tenant and single-tenant deployments. For more information, see Set Compliance Settings for Organizations.
- Enforce additional password complexity: Set to require that passwords must satisfy a more complex definition where at least one upper and lower case letter, a number, and a special character is required. The password can't start or end with a number either.
- Enforce no password reuse: Set to prevent passwords from matching the current password, or any of the previous five passwords from the user's password history.
- Enable password expiry: Set to have the password expire after a configured number of days, and have it be changed on the first user login attempt.
- Enable account lock: Set to lock the user's account after a configured number of failed login attempts.
- Enable self-service password reset: Set to enable users to reset their own password if they have forgotten it.
- Choose Save.
NOTE
Based on your specific AWS or network setup, creating a new organization may not be successful because of proxy or firewall restrictions. As a result, you may see various issues when uploading files, such as KMS errors, missing Data Hub policies, and more. To verify that your organization can communicate with AWS, see the Make Sure that Your Organization Can Communicate with AWS section of this topic.
Create a New Tenant
Note
The ability to create a new tenant is available for Tetra-Managed or Customer-Hosted and Tetra-Managed TDP deployments only.
To create a new tenant (parent group), do the following:
- Sign in to the TDP with the ts-admin role.
- In the left navigation pane, select the hamburger menu icon. Then, choose Administration.
- Choose Manage Organizations. The Manage Organizations page appears.
- ChooseCreate Tenant. The Create Tenant dialog appears.

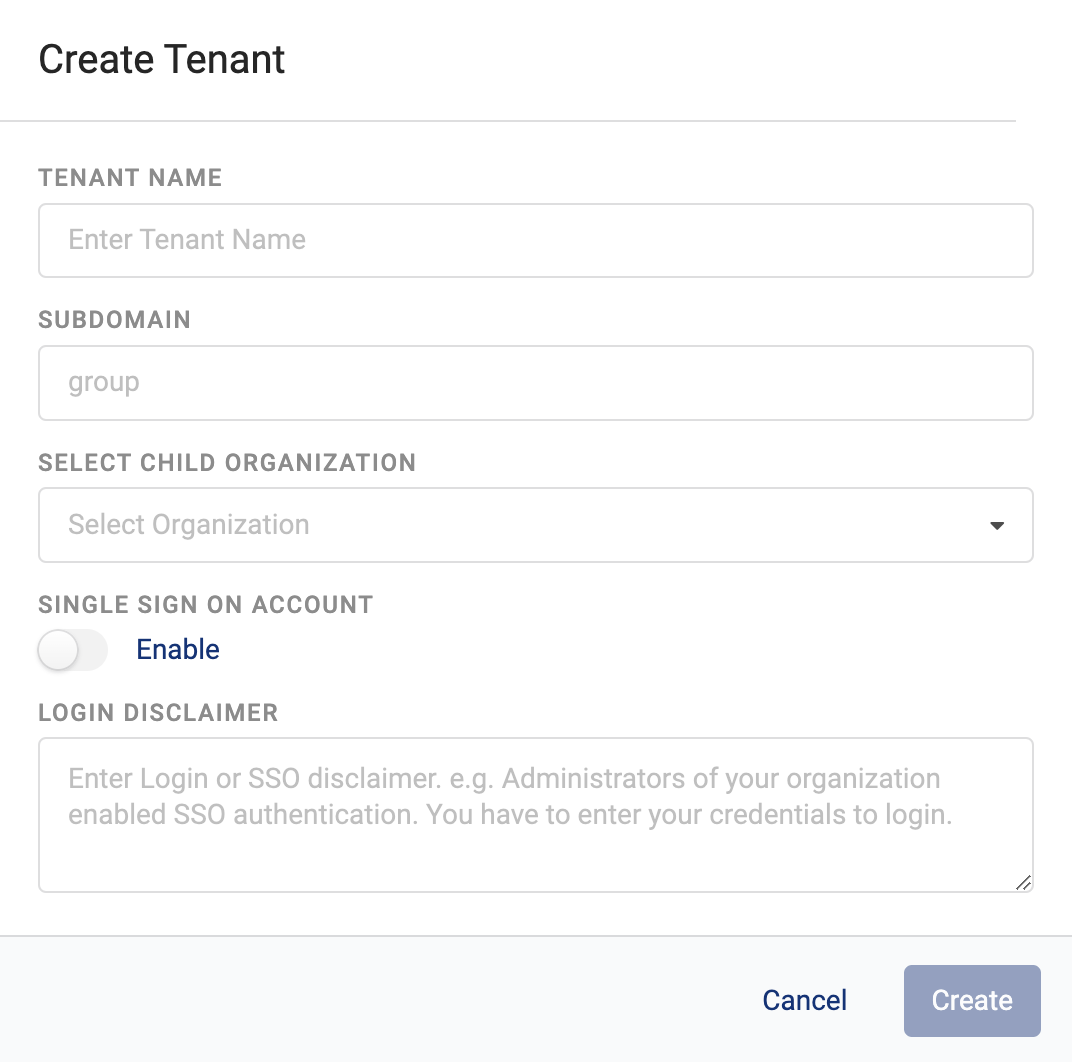
Create Tenant dialog
- Enter the tenant name, its subdomain group, and the organizations (children) that you want to include in the tenant (parent) group. The LOGIN DISCLAIMER contains the text that's displayed on the TDP login dialog alerting users that SSO is enabled for your organization.
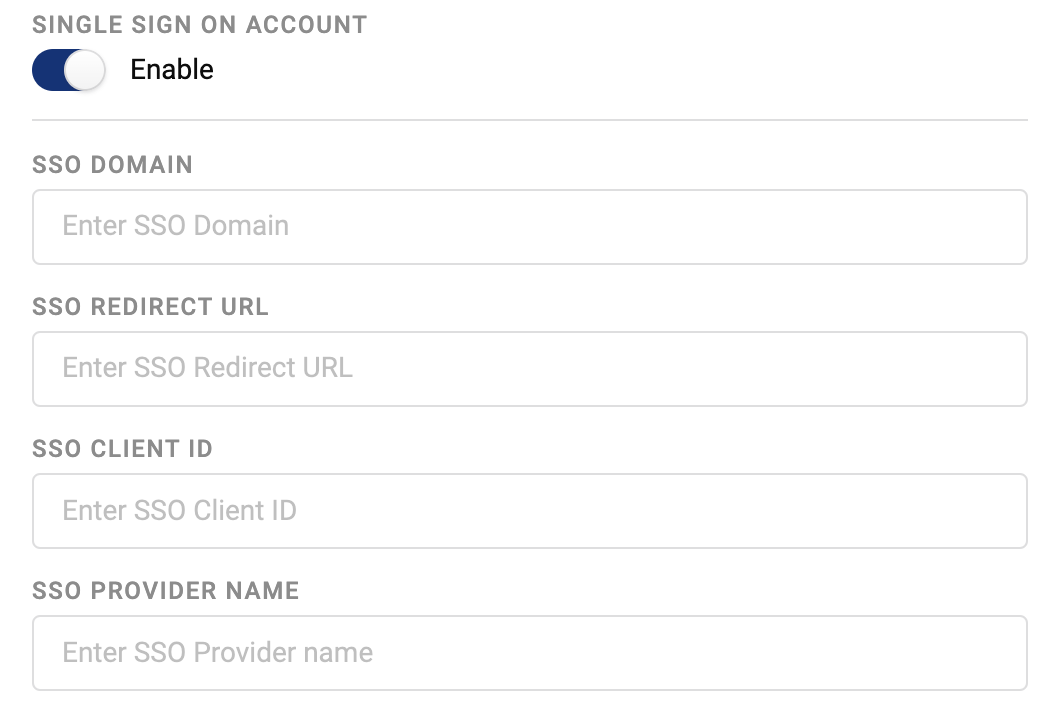
- To allow users to log in by using single sign-on (SSO), slide the SINGLE SIGN ON ACCOUNT toggle to Enable to display the following additional fields:

With SSO Enabled
- SSO DOMAIN: Enter the identifying Amazon Cognito domain prefix previously entered in the App Integration section of Cognito. The following is an example Cognito domain:
https://acme-demo.auth.us-east-2.amazoncognito.com - SSO REDIRECT URL: Enter the sign-in and sign-out URL previously entered in Cognito. The following is an example sign-in URL:
https://tetrascience-dev.com/acme-demo/login/sso - SSO CLIENT ID: Enter the client ID from the App Integration section of Cognito.
- SSO PROVIDER NAME: Enter the provider name from Cognito (for example,
SAML).
- Choose Save.
NOTE
After you create a tenant, you can edit it by selecting the Edit button on the right side of the Organization Settings page. You can change the tenant's name, add or remove organizations, enable SSO, and edit the login disclaimer.
Search for a Specific Organization
To search for a specific organization, do the following:
- Open the Manage Organizations page.
- Enter the organization's name in the upper left search box. Organizations that match your search criteria appear.
Switch Between Organizations
To switch between organizations, do the following:
- Open the Manage Organizations page.
- In the list of organizations, find the organization that you want to switch to. Then, select the far right Switch button in that organization's row. The selected organization becomes active (indicated by a gray Current label and by the current organization name label displayed at the bottom of the page). The previous organization becomes inactive.
NOTE
To set your default organization, see View Your Account Details.
Make Sure That Your Organization Can Communicate with AWS
To make sure that each organization you create is able to communicate with AWS through the TetraScience API, you must select the AWS button next to the organization name listed on the Manage Organizations page. A Success! message displays indicating communication has been established. Choose Dismiss to close the message.
Updated over 1 year ago
