Manage Service Users
As an admin, you can manage service users by doing the following:
- Access the Service Users page
- Manage Service Users
- Generate a JSON Web Token (JWT) for a Service User Account
View the Service Users Page
To access the service users page, do the following:
- Sign in to the TDP as an admin.
- In the left navigation pane, select the hamburger menu icon. Then, choose Administration.
- Choose Organization Settings. The Organization Settings page opens.
- Select the Service Users tab. From the Service Users tab, you can add, edit, disable, or activate a service user.
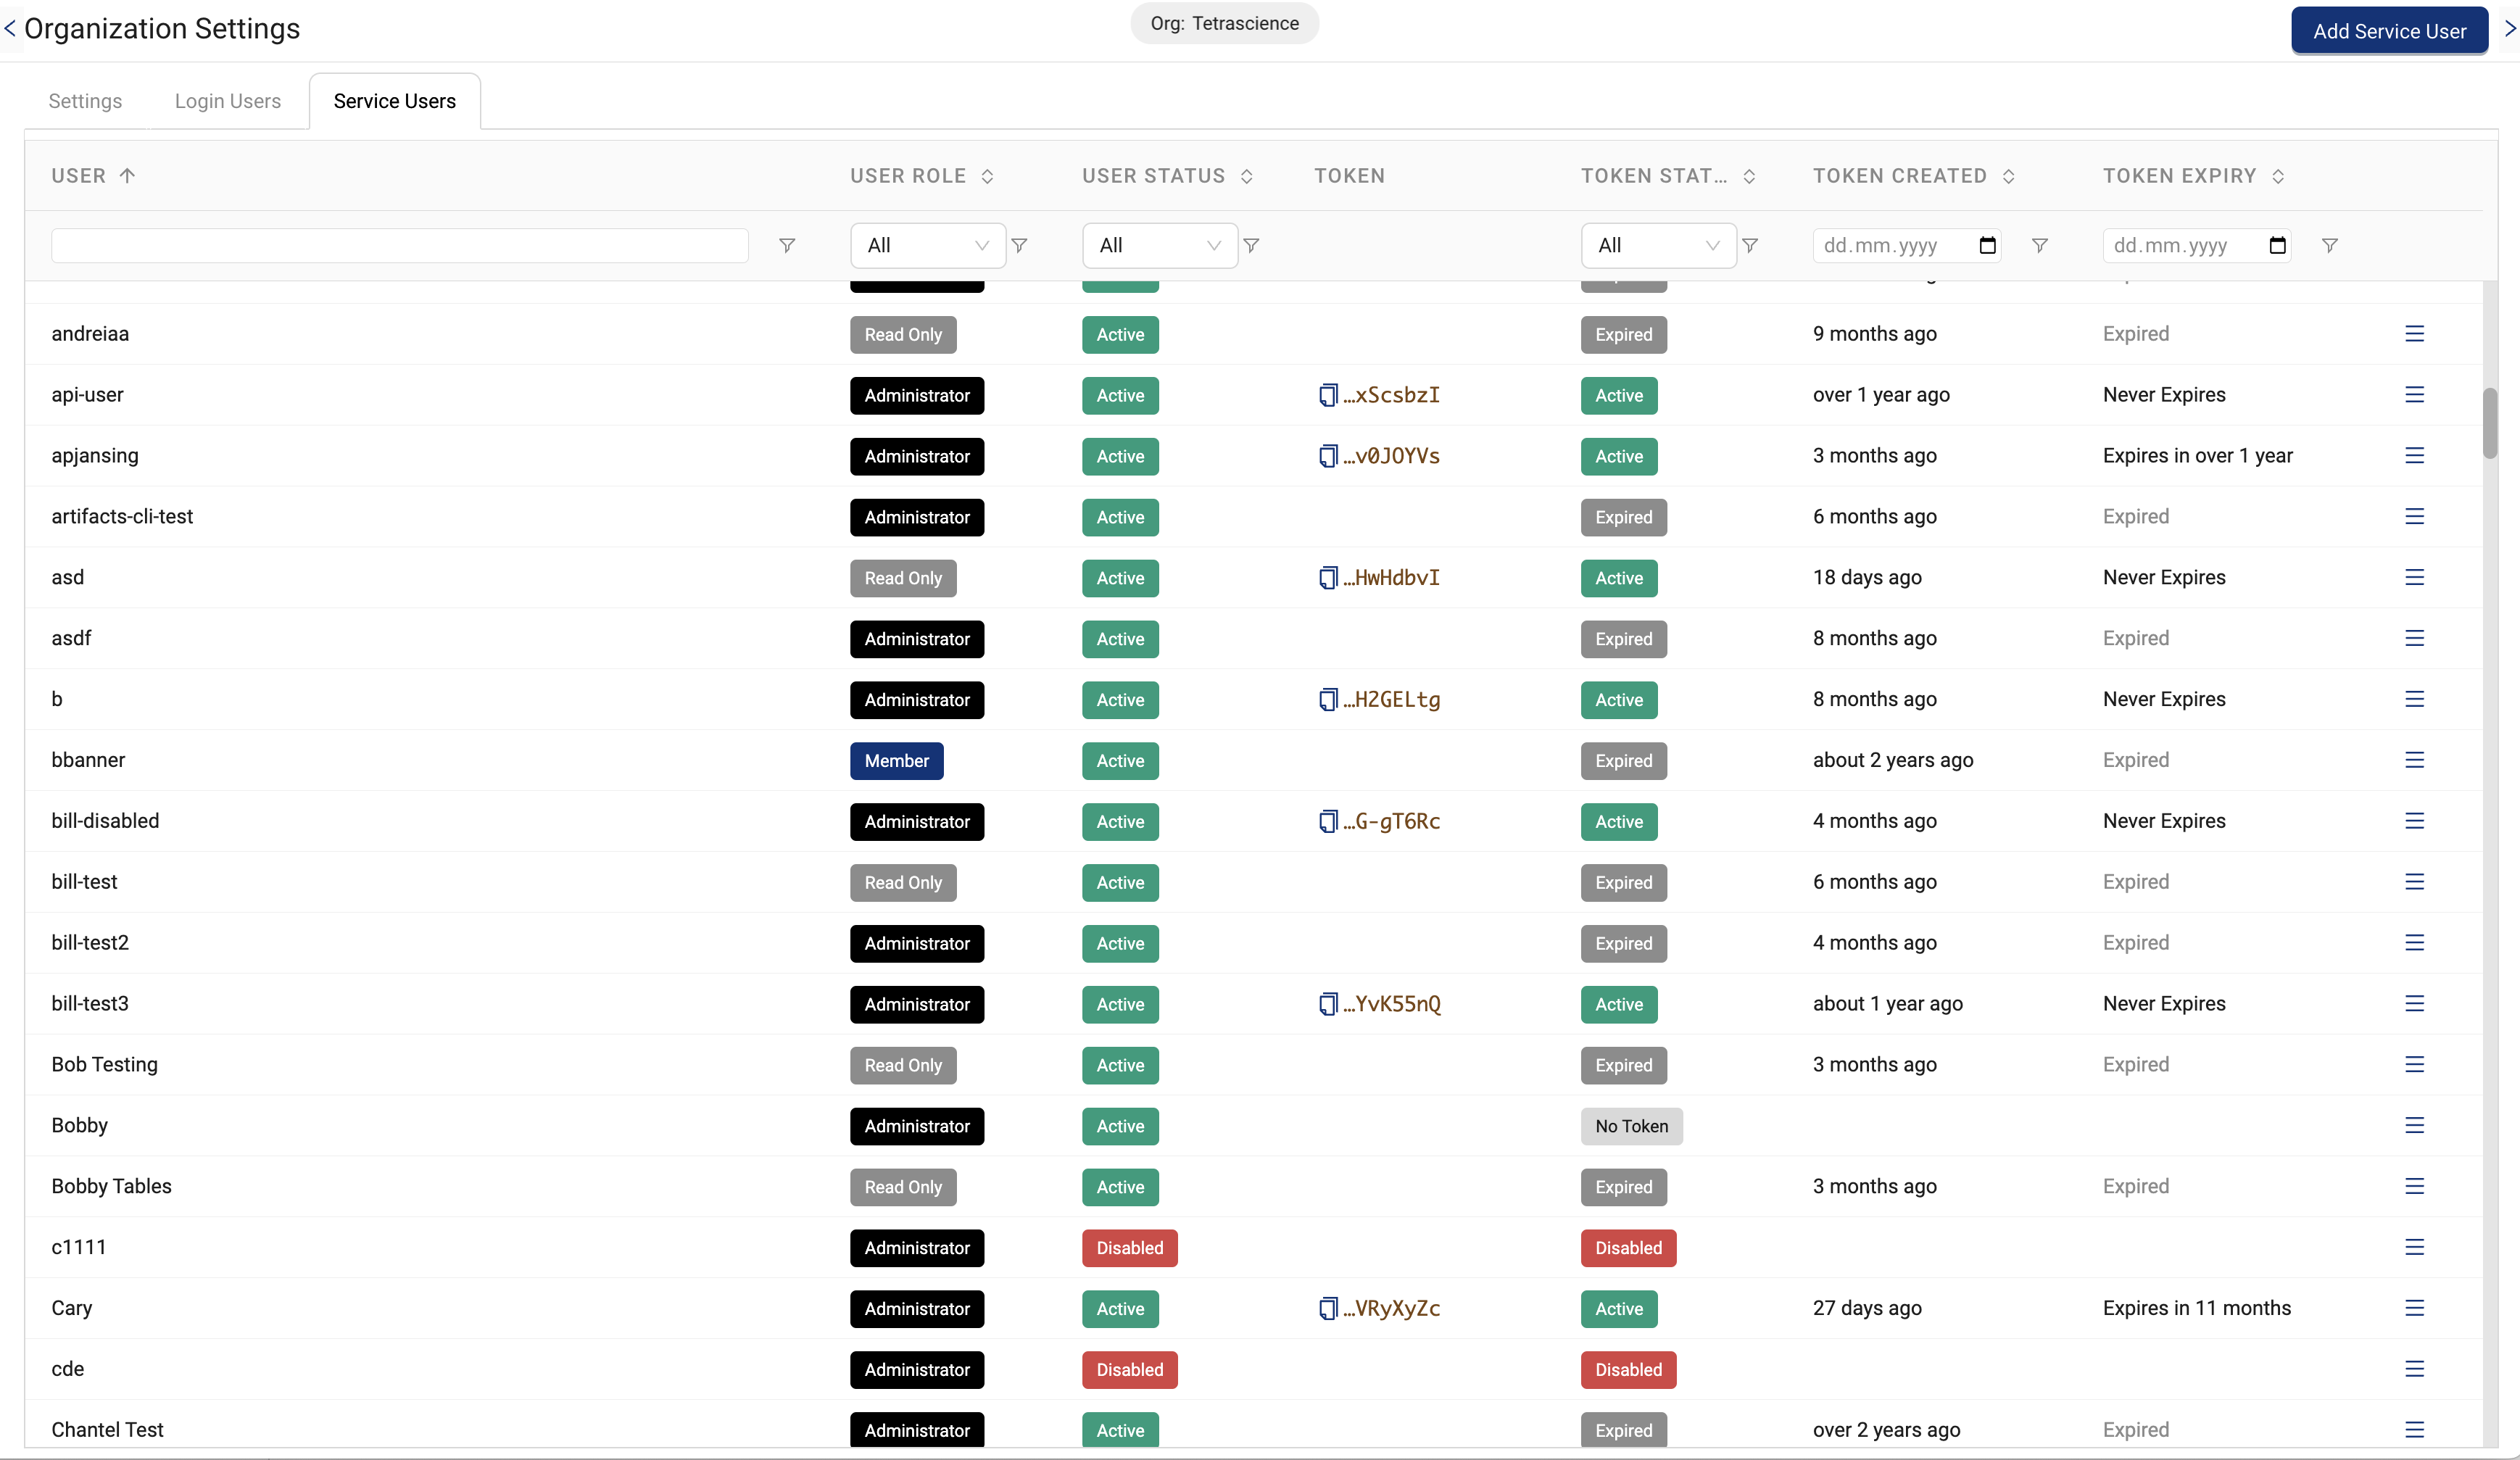
Organization Settings > Service Users tab
Service Users Tab Fields
The following table describes the fields in the Service Users tab.
| Field | Description |
|---|---|
| + Add Service User | Add a service user |
| Hamburger menu | Edit User, Disable user, Generate Token |
| User | Lists the user name (includes a search field) |
| User Role | Filters the list of users to display on the page: Administrator, Member, or Read Only. Note: Select All (default) to show all user accounts |
| User Status | Filters the list of users to display on the page: Active or Disabled. Select All (default) to show all user accounts. |
| Token | Displays the token generated for the service user (you can copy the token to your clipboard) |
| Token Status | Filters the list of users to display on the page: Active, Disabled, Expired or No Token user accounts Note: Select All (default) to show all user accounts |
| Token Created | Indicates when the token was created |
| Token Expiry | Indicates the expiration date for the token, if there is one (has a date filter) |
Add a Service User
To add a service user, do the following:
- On the Service Users tab on the Organizations Settings page, select Add Service User. The Add Service user dialog appears.
- Enter the service user's name and assign the user an organizational role. Choose a date for the user's token to expire, if needed.
- Choose Add.
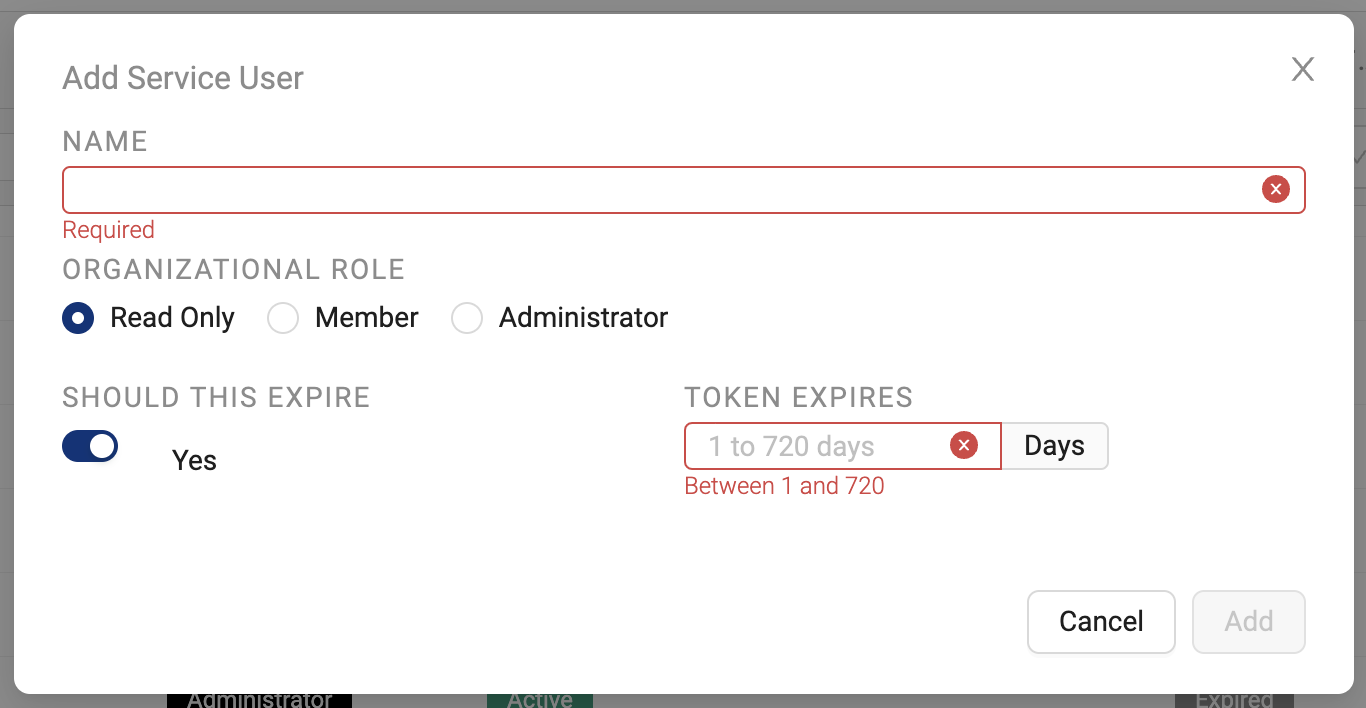
Add Service User dialog
Edit a Service User's Role
To edit a service user's role, do the following:
- On the Service Users tab on the Organization Settings page, find the service user that you want to edit.
- Select the hamburger menu icon on the right of the service user's row. Then, choose Edit User. The Edit Service User dialog appears.

Edit User Menu Option
- Edit the name and the organization role.
- Click Edit to change the user's information.
Disable a Service User
To disable a user's account for a service user, do the following:
- On the Service Users tab on the Organization Settings page, find the service user that you want to make inactive.
- Select the hamburger menu icon on the right of the service user's row. Then, choose Disable User. A message displays that asks you to confirm the action.
- Choose OK to disable the user's account.
Activate a Service User
To activate a user account that has been disabled, do the following:
- On the Service Users tab on the Organization Settings page, find the service user that you want to activate.
- Select the hamburger menu icon on the right of the service user's row. Then, choose Enable User. A message displays that asks you to confirm the action.
- Choose OK to activate the user's account.
Generate a JSON Web Token (JWT) for a Service User Account
NOTE
You can generate a JWT for a service account, regardless of role.
To generate the JWT for a service account, do the following:
- On the Service Users tab on the Organization Settings page, find the service user that you want to generate a JWT for.
- Select the hamburger menu icon on the right of the service user's row. Then, choose Generate Token. The Generate New Token dialog appears. If the user's current token is not expired or it will not expire in the following 72 hours, then the following message appears: "You can only generate tokens when the current token is expired or will expire within 72 hours."
- Enter the number of days that you want the token to be valid for (1 to 720 days), or deselect the Should This Expire toggle to generate a token without an expiration date.
Token With No Expiration Date
If you create a JWT without an expiration date, then the token will remain valid until you disable the service user.
- ChooseGenerate token. If you deselect Should This Expire toggle, the generated token displays.
- Choose Copy Token to copy the token to your clipboard and paste to where you want. You can also download the token in a TetraScience Software Development Kit (SDK) configuration file.
- ChooseOK.
Updated over 1 year ago