Basic Search (Beta Release)
IMPORTANT
The Basic Search page is in beta release currently and is activated for customers on request only. The feature may require changes in future Tetra Data Platform (TDP) releases. For more information, or to activate the Basic Search page in your TDP environment, contact your customer success manager (CSM).
The Basic Search page is designed for scientific users to be able to the following more efficiently:
- Find primary (RAW) data in the TDP by scientifically relevant criteria, including the following:
- Search for text
- File upload date
- Any recommended labels where data exists
- Saved searches (also referred to as Collections)
- Create, update, and manage saved searches
- Download or add labels to multiple files
Access the Basic Search Page
To access the Basic Search page, do the following:
- Sign in to the TDP. Then, in the left navigation menu, select the hamburger menu icon.
- Choose Search (beta). The Basic Search page appears.
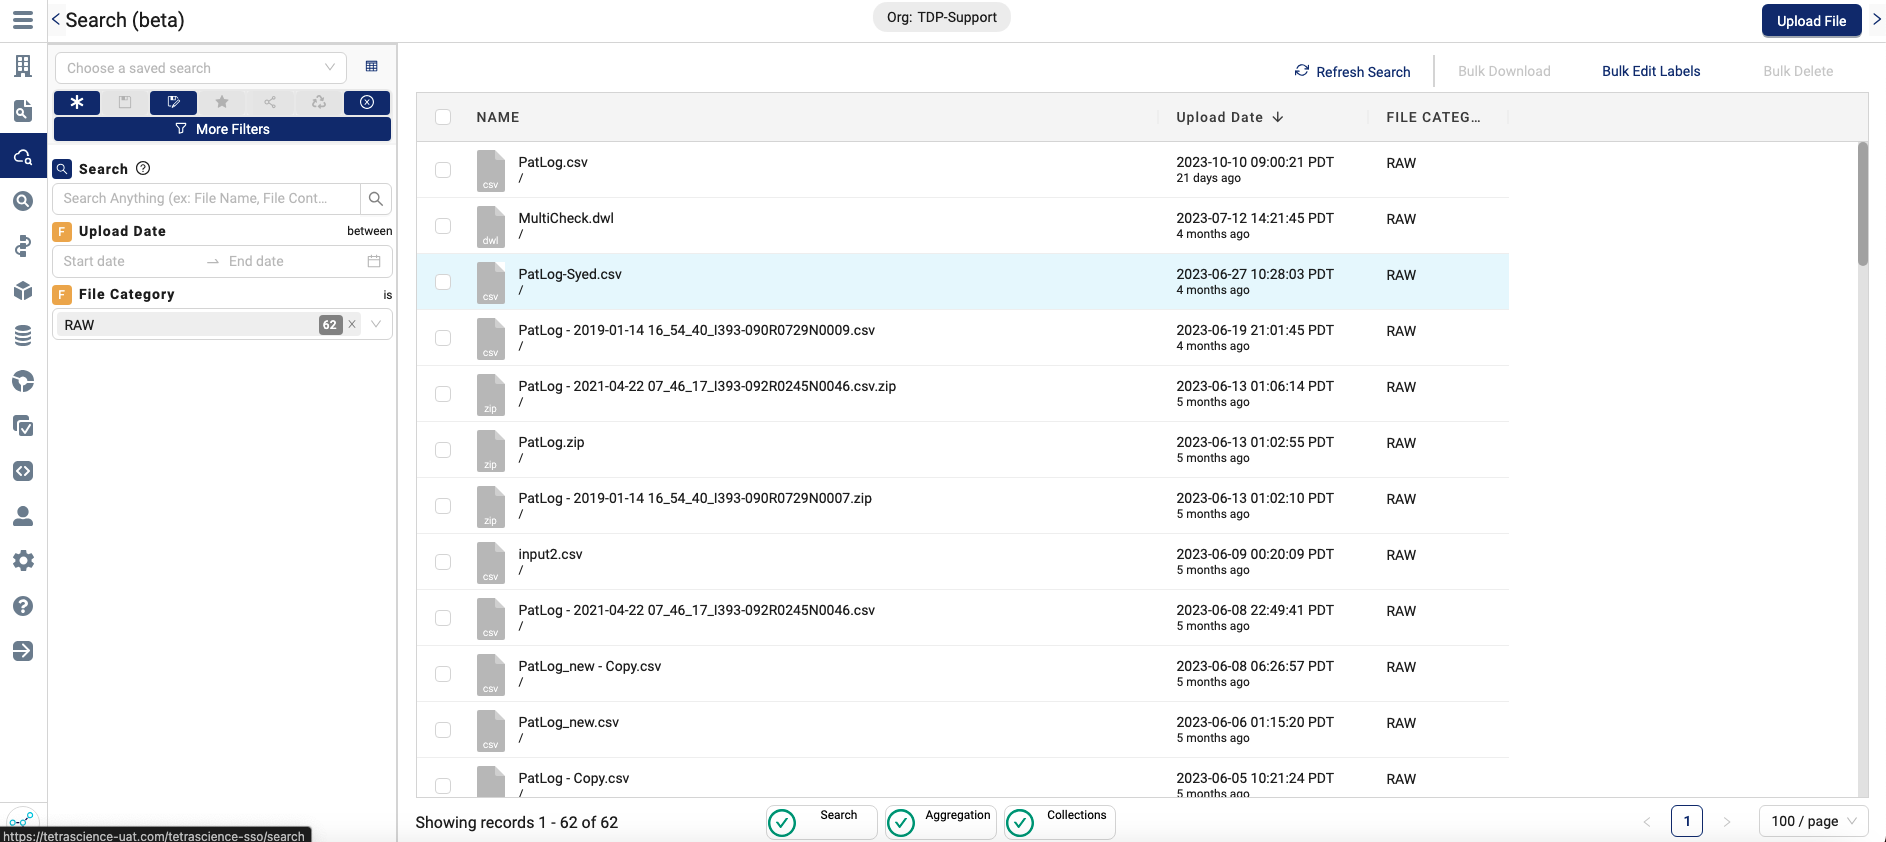
Basic Search (beta) page
Filter Options for Basic Search
The left filter pane on the Basic Search page includes the following filter options.
Default Filter Options
The following filter options appear by default on every search on the Basic Search page.
| Filter | Description |
|---|---|
| Search | Standard search bar, which allows you to search for any keywords (for example, by file name or file contents) |
| Upload Date | Searches by a date range, based on when files were last uploaded or modified in the TDP |
| File Category | Searches by the type of file: RAW, PROCESSED, or IDS (default option is RAW) |
| Labels* | Searches by any populated Recommended Labels that are in your TDP environment, if there are any *If you don't have labels in your TDP environment, no label search filters appear. Tool tips are available from the Description value in Attribute Management |
More Filter Options
To add more filter options outside of the default filter options on the Basic Search page, do the following:
- In the left filter pane, choose the More Filters button. The More Filters dialog appears.
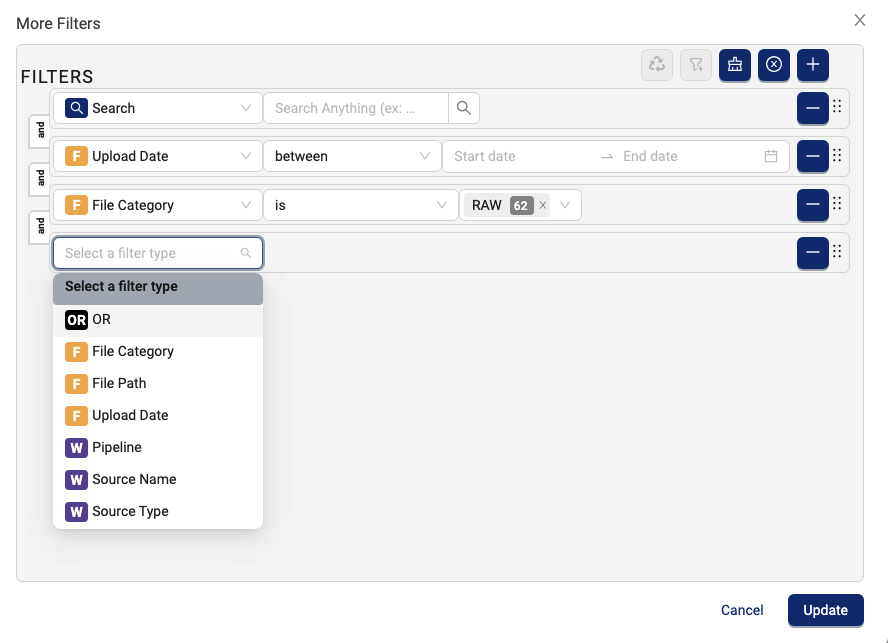
More Filters dialog
- To add a new filter type, select the upper right plus sign (
+) button. A new row with a Select a filter type field appears. Then, select a filter type from the drop-down list in the new row and choose Update.
NOTE
To remove a filter, choose the minus sign (
-) button next to the filter that you want to remove from your search.
Optional Filter Types
The following are optional filter types that you can add to any search on the Basic Search page.
| Filter | Description |
|---|---|
| File Path | Searches by the name of the file, and includes the ability to use contains, ends with and other operatorsNote: The filePath\* variable is determined by the TDP component that uploaded the file and has the following format: {orgSlug}/{sourceId}/{category}/{filePath\*} |
| Metadata, Tags, and Labels | Searches by specific metadata, tags, and labels as well as their corresponding values |
| Other Options | Searches by Pipeline, Source Name, and/or Source Type, and includes the ability to do complex filters by using Boolean operators (AND/ OR) |
Saved Searches
You can access, create, and manage saved searches from the Basic Search page by using the saved search actions at the top of the left filters pane.
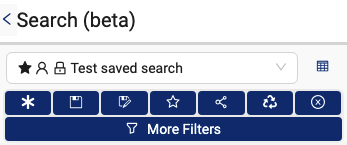
Saved search actions
Access and Manage Saved Searches
To access your personal, or your organization's saved searches from the Basic Search page, select the Choose a saved search drop-down field from the top of the left filters pane.
To manage your personal, or your organization's saved searches, select the Manage Saved Searches icon to the right of the Choose a saved search drop-down.
Start a New Search
To start a new search, select the Start a new search button (shown as an asterisk (*) icon).
Update an Existing Saved Search
To update the saved search that you're using, select the Update this saved search button (shown as a save icon).
Create a New Saved Search
To create a new saved search based on the filters that you've chosen, select the Create a new saved search icon (shown as a save icon that includes a pen).
Share a Saved Search with Your Organization
To share one of your personal saved searches with your organization, select the Share this saved search with your organization button (shown by a link icon).
Revert Filters to an Original Saved Search
To revert your search filters to the original saved search that you were using, select the Revert filters to the saved search button (shown as a recycle icon).
Clear All Filters
To clear all filters from your search and revert to the default search filter options, select the Clear all filters button (shown as an X icon).
Refresh Search Results
To refresh your search results, choose the upper right Refresh Search option that's above your search results.
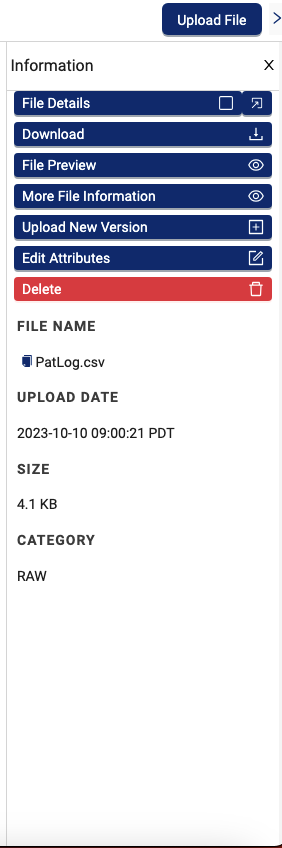
View File Information
To view a specific file's information on the Basic Search page, select a file from the list of files that are returned by your search. An Information pane appears on the right that lists the following information by default:
- FILE NAME—shows the file's name
- UPLOAD DATE—indicates the date and time when the file was last modified
- SIZE—shows the compressed file size. The actual file size is larger when you download it.
- CATEGORY—indicates the type of file (RAW, PROCESSED, or IDS)
Information pane
Available Actions For Files
After you select a file on the Basic Search page, you can run any of the following actions from the file's right Information pane. The available actions are based on the logged-in user’s role.
| Action | Description |
|---|---|
| File Details | Opens the File Details page for the file |
| Download | Downloads the file to your computer |
| File Preview | Opens a preview of the file |
| More File Information* | Shows JSON details |
| Upload New Version* | Opens a dialog that allows you to upload a new version of the file |
| Edit Attributes* | Opens a dialog that allows you to edit the file's attributes |
| Delete* | Deletes the file permanently from the TDP Note: A dialog appears that asks you to confirm if you want to delete the file or not. |
NOTE
Actions marked with an asterisk (*) are available for admin roles only.
Download, Edit, or Delete Multiple Files
The bulk action options at the top right of the Basic Search page allow you to select multiple files, and then either download, edit, or delete those files all at once.
Select Multiple Files
To select the files that you want to include in your bulk action, you can do any of the following:
- Choose multiple, individual files by selecting the left check box in each file's row
-or- - Choose all of the files returned by your search by selecting the top left check box in your search results (next to the NAME column)
Bulk Download
To download all of your selected files to your computer, do the following:
- Select the upper right Bulk Download option. A Bulk Download dialog appears.
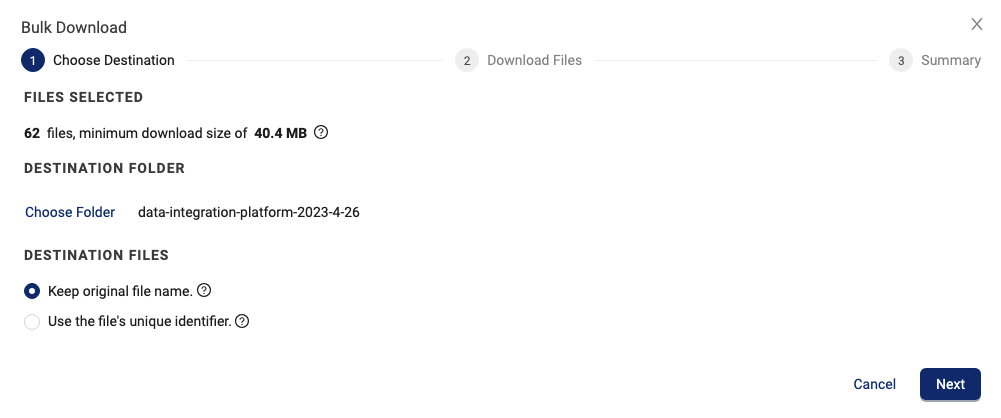
- Under DESTINATION FOLDER, select Choose Folder. Then, select a local folder to download the files to.
- Choose Next. The dialog shows the bulk download job status as it's running, and then confirms when it's successful.
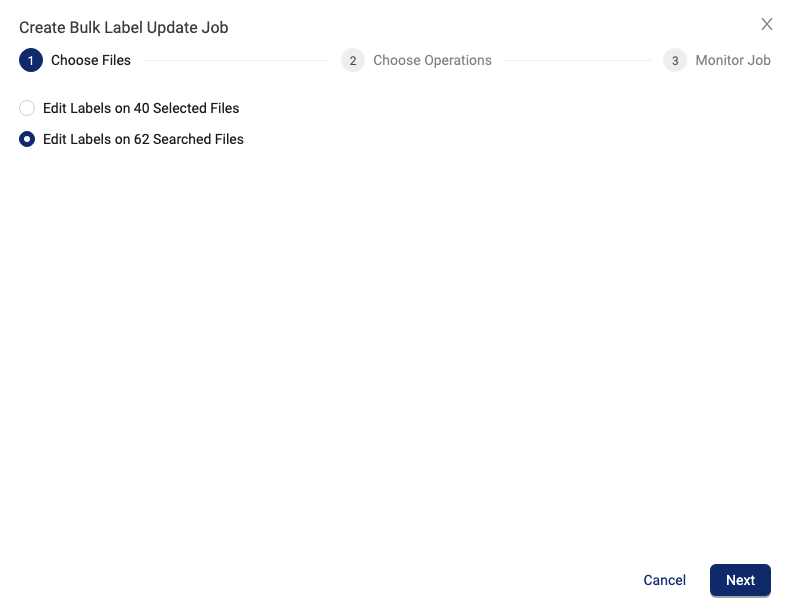
Bulk Edit Labels
To edit the labels of all of your selected files, do the following:
- Select the upper right Bulk Edit Labels option. A Create Bulk Label Update Job dialog appears.
- Follow the instructions in steps 6-9 of Edit Labels in Bulk.
Create Bulk Label Update Job dialog
NOTE
To monitor a Bulk Label Edit job's status, see Monitor a Bulk Label Edit Job's Status.
Bulk Delete
To delete all of your selected files from the TDP permanently, do the following:
- Select the upper right Bulk Delete option. A Delete Files dialog appears.
- To delete the selected files, choose Delete Files. To cancel the operation, choose Cancel.
NOTE
When you delete a file version, keep in mind the following:
- Deleting a file version is a soft delete.
- The file version remains in the Data Lake.
- The file version is still displayed in file details (with a URL for the
ID).- The file version is still available through the TetraScience API (with a URL for the
ID).- The file version isn't available through search or SQL queries.
Upload a New File
NOTE
When a new file version is uploaded, the TDP copies all file metadata from the previous file version, including workflow data. The system then uses this information to relate the new file version to the workflow that created the previous file version. This process results in the new file version being displayed on the File Details page and showing that the new, uploaded file version was produced by a workflow.
To upload a new file through the Basic Search page, do the following:
- Select the upper right Upload File button. An Upload File dialog appears.
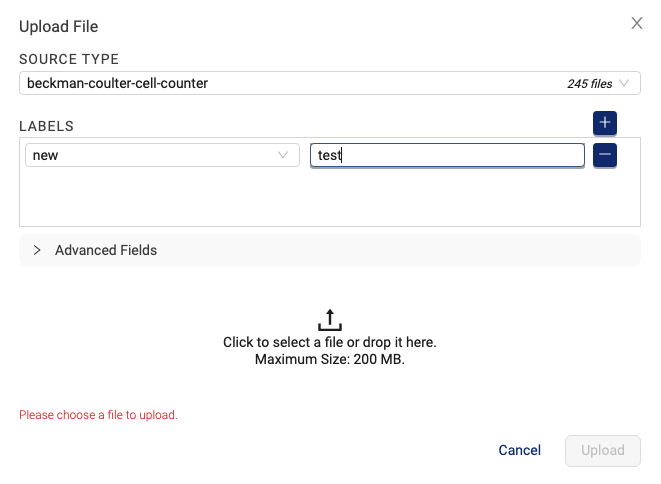
Upload File dialog
- For SOURCE TYPE, enter a source type for the uploaded file. Each newly uploaded file needs to be attributed to a source type.
- (Optional) For LABELS, select the labels that you want to add to the file.
- Select the file upload box to select a file to upload, or drag and drop a file into the box.
- Choose Upload.
NOTE
The maximum file size you can upload through the TDP user interface is 200 MB. To upload larger files, use the TetraScience API or a Tetra Agent or Connector.
Updated over 1 year ago