Connect to Athena Tables from IDE Tools (IntellJ IDEA)
Amazon Athena is an interactive query service that allows you to use standard SQL to view and analyze data in your organization's Tetra Data Lake S3 bucket. This page describes how to connect to your Athena tables from the IDE Tools (IntelliJ IDEA) third-party tool.
Before You Begin
Before you can use IDE Tools (IntelliJ IDEA) as a third-party tool to connect to Athena tables, you must have:
Connect to Athena Tables from IDE Tools (IntellJ IDEA)
To connect to Athena tables from IDE Tools (IntellJ IDEA), you:
- Add the JDBC Driver for Athena in DataGrip
- Add a new Data Source
Add the JDBC Driver for Athena in DataGrip
To add the JDBC driver for Athena in DataGrip:
- Launch DataGrip and then click Add (+ sign) at the top left corner of the page.
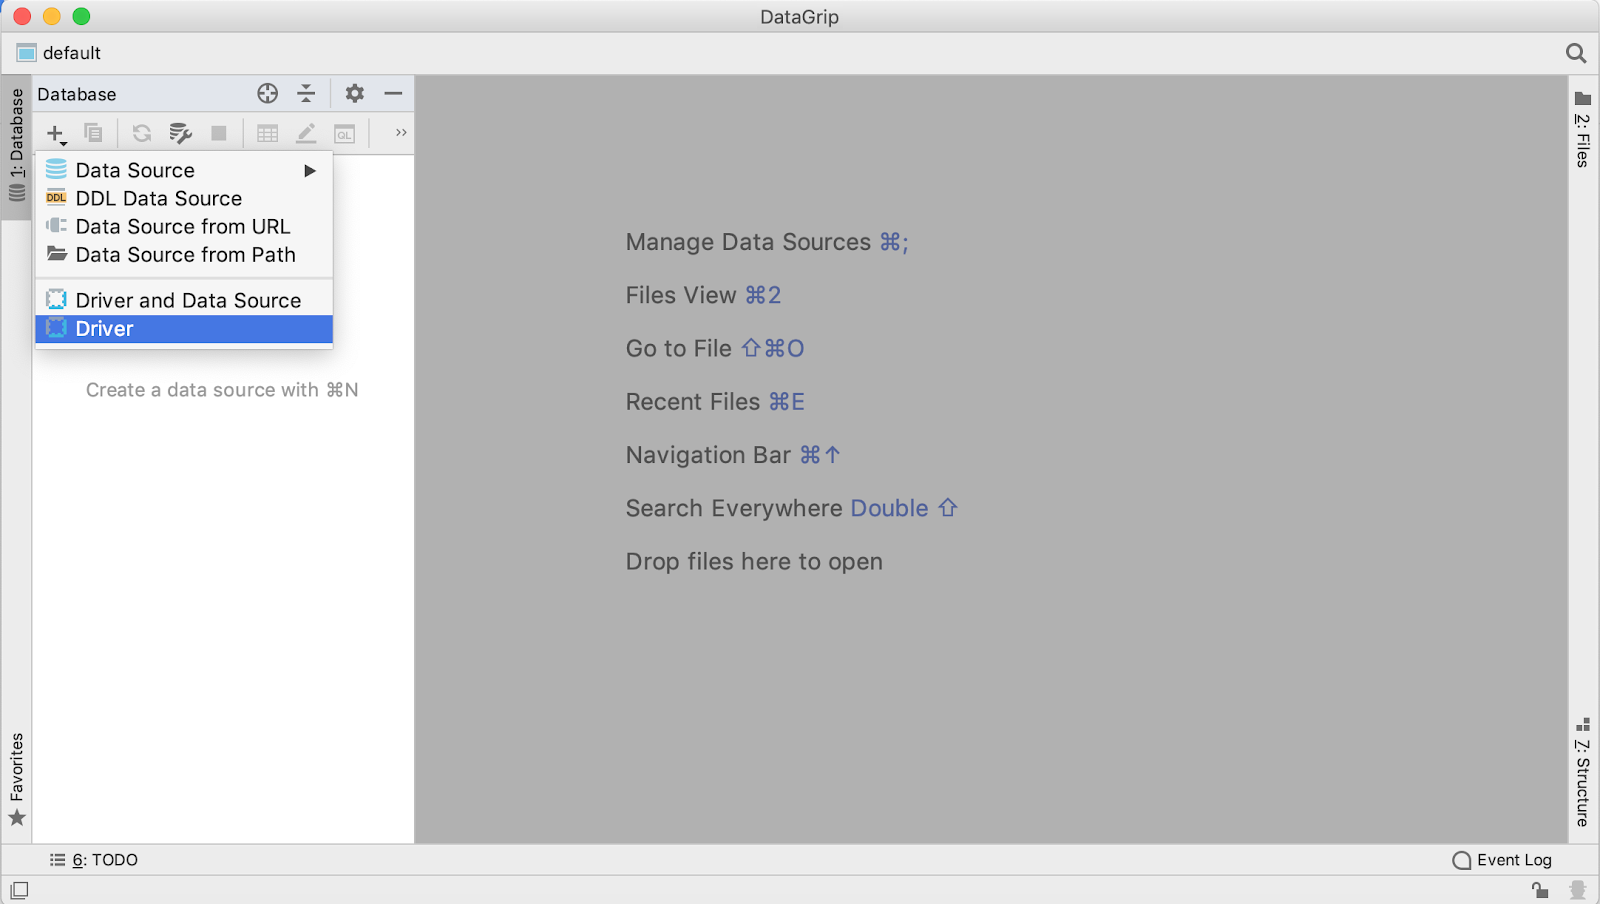
DataGrip - Add Driver
- Click Driver from the drop-down and enter a name for your driver (for example, Athena - Demo.
- Add the previously downloaded Athena JDBC driver file by clicking + sign below the Driver files box.
- Select Custom JARs and then navigate to the downloaded file to upload it.
- After the driver file has completed uploading, you can select the correct Class: “com.simba.athena.jdbc42.Driver”.
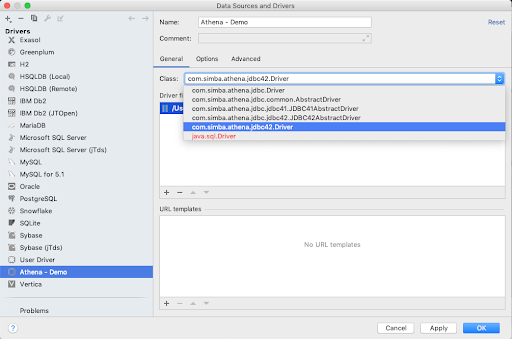
Select Class
- Under Options, set the Dialect to “Generic SQL”.
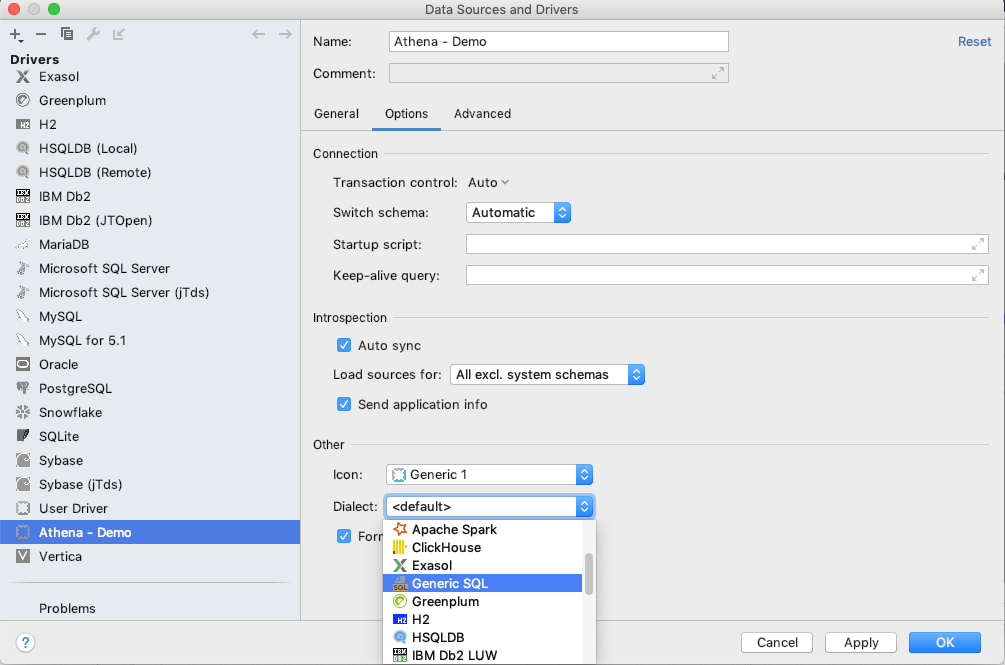
Select Dialect
- Under Advanced, enter values for these Names:
- AwsRegion - Enter the region where your Athena bucket is located, for example,“us-east-2”.
- S3OutputLocation - Enter the S3OutputLocation connection information you previously gathered from the SQL Access page of the TDP.
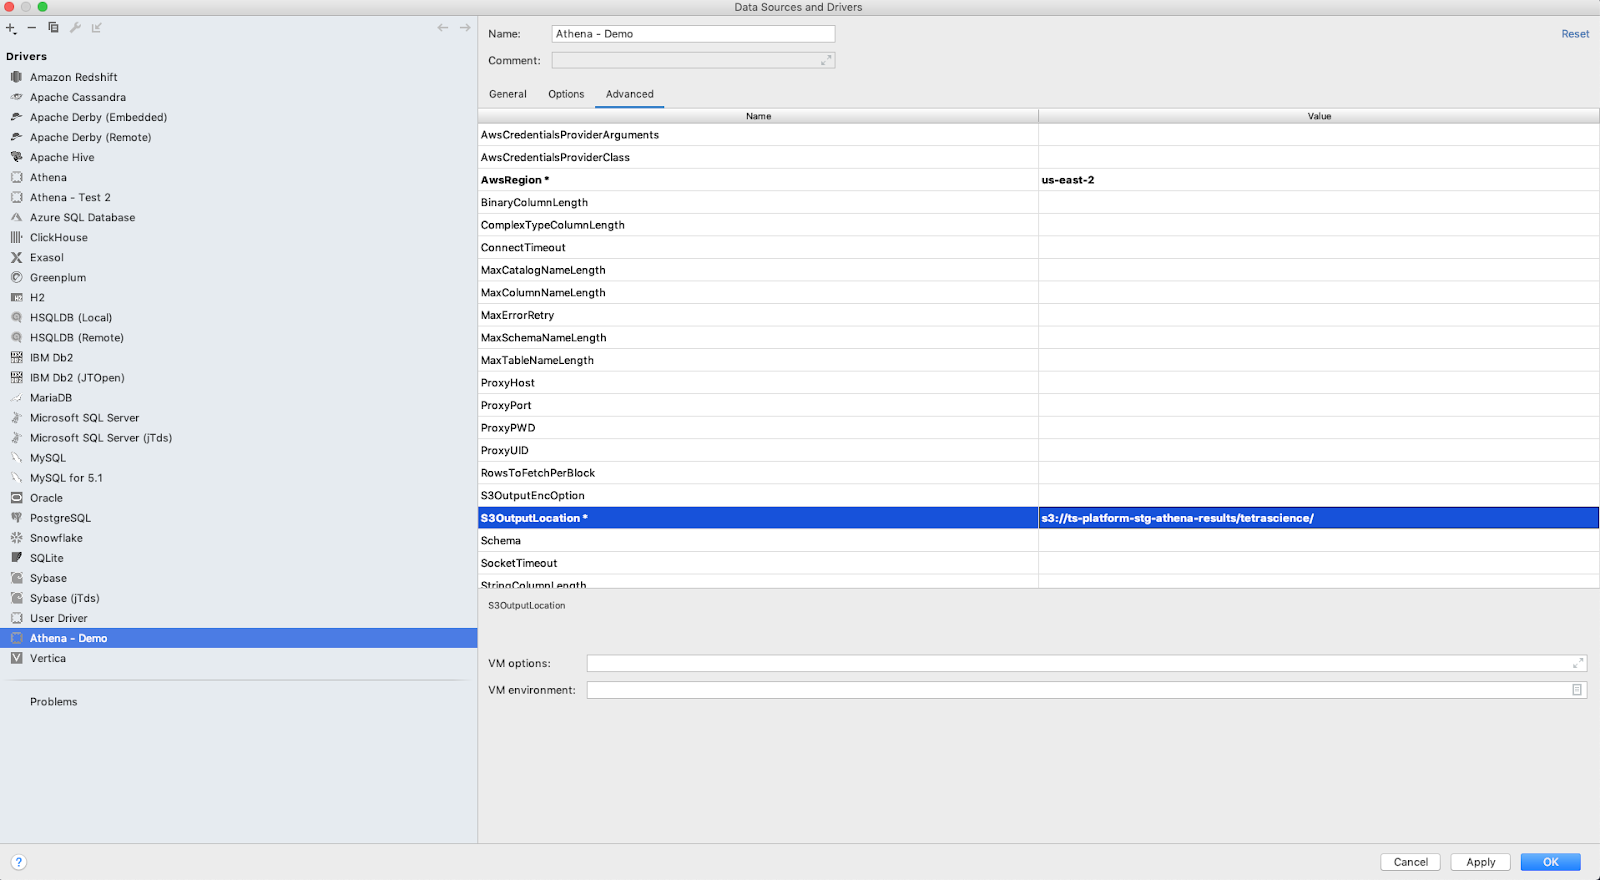
- After you enter the values for the name, click Apply and then click OK.
Add a new Data Source
To add a new data source:
- Click Add (+ sign) at the top left corner of the page and select Data Source.
- Locate the driver you created, for example Athena - Demo.
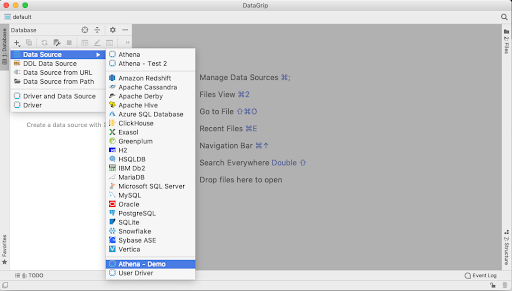
Add Data Source
- Enter values for these fields:
- User - Enter the user information you previously gathered from the SQL Access page of the TDP.
- Password - Enter the password information you previously gathered from the SQL Access page of the TDP.
- URL - Enter the URL information you previously gathered from the SQL Access page of the TDP.
- Click Test Connection. After you are connected successfully, a green checkmark displays. Click OK.
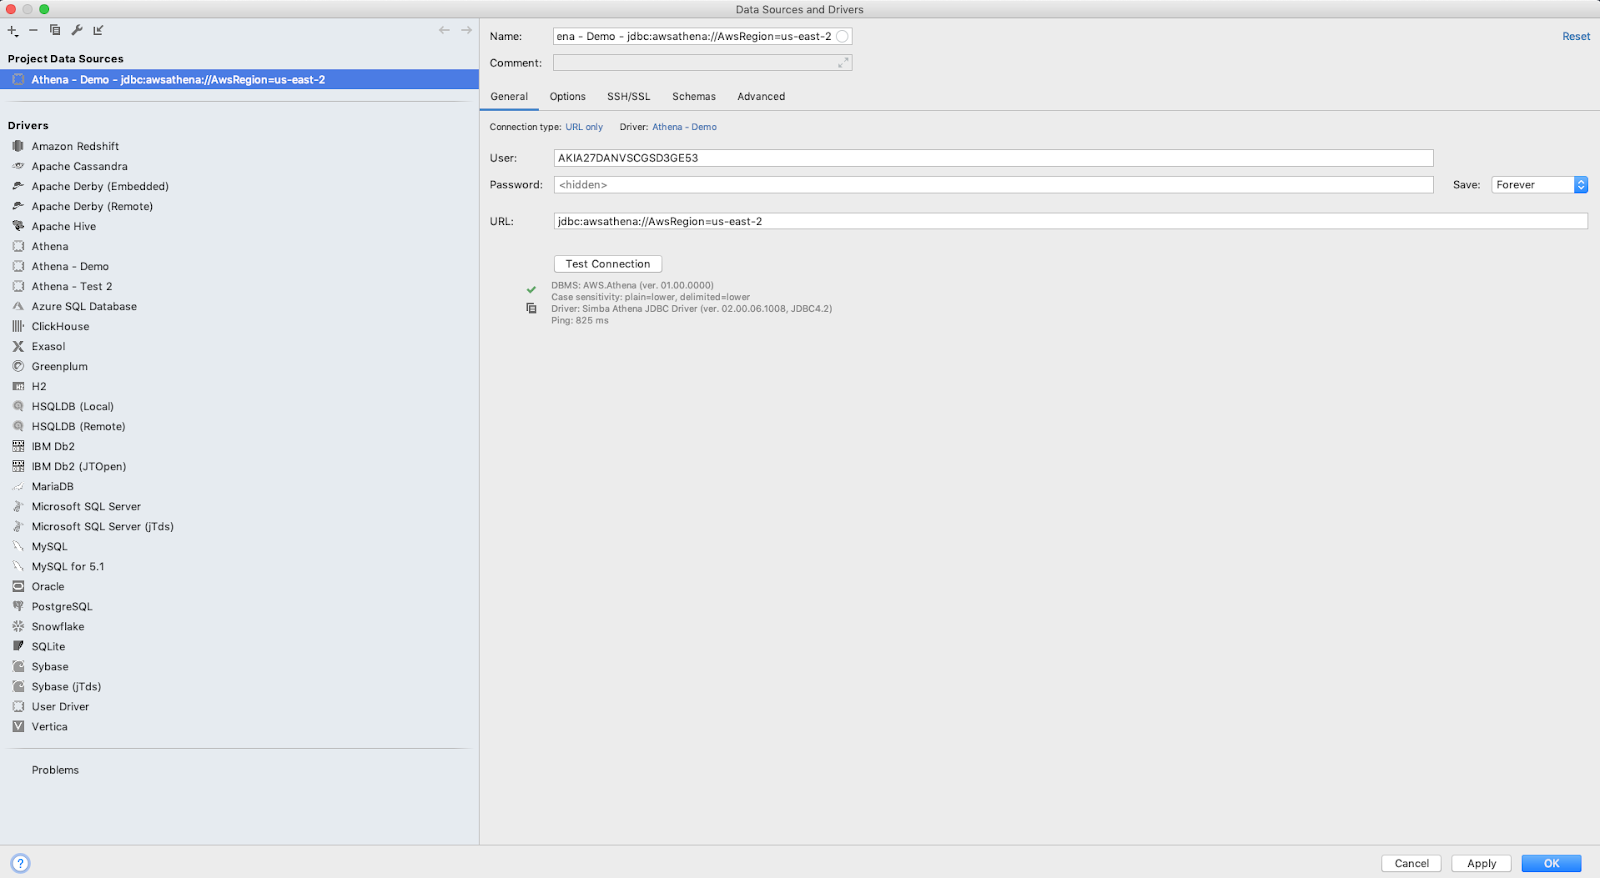
User, Password, and URL
You can now access your data using DataGrip’s Console:
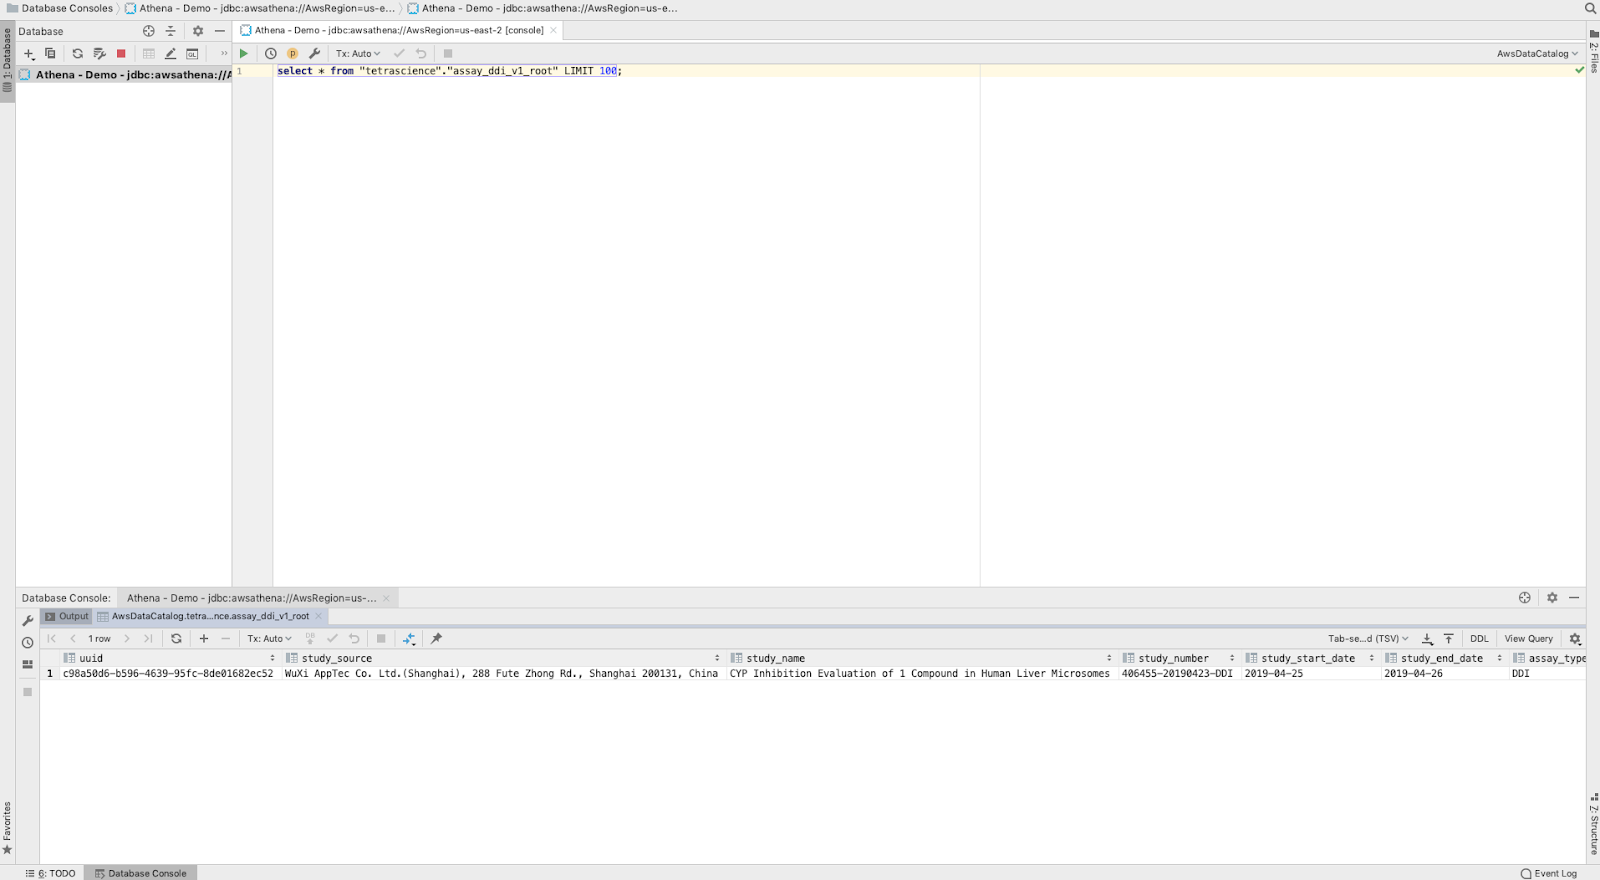
DataGrip Console
Updated over 1 year ago
