Tetra Empower Agent Installation Guide (Versions 4.1.2 and 4.1.3)
This page describes how a system administrator can install the Tetra Empower Agent and verify the system integration. Before you can run the Tetra Empower Agent, you must set up the data connection and have the required hardware, software, and user account credentials.
Set Up the Data Connection
The Tetra Empower Agent generates RAW files which are are uploaded to the Tetra Data Platform (TDP) through a Data Connector.
To enable secure file transfers, TetraScience provides two available cloud data connectors:
- [Generic Data Connector (GDC)] (https://developers.tetrascience.com/docs/agent-common-behavior#generic-data-connector-aka-gdc)
- [Cloud Data Connector (CDC)] (https://developers.tetrascience.com/docs/agent-common-behavior#user-defined-integration-aka-udi) (Formerly known as UDI).
Before you install the Tetra Empower Agent, you must set up one of these data connectors. To determine which data connector to select, click [link] (https://developers.tetrascience.com/docs/agent-common-behavior#agent-tetrascience-platform-integration-summary) for details.
Hardware and Software Requirements
The following hardware and software are required:
- Windows 10 Enterprise or Professional, 64 bit or Windows Server 2019
- .NET Framework 4.8
- 16 GB RAM at minimum (64 GB RAM is recommended)
- 8 Core CPU
- Minimum 150 GB free disk space
- Empower 3 Service Release 2 or later Client Software
Empower 3 Client Software
You must install the Tetra Empower Agent at the same workstation where Empower 3 Client Software is running. The Tetra Empower Agent is compatible with Empower 3 Service Release 2 or later (latest version is FR5). If the Empower 3 Client version is earlier than Service Release 2, then you must upgrade the Empower 3 Client software. For detailed system requirements, see the Client Software section in the Empower 3 System Administrator Guide.
User Account Credentials
To run the Tetra Empower Agent, you need the following valid user account credentials:
- Empower DB User account used to access the Empower database through the Empower Toolkit.
- Group User account used to access the Empower file server.
Projects available for extraction from the Tetra Empower Agent depend on the access permission of the Empower DB User account.
You must ensure that the Group User account that runs the Tetra Empower Agent is part of the Empower User Group in the Active Directory Organization Unit, and has the same privileges as the standard Empower User. The Tetra Empower Agent uses this account to access the raw data stored in the Empower file server.
Install the Tetra Empower Agent
The Tetra Empower Agent includes an installation package. For download instructions, please contact your Customer Success Manager (CSM).
After you move the downloaded files to a local folder, run this command to install the software: TetraScience.Agent.Empower.v4.x.x.msi.
The following shows the default installation folder location:
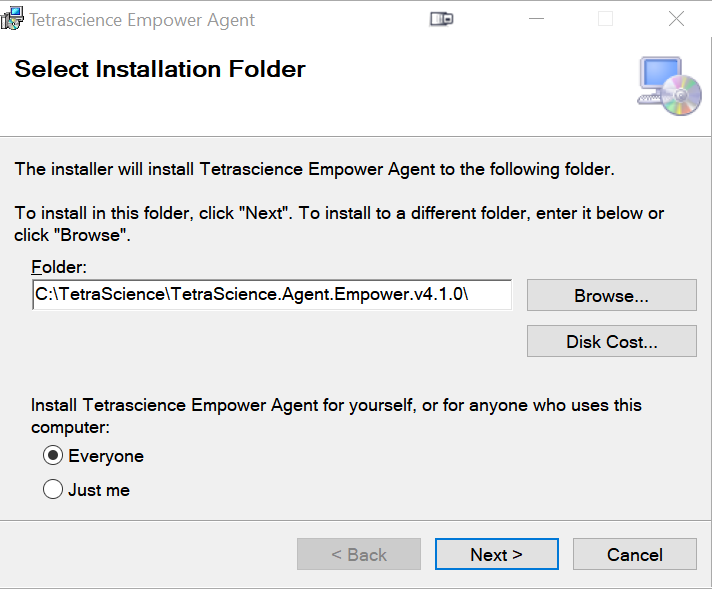
Tetra Empower Agent Installer (Select Installation Folder)
After the Tetra Empower Agent has successfully installed, the Tetra Empower Agent shortcut is added to the Windows All Program Group menu and to the desktop.
To initialize the Tetra Empower Agent, you must add the configuration settings.
Verify Tetra Empower Agent Installation
To verify the Tetra Empower Agent installation, follow these steps:
- Verify that the Tetra Empower Agent home was installed on the local drive. Verify that:
- Tetra Empower Agent is installed under the "C:\TetraScience" directory by default.
- Under the Tetra folder, you see TetraScience.Agent.empower.v4.x.x
- There are three subfolders under the TetraScience.Agent.empower.v4.x.x folder:
- bin
- bin64
- db
- If the Tetra Empower Agent was installed correctly, then you you should see the following:
- The Tetra Empower Agent shortcut appears on the Windows Desktop, and
- The Tetra folder was added to Windows Start Menu which includes the Tetra Empower Agent application.
To launch the Tetra Empower Agent Management Console, you can click either the shortcut on the Windows Desktop, or the folder on the Windows Start Menu.
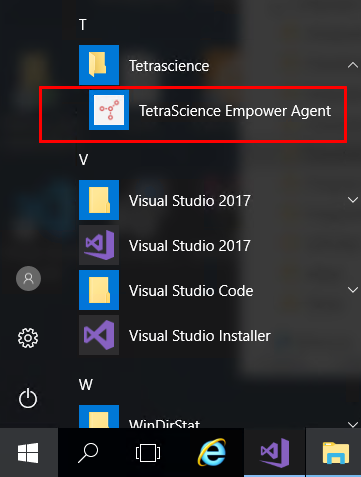
Tetra Empower Agent Shortcut
Verify Tetra Empower Agent System Integration
To verify the Waters Empower system integration, follow these procedures:
- Verify Waters Empower System Connection
- Verify Empower Group Account
- Verify Data Connector Connection
- Verify that the Tetra Empower Agent can retrieve the Empower Data
- Verify that the generated RAW files are uploaded to the Tetra Data Lake
Verify Waters Empower System Connection
- From the Tetra Empower Agent Management Console, select the Configuration tab.
- Enter the Waters Empower Database Account in the Database Name field.
- Enter the Waters Empower User Group Account in the User Name field.
- Click Test Connection.
- If the connection was successful, a dialog appears. Click OK to confirm the connection from the Empower account to the Empower system.
- If the connection was not successful, then re-check the database account name and user group account name.

Verified Empower DB Connection
Verify Empower Group Account
- From the Tetra Empower Agent Management Console, select the Configuration tab.
- Enter the Waters Empower Database Account in the Database Name field.
- Enter the Waters Empower User Group Account in the User Name field.
After you move the cursor, the Tetra Empower Agent validates the account immediately.

Verified Empower Group User
Verify Data Connector Connection
- Set up a Data Hub/Data Connector or CDC.
- From the Tetra Empower Agent Management Console, select the Configuration tab.
- Enter the Agent ID in the Agent id field.
- Enter the complete URL of the GDC or CDC in the Connection Url field.
- (Optional if you select CDC) Enter the Org Slug and JWT Token in the Org Slug field and Authorization field, respectively.
After you enter the information, the Tetra Empower Agent immediately validates the connection status.

Verified Connection Status
Verify that the Tetra Empower Agent Can Retrieve Empower Data
When the Tetra Empower Agent is active, you can validate the detection, generation, and upload of the Tetra Empower Agent RAW file.
- From the Tetra Empower Agent Management Console, navigate to the Project tab.
- Click Refresh to retrieve the most recent list of Empower projects.
- From the Project list, select a test project (for example, "Demo").
- Click Save to save the selection.

Select Test Project
- From the Tetra Empower Agent Management Console, navigate to the Processing Status tab, and review the Tetra Empower Agent status.
- After the Agent completes its routine scan and generates the RAW file, you can validate these tasks listed in the Processing Summary section:
- Scanned Injections - Number of injections the Agent detected for the Demo project.
- Generated RAW File - Number of injections the Agent retrieved for the Demo project.
- Uploaded - Number of injections the Agent uploaded to the Tetra Data Lake.
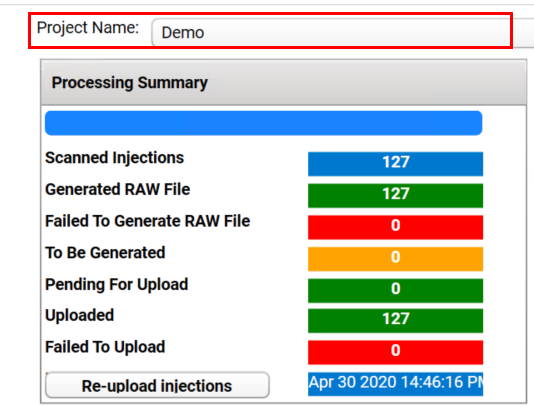
Verify Processing Details
The count for each step listed Processing Summary section should match the total injection count in the Waters Empower client. If you are using the demo account, the total injection count should be 127.
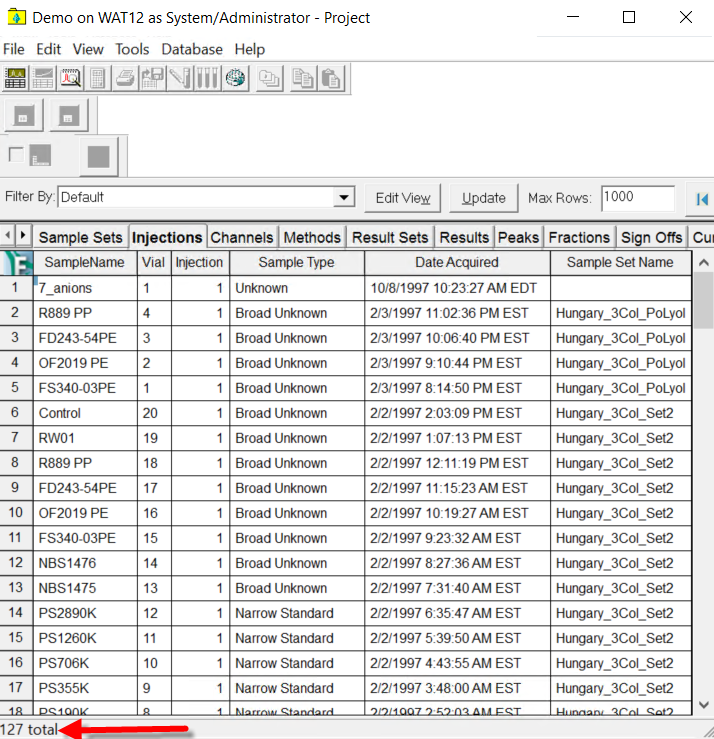
Verify Project Injection Counts in Waters Empower Client
Verify that the Generated RAW Files are Uploaded to the Tetra Data Lake
- Log in to the Tetra Data Platform.
- From the Search File page, check the RAW files of project "Demo" in the search result.
- Verify that the total number of RAW files from project "Demo" equals 127.
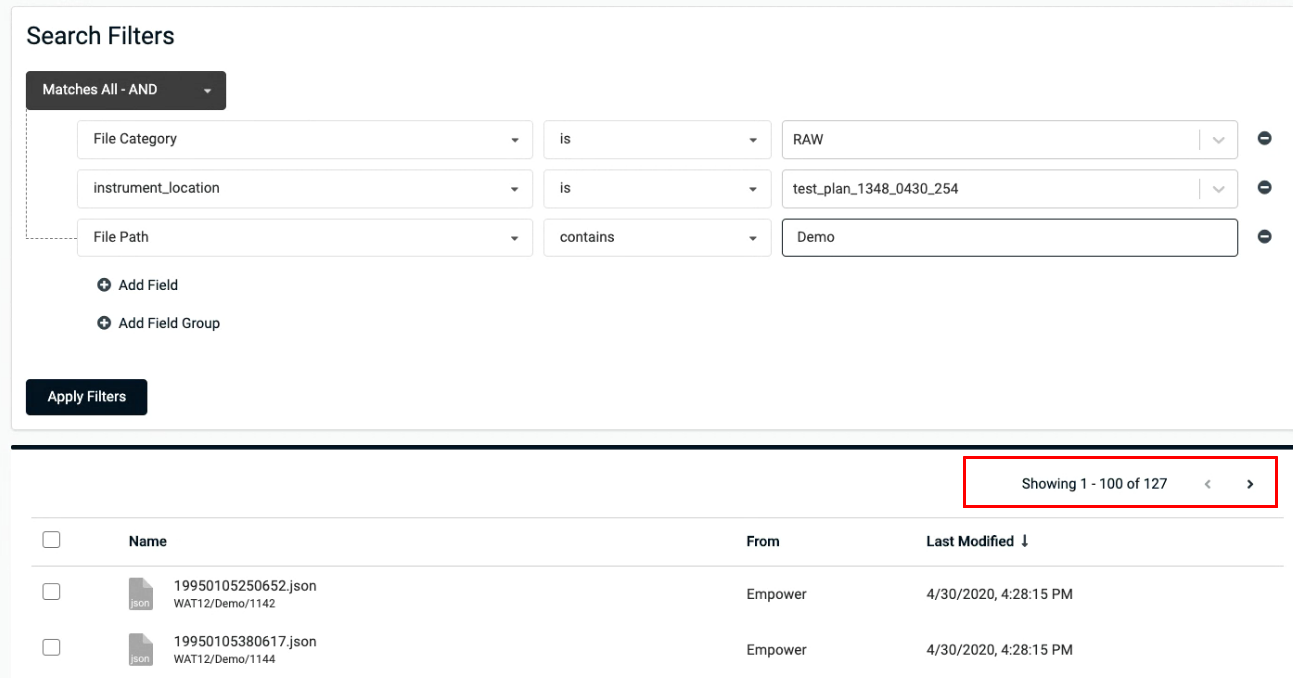
Verify Tetra Data Lake Upload
Daily Agent Run Schedule
After you complete the initial installation and configuration, you can use a Windows Task script to re-start the Tetra Empower Agent (for example, you can set it to run at 1:00 AM) and ensure that it runs constantly. For details, see [link] (https://developers.tetrascience.com/docs/using-windows-schedule-task-to-schedule-agent-services).
Updated over 1 year ago
