Audit Trail
The Tetra Data Platform (TDP) has a secure, computer-generated, time-stamped audit trail to independently record the date and time of operator entries and actions that create, modify, or logically delete electronic records. As an Admin user, you can access the audit trail, filter and view audit trail records, and download them to a CSV for further analysis or record keeping. The audit trail was designed and validated for compliance with 21 CFR Part 11. Audit trail records can be accessed but they cannot be altered, and are retained indefinitely.
Access the Audit Trail Page
To access the page as an Admin user, do the following:
- Sign in to the TDP.
- In the left navigation menu, choose Administration.
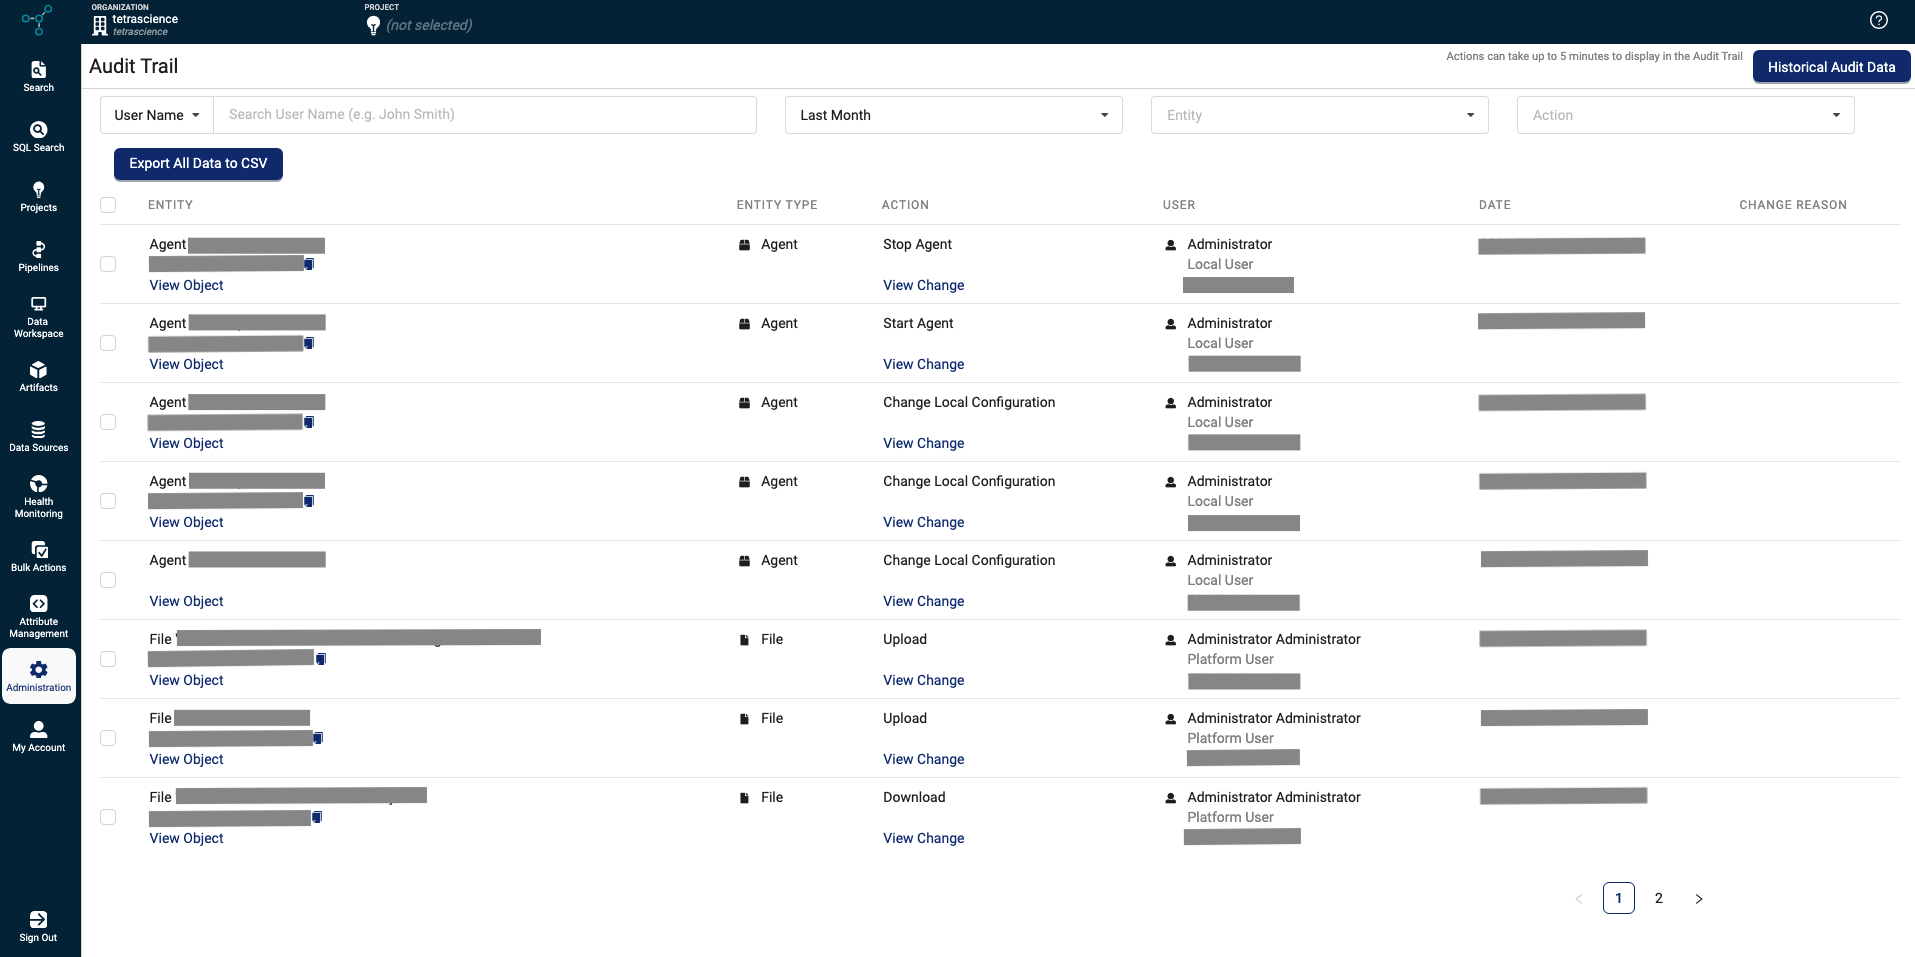
- Choose Audit Trail. The Audit Trail page appears and displays audit log records, showing the most recent records first.
NOTEThere may be a possible time lag of up to five minutes before actions display on the Audit Trail page.
View and Filter Audit Trail Records
To view and filter audit trail records, you can select various options at the top of the page. To view all of the audit trail records, leave all filter fields blank.
Audit Trail Filters
| Filter | Description |
|---|---|
| User Name | The name of the user who initiated the action. The name may be a service user's name or an individual user's name. For example, to see all of the authorization tokens that a specific user created, select User Name from the Filter dropdown, then enter the specific user name in the field. |
| Date | Select the date range from the options. If you select custom, you can select the start (From) and end (To) date range from the calendar to view audit logs that were generated on or between those specific dates. Note that the 'To' Date is exclusive; for example, if you select From 2023-08-16 - 2023-08-17, then only data from August 16, 2023 displays. |
| Entity | Select the component to review. For example, you could select Pipeline to view the logs related to pipelines. To view a list of the available entities and their corresponding actions, see the Entities and Logged Actions table. |
| Action | Select the action that was performed on the entity. This field displays different information based on the selected entity. For example, if you select Pipeline as the entity, you could select to view all pipelines that were: created, updated, deleted, reprocessed, or submitted files for process. To view the available entities and their corresponding actions, see the Entities and Logged Actions table. |
Entities and Logged Actions
| Entity | Available Actions |
|---|---|
| Access Group | Add users, Create, Delete, Remove users, update |
| Agent | Create, Update, Enable, Disable, Enable Queue, Disable Queue, Change Cloud Configuration, Change Local Configuration, Start Agent, Stop Agent, Add New, Add New Empower Project, Rerun Existing Empower Project, Select Existing Empower Project. |
| Datahub | Activate, Create, Update, Enable, Disable, Delete, Sync, Update Config |
| Datahub Agent | Create, Update, Delete, Enable, Disable |
| Datahub Connector | Create, Update, Enable, Disable, Delete |
| File | Upload, Update Labels, Update Tags, Update Metadata, Update Metadata & Tags, Delete |
| Hubs | Create, Update, Configure, Change Status, Sync |
| Integration | Create, Update, Delete |
| Source | Create, Update, Delete, Enable, Disable, Enable Queue, Disable Queue |
| IoT Device | Create, Update, Delete, Enable, Disable |
| IoT Agent | Create, Update, Delete, Enable, Disable |
| IoT Integration | Create, Update, Delete |
| IoT Source | Create, Update, Delete |
| Organization | Create, Update, Delete |
| Pipeline | Create, Update, Delete, Reprocess, Submit files for process |
| Pluggable Connector | Create, Update, Configure, Change Status, Sync |
| Shared Secret | Create, Update, Delete, |
| Shared Setting | Create, Update, Delete |
View Audit Trail Results
After you select filters to view the audit trail records, information matching those filters displays on the page. To review the next page of results, click the page number or arrow keys at the bottom right corner of the page.
Audit Trail Result Fields
| Field | Description |
|---|---|
| Entity | Name of the entity that the action was performed on. The entity contains:
|
| Entity Type | Lists the entity type (see the Entities and Logged Actions table for a list.) |
| Action | Displays the action performed on the Entity. To view the available entities and their corresponding actions, see the Entities and Logged Actions table. The action contains:
|
| User | User who initiated the action. The user may be a service user's name or an individual user's name. The user contains:
|
| Date | Date and time of the audit log entry. Timestamps are stored in Coordinated Universal Time (UTC) in the database and displayed in your local browser's time zone. |
| Change Reason | If Change Reason for Audit Trail was enabled as a compliance setting, the change reason displays in the last column. |
Export Audit Trail History
To export your Audit Trail history to a CSV file from the Audit Trail page, do one of the following:
-
To export all of your Audit Trail history, select the upper left Export All Data to CSV button.
- or -
-
To export a specific selection of logs only, select the checkboxes next to the audit logs that you want to export. The Export All Data to CSV button label changes to indicate the number of records selected (for example, Export3 Selections to CSV). Then, select the Export_[#]_ Selections to CSV button.
The CSV file downloads to your local machine and provides the following information that's not shown in the Audit Trail page results list.
Audit Trail Details Available in CSV Downloads
| Column Name | Definition |
|---|---|
| id | Unique identifier of the specific entities in the log files |
| org_slug | Organizational slug of the actor |
| actor_id | Unique identifier for the actors |
| actor_type | Indicates the type of actor |
| actor_name | Name of the actor |
| actor_email | Email address of the actor |
| ip_address | Actor's IP address |
| host | Name of the host |
| auth_token_ending | Last seven characters of the authorization token |
| entity_name | Name of entity |
| entity_type | Type of entity |
| entity_id | ID for the entity |
| action | Action performed on the entity |
| before | Entity details before the action was taken. Typically, for create or login-attempt actions, this field remains empty. For update or delete actions, the field shows the state of the entity before the action occurred. |
| after | Entity details after the action was taken. For delete actions, this field typically is empty |
| entity-schema-version | Schema version for the entity (if the entity has one) |
| created_at | Date and timestamp for the log entry. Timestamps are recorded in Coordinated Universal Time (UTC) and displayed in your local browser's time zone. The server time used to generate this authoritative UTC timestamp is synchronized through the Network Time Protocol (NTP). |
Log RetentionThere is no purge policy for entries in the Audit Trail.
Disabling the Audit TrailYou should disable the audit trail for development environments only. If you disable the audit trail for production environments, you will not be able to demonstrate compliance with GxP quality guidelines and regulations.
AWS and Auditing Information
- Tetra Agent audit information displays in AWS CloudWatch.
- AWS Infrastructure logs that contain automated and user-initiated data is captured in AWS CloudWatch and CloudTrail. For details about these features, click these AWS documentation links: CloudWatch and CloudTrail.
View Historical Audit Trail Data From Before TDP v3.0
To view historical audit trail data prior to TDP version 3.0 (31 March 2021), do the following:
- On the Audit Trail page, select the upper right Historical Audit Data button. The Historical Audit Data page displays.
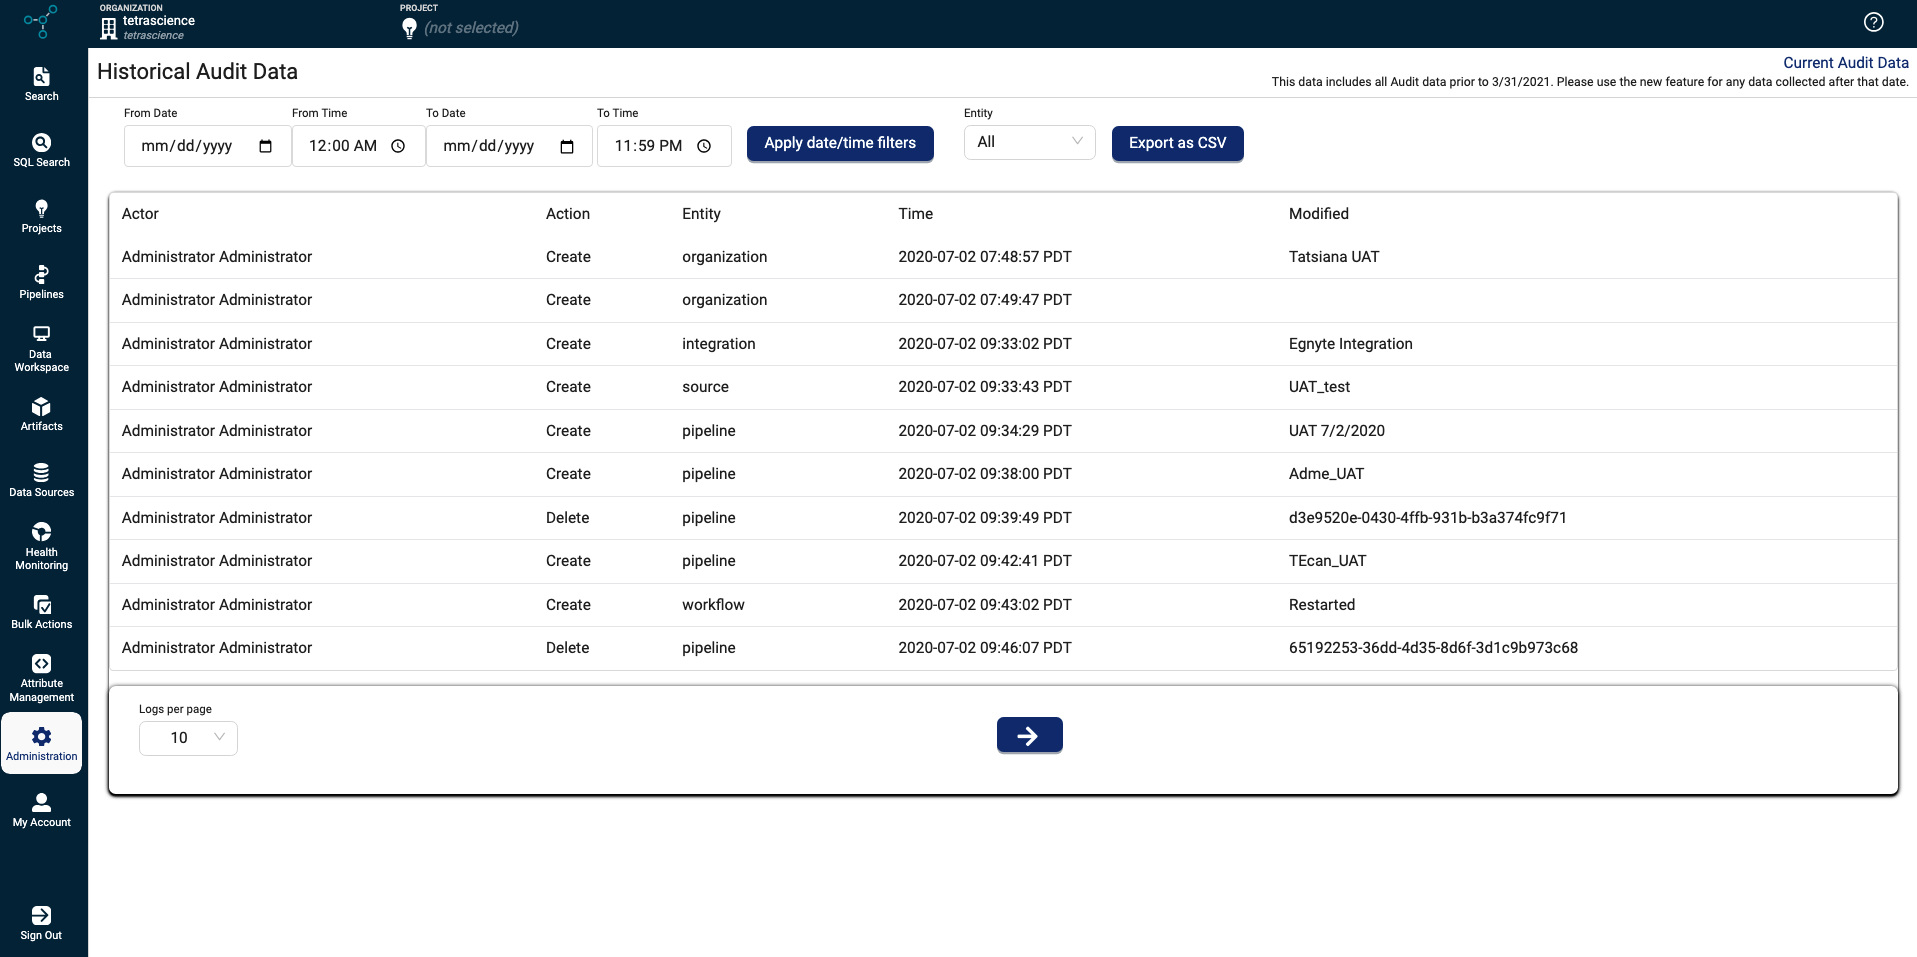
- Refine your search by adjusting the following filters:
- From date/time - Display log entries starting with this date and time.
- To date/time - Display log entries through this date and time.
- Apply Date/Time Filters - Click to apply the date/time filters.
- Entity - Select the entity to view.
- Adjust the number of logs shown per page by selecting a number in the Logs per page dropdown at the bottom of the page.
- To export your results as a CSV file, select the Export as CSV button. To specify the fields that you want to export, you can set the following filters:
- From date - Enter from the date, or click the calendar to select the date
- From time - Enter from the time, or click the clock to select the time.
- To date - Enter from the date, or click the calendar to select the date
- To time - Enter from the time, or click the clock to select the time.
- Entity - Select all or a specific entity to export.
- Choose Export.
- (Optional) To return to the current Audit Trail page, select Current Audit Data in the upper right.
Documentation Feedback
Do you have questions about our documentation or suggestions for how we can improve it? Start a discussion in TetraConnect Hub. For access, see Access the TetraConnect Hub.
NOTEFeedback isn't part of the official TetraScience product documentation. TetraScience doesn't warrant or make any guarantees about the feedback provided, including its accuracy, relevance, or reliability. All feedback is subject to the terms set forth in the TetraConnect Hub Community Guidelines.
Updated 2 months ago