Create and Install a Tetra Data Hub
IMPORTANTTetra Data Hub is on a deprecation track. For new deployments, Tetra Hub should be installed, except for the following use cases:
- Tetra Solace Connector integrations
- Facilitating on-premises HTTP requests from pipelines if AWS PrivateLink or an API gateway doesn't meet your requirements
For more information, see Tetra Data Hub Deprecation.
This page describes how to create and install a Tetra Data Hub.
Before you Begin
Verify that you meet the following requirements:
- You have a TetraScience account, and you are either the organization owner or the Administrator.
- You have a dedicated machine for the Hub, because the Hub will always be running.
- You have admin access to the dedicated device.
For more information about the Data Hub machine's system requirements, see Tetra Data Hub System Requirements.
Create and Install the Data Hub
To create a Tetra Data Hub, do the following:
- Sign in to the TDP.
- In the left navigation menu, choose Data Sources. Then, choose Data Hub (v1)
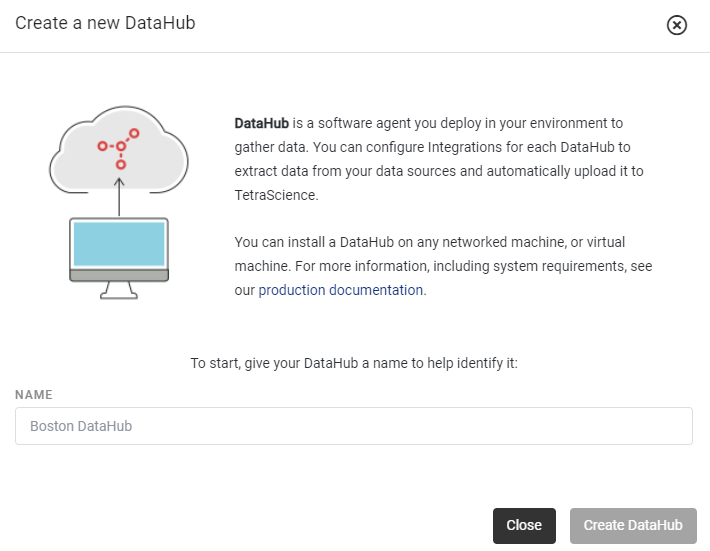
- Select + Create new Data Hub. The Data Hub wizard opens.

Data Hub Wizard
- Enter a name for the new Hub. Then, choose Create Data Hub.

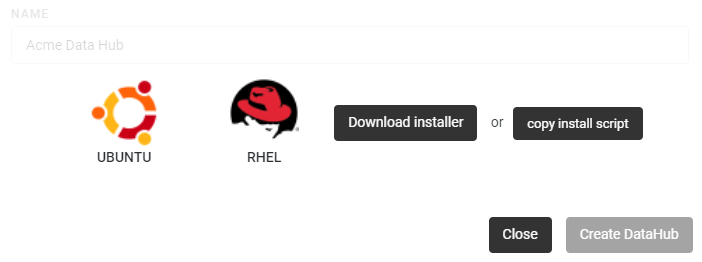
Data Hub Wizard
- Select Download installer to download the installation script.
- Copy the installation script to your Hub's host server.
- Open the Hub host server's Terminal app and navigate to the installation script directory. Change the installation script to run as an executable by entering running the following command:
sudo chmod +x datahub-installer.sh
For TDP Versions 2.22.0 and Higher
If the Data Hub machine is behind a proxy, you can do the following:
- Manually add environment variables for the proxy (usually done when network administrators prepare a clean machine for the Data Hub as part of their set up), or
- Configure it automatically through an installation script*.
- Run the installation script as root by typing
sudo ./datahub-installer.sh. Click here for details. - The Hub installer performs various checks and prompts you for input and/or confirmation.
- Installer checks if the machine has enough RAM memory:
- if there < 4 GB of RAM, then the installer will abort.
- if there >= 4 GB but <= 8 GB of RAM, then the installer will issue a warning and ask if you want to continue.
- if there > 8 GB of RAM, then the installer will continue without any warning.
MEM ConfigurationThe MEM configuration can be bypassed during installation. TetraScience has identified performance issues for AWS instance types < 4 GB of RAM. Therefore, we recommend that you use t3.small or larger AWS instance types.
- Installer checks if the machine has enough allocated disk space:
- if there < 20 GB of disk space, then the installer will abort.
- if there >= 20 GB but <= 50 GB of disk space, then the installer will issue a warning and ask if you want to continue.
- if there > 50 GB of disk space, then installer will continue without any warning.
- Installer attempts to detect environment proxy variables:
- If environment proxy variables are set, then the installer presents them and checks if they have the correct values.
- If no environment proxy variables are detected, then the installer asks if the machine is behind the proxy. If you enter Yes, then you must provide the proxy settings.
- If proxy settings were detected, or you manually entered the proxy settings in a previous step, then the installer will ask for permission to update the AWS SSM client settings with those proxy details after installation completes. If you reject to provide permission, then the installer will abort. Otherwise, if no proxy settings were detected and you did not provide proxy settings in a previous step, then the installer continues normally.
- Installer checks if all required software is installed, and if not, it will install it.
- After the installation completes, return to the TDP platform UI to register and activate the Hub with AWS. Click Activate. The activation expires 24 hours after the Data Hub was created. You can only use the activation code once and it must be within the 24 hours after you created the Data Hub in the TDP UI. If it expires, then you must create a new Data Hub and run a new installation script.
The new Data Hub should appear as activated and online. You can add connectors to this Hub.
For TDP Versions Earlier than 2.22.0
- If the Data Hub machine is behind the proxy, then you must configure the proxy environment variables for the root account. Click here for details.
- If the Data Hub machine is behind the proxy, and it was successfully installed, you must configure the proxy settings for the Amazon SSM client before you activate the Data Hub. Click [here]https://developers.tetrascience.com/v3.3/docs/proxy-settings#configure-amazon-ssm-client-proxy-settings) for details.
After the installation is complete, return to the TDP UI to activate the newly installed Data Hub. Click Activate to continue. The activation expires 24 hours after the Hub was created. You can only use the activation code once and it must be within the 24 hours after you created the Hub in the TDP UI. If it expires, then you must create a new Hub and run a new installation script.
The new Data Hub should appear as activated and online. You can add connectors to this Hub.
Troubleshooting Common Tetra Data Hub Installation Issues
These common issues may occur during the Tetra Data Hub installation procedure:
-
Installation script fails because there is no network access. To fix this issue, you should check:
- Does the Data Hub machine have network access?
- Does the Data Hub machine have open 443 port?
- Is the Data Hub machine behind a proxy? If so, then you must configure the environment variables.
-
Installation script fails because some of required software components cannot be installed automatically. This generally occurs with Docker installation. If it does happen, then manually install Docker and run the installation script again.
-
Data Hub activation fails. Please review the log at
/var/log/amazon/ssm/amazon-ssm-agent.logand verify that there are no network related issues. If there are network issues, then review the network and proxy settings for the Hub machine.
Documentation Feedback
Do you have questions about our documentation or suggestions for how we can improve it? Start a discussion in TetraConnect Hub. For access, see Access the TetraConnect Hub.
NOTEFeedback isn't part of the official TetraScience product documentation. TetraScience doesn't warrant or make any guarantees about the feedback provided, including its accuracy, relevance, or reliability. All feedback is subject to the terms set forth in the TetraConnect Hub Community Guidelines.
Updated 5 months ago
