Monitor Pipeline File Processing
There are four ways to monitor Tetra Data Pipeline file processing:
- The File Processing page
- The Workflow Processing page
- The Pipelines page
- The Search Workflow API
- Email notifications
To configure a pipeline, see Set Up and Edit Pipelines.
Monitor and Manage Pipelines by Using the File Processing Page
To monitor pipeline processing, files, workflows, and logs on the File Processing page, do the following:
- Sign in to the TDP.
- In the left navigation menu, choose Pipelines. Then, choose File Processing. The File Processing page appears.
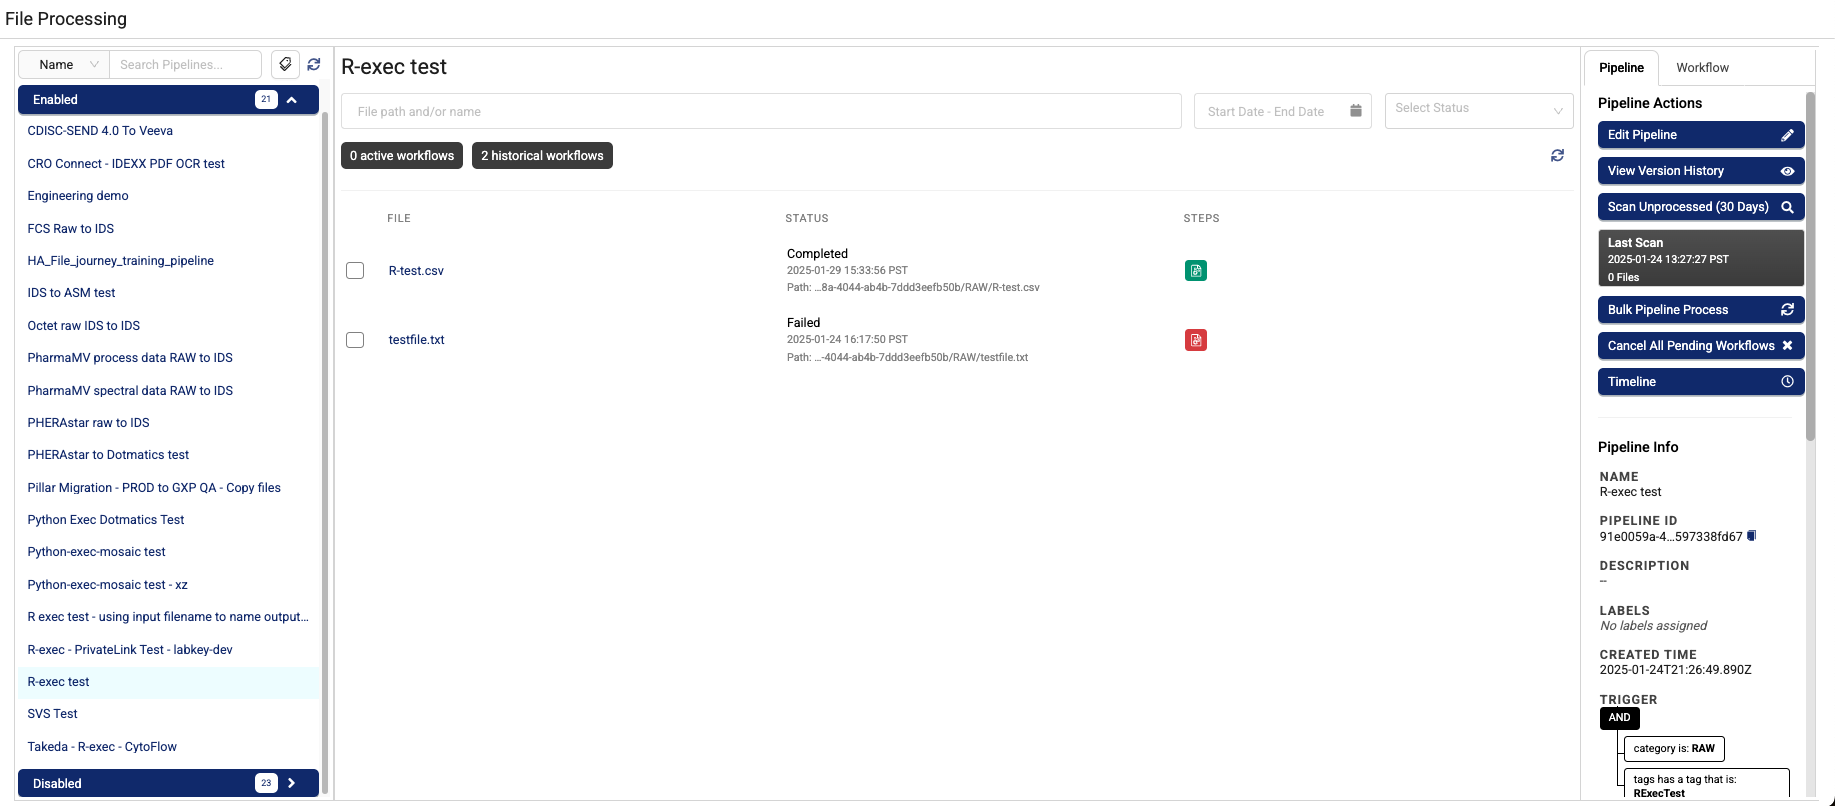
There are two tabs in the right panel:
- In the Pipeline tab, you can click a link that will take you to a page where you can edit your pipeline, scan for unprocessed files, create a bulk pipeline process job, cancel pending workflow, and view high-level trigger, protocol, and step details.
- In the Workflow tab, you can click links to open workflows, files, and a file workflow history. You can also use it to reprocess files, view workflow logs, manage files, and more.
Find a Pipeline
To find a specific pipeline, you can do either of the following:
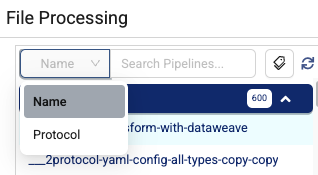
- To search for a pipeline by name or its protocol, type the information in the upper left Search field. Use the drop-down menu to select your search type: Name or Protocol.
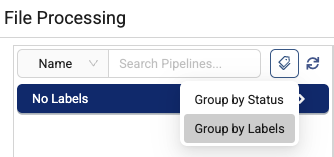
- To browse pipelines by either their status (Enabled or Disabled) or assigned labels, hover over the tag icon next to the Search field and select either Group by Status or Group by Labels. The pipelines in your organization appear in the list on the left, organized by either their status or assigned labels.
Review a Pipeline's Workflows
After you select a pipeline, its active and historical workflow counts are shown near the top of the screen.
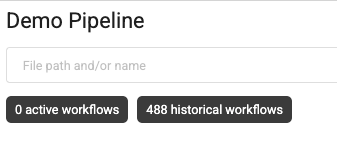
The active workflow count shows all workflows that are pending or currently being processed. The historical workflow count represents workflows that have been completed or have failed. If workflows are active, you can select the refresh button next to it to view the latest status.
NOTEThere might be an overlap between active and historical counts during reprocessing. A previously completed fileID will have a historical record and an active record while it is being reprocessed.
View a Specific File from a Pipeline
After you've selected a pipeline, you can view specific files' File Details pages by selecting them from the list. Use the filters at the top of the page to search for files by name, file path, date, and status.
Edit a Pipeline
To edit a pipeline from the File Processing page, do the following:
- In the left navigation menu, select Pipelines.
- Choose File Processing. The File Processing page appears.
- Select the right Pipeline tab.
- Choose Edit Pipeline. The Pipeline Manager page appears.
For more information about how to edit pipelines, see Set Up and Edit Pipelines.
Scan for Unprocessed Files
To scan for unprocessed files from the File Processing page, do the following:
- In the left navigation menu, select Pipelines.
- Choose File Processing. The File Processing page opens.
- Select the right Pipeline tab.
- Choose Scan for Unprocessed Files. The scan runs and the date of the Last Scan is updated.
Create a Bulk Pipeline Process Job
You can create a bulk pipeline process job on either the File Processing page or the Pipelines page.
Create a Bulk Pipeline Process Job from the File Processing Page
To create a bulk pipeline process job from the File Processing page, do the following:
- In the left navigation menu, select Pipelines.
- Choose File Processing. The File Processing page appears.
- Select the right Pipeline tab.
- Choose Bulk Pipeline Process. The Create Job dialog appears.
- In the Create Job dialog, enter the following:
- For PIPELINE, enter the name of the pipeline that you want to create a job for.
- For WORKFLOW STATE, select the workflow state(s) of the files that you want to process. You can select one or more of the following workflow states:
- All—processes all workflow states.
- Unprocessed—processes unprocessed files.
- Failed—processes failed files.
- Completed Successfully—processes previously processed files.
- For DATE RANGE, enter the date range for the files that you want to process.
- (Optional) For NAME, enter a name for the job.
- To scan for unprocessed files in the job you've configured, choose Scan Files.
-or-
To process the files in the job you've configured, choose Process Files.
A dialog appears that confirms that the job was created. To view the status of the job, either choose View Jobs in the dialog or follow the instructions in the Monitor a Bulk Pipeline Process Job's Status section of this topic.
Create a Bulk Pipeline Process Job from the Pipelines page
To create a bulk pipeline process job from the Pipelines page, do the following:
- In the left navigation menu, choose Bulk Actions.
- Choose Pipelines. The Pipelines page appears.
- Select the Create Job button. The Create Job dialog appears.
- In the Create Job dialog, enter the following:
- For PIPELINE, enter the name of the pipeline that you want to create a job for.
- For WORKFLOW STATE, select the workflow state(s) of the files that you want to process. You can select one or more of the following workflow states:
- All—processes all workflow states.
- Unprocessed—processes unprocessed files.
- Failed—processes failed files.
- Completed Successfully—processes previously processed files.
- For DATE RANGE, enter the date range for the files that you want to process.
- (Optional) For NAME, enter a name for the job.
- To scan for unprocessed files in the job you've configured, choose Scan Files.
-or-
To process the files in the job you've configured, choose Process Files.
A dialog appears that confirms that the job was created. To view the status of the job, either choose View Jobs in the dialog or follow the instructions in the Monitor a Bulk Pipeline Process Job's Status section of this topic.
Monitor a Bulk Pipeline Process Job's Status
To monitor a bulk pipeline process job's status, do the following:
- In the left navigation menu, choose Bulk Actions.
- Choose Pipelines. The Pipelines page appears and displays a list of all your active and inactive bulk pipeline process jobs.
The Pipelines page includes the following information:
- STATE—shows the job’s status.
- NAME—shows the job’s name.
- COMPLETION %—shows how much of the job has been processed.
- STARTED—shows the date and time the job started processing.
- COMPLETED—shows the date and time the job completed.
- PIPELINE—shows the name of the pipeline the job was for.
- INFO—opens a Bulk Processing Job Details dialog that shows the job’s details, including all of the files affected by the operation.
Retrying and Reprocessing Files
Retry and Reprocess are two related, but different terms. By default, if there is an error or issue that prevents the processing of a file, the pipeline retries processing three more times before the pipeline fails. This is done automatically, but you can do it manually as well in the TDP Dashboard. Reprocess is starting the process again; it is as if you've re-uploaded the file.
NOTEPipeline reprocessing operates on the latest version of an existing file only. No previously deleted files are reprocessed as part of a pipeline reprocessing job.
Here is a table that compares both features and explains what happens if you edit the pipeline.
| Scenario | Retry | Reprocess |
|---|---|---|
| If you configure the pipeline to use another protocol. | Still uses the old protocol. | Will use the new protocol. |
| If you force overwrite the protocol (and the protocol version stays the same) | Will use the force-written protocol. | Will use the force-written protocol. |
| If the protocol refers to a wildcard version of a task-script e.g. 1.x and you upload a bumped minor version of the task-script. | Will use the new task script version. | Will use the new task script version. |
| If you force overwrite a task-script (and the script version stays the same). | Will use the force-written script. | Will use the force-written script. |
| If you update the pipeline config value directly in the pipeline design page. | Still uses the old pipeline config value. | Will use the new pipeline config value. |
| If you update a non-secret pipeline config value on the Shared Settings page. | Still uses the old pipeline config. | Will use the new pipeline config. |
| If you update a secret pipeline config value on the Shared Settings page. | Will use the new secret value in most cases (see note below) | Will use the new secret value. |
NOTE:If you update a secret pipeline config value on the Shared Settings page, the secret is resolved when you create a new task instance, and it can only get the latest secret from SSM Parameter Store. If the workflow still uses an existing task instance, it will use the old secret. On the other hand, if the workflow creates a new task instance, it will use the new secret. The reason for this is that secret only appears in SSM or task instance, and the software doesn't copy the secret value anywhere else, so when you retry the workflow, it can only get a secret reference, not the real value.
Canceling Pending Workflows
To cancel pending workflows, do the following:
- On the File Processing page, select the pipeline that you want to cancel pending workflows for.
- Select the right pane's Pipeline tab.
- Choose Cancel All Pending Workflows.
Viewing Trigger, Protocol, and Step Details
In the Pipeline tab on the File Processing page, you can view pipelines' Trigger, Protocol, and Steps details.
- The Trigger shows the criteria that must be met for the pipeline to process a file.
- The Protocol shows the following:
The namespace is a combination of which organization the file belongs to and who can use the file. Namespaces arediscussed in detail in this topic.
 The slug is the unique name of the protocol. Slugs are discussed in detail in this topic.
* The version shows the version number of the pipeline used. - The Steps show the name of each step that is part of the pipeline workflow.
Using the Workflow Tab to View Workflows, Workflow Histories, Logs, File Properties, and to Manage Files
The Workflow tab provides details on files and workflows. It also allows you to view, download, add attributes (metadata, labels, and tags), and reprocess them. This panel becomes visible when you select one or more files from the list in the center of the page. You can also view and download files from this panel.

Pipeline Processing Workflow Panel
Viewing a Workflow
To view a workflow, select a file by clicking the checkbox next to it. Then, click the Open Workflow button. The workflow screen appears.
The following table describes the items on the workflow page.
| Item | Description |
|---|---|
| Input file | File input into the pipeline for processing. Clicking this will display File Versions, File Details, Workflow History and Related Files. |
| Pipeline Name | Name of the pipeline. Clicking this displays the Pipeline Manager screen that shows the pipeline name, protocol, and last configuration update. |
| Pipeline Protocol | Lists the pipeline protocol’s namespace, slug, and version in the following format: namespace/slug:version. By selecting the pipeline protocol, you can also see the protocol’s name, description, last update date, README file, associated task scripts and Intermediate Data Schemas (IDSs), and labels. |
| Output Files | Lists the output files. Click on a file to download it to your device. |
| Started | Lists the time the pipeline processing started. |
| Ended | Lists the time the pipeline processing ended. |
| Workflow ID | Displays an abbreviated ID for the workflow (first and last 11 characters). If you need the entire number, check the JSON Log or the JSON Tree (see information in the Attempt Log section. |
| Workflow Execution Time | Indicates how long a workflow takes to run once it is scheduled. Clicking this shows the workflow timeline. |
| Status | Status of the processing: pending, in progress, completed, failed. |
| Steps | List of steps in the pipeline. |
| Attempt Logs | Lists logs that show information about each attempt to run the step. For each attempt, three logs are shown. Basic Log shows log messages for a specific test attempt. JSON Log shows Basic Log data in JSON format with additional data such as taskId and workflow. JSON Tree shows the same data as the JSON Log, but is arranged in an expandable/collapsible tree format. |
The following show examples of the different logs.
NOTETo download log files, choose the Download All Logs button.

Basic Log Example

JSON Log Example

JSON Tree Example
Viewing the Workflow History
To view the file workflow history, do the following:
- View the Workflow History information near the bottom of the Workflow panel. The timestamp that indicates when the workflow was completed appears.
- Click the workflow to view more details about the workflow.
View Error Logs, Workflow Status, and other Details
- To view logs, select a file on the page. Then, select the View Logs button in the Workflow tab. The Workflow Logs screen appears.
- The log file appears in the bottom half of the screen. By default, the log is displayed at the “info” level, which provides general information about pipeline processing.
a. If you want to troubleshoot a problem, change the log level to debug by moving the Display debug output toggle to the right. More details about processing appear.
b. To view task logs, select View Step Logs in Cloudwatch. Amazon CloudWatch is a metrics repository in AWS that contains log data.

Workflow Logs
The following table describes the fields shown on the screen.
| Field | Description |
|---|---|
| Pipeline | Pipeline name. |
| Description | Short description of the pipeline. |
| Protocol | Protocol name. |
| Pipeline run status | Indicates the status of the pipeline run (pending, in-progress, completed, failed.) |
| Task Attempts | Indicates how many attempts, and whether the attempts are pending, in-progress, completed, or failed. |
| Display Debug Output | Indicates whether the debug output should be shown. |
View File Properties
To view file properties, select a file, then look at the File Properties in the Workflow tab. It shows the Input file, its source type, and name as well as the same information for the output file, if there is one.
View and Download Files
To view or download a file from the File Processing page, select a file. That file's File Details page appears.
The File Details page displays two tabs:
- File info—shows additional file details
- File Journey—shows the event history for a file after it's been uploaded to the Tetra Data Lake, including pipeline processing events
For more information, see View the File Details Page.
Download a File
To download a file from the File Details page, select the Download Version button in the FILE ACTIONS section.
Preview a File
To preview a file from the File Details page, select the File Preview button in the FILE ACTIONS section.
View More File Information
To view a file in JSON format from the File Details page, select the More File Information button in the FILE ACTIONS section.
Upload New File Versions
NOTEWhen a new file version is uploaded, the TDP copies all file metadata from the previous file version, including workflow data. The system then uses this information to relate the new file version to the workflow that created the previous file version. This process results in the new file version being displayed on the File Details page and showing that the new, uploaded file version was produced by a workflow.
To upload a new file version, do the following:
- On the File Details page, in the FILE ACTIONS section, select the Upload New Version button. A dialog appears.
- (Optional) To add labels to the file, select the plus icon in the LABELS row. For more information, see Attributes.
- (Optional) To add metadata or tags, expand the Advanced Fields section. Then, select the plus icon in the METADATA row to add metadata. Choose the TAGS menu to select tags.
- Either click the file box and select a file to upload by using your computer's file browser, or drag and drop a file into the dialog.
- Choose Upload.
Delete a File
NOTETo delete a file, you must be logged in as a user with an Org Admin role.
To delete a file from the File Details page, select the Delete button in the FILE ACTIONS section. A dialog appears that asks you to confirm if you want to delete the file or not. Then, choose Delete File.
Monitor and Manage Pipelines by Using the Workflow Processing Page
The Workflow Processing page displays each pipeline or Tetraflow's workflow execution instead of grouping them by file. To monitor pipeline processing, files, workflows, and logs using the Workflow Processing page, do the following:
-
In the left navigation menu, choose Pipelines. Then, choose Workflow Processing. The Workflow Processing page appears.
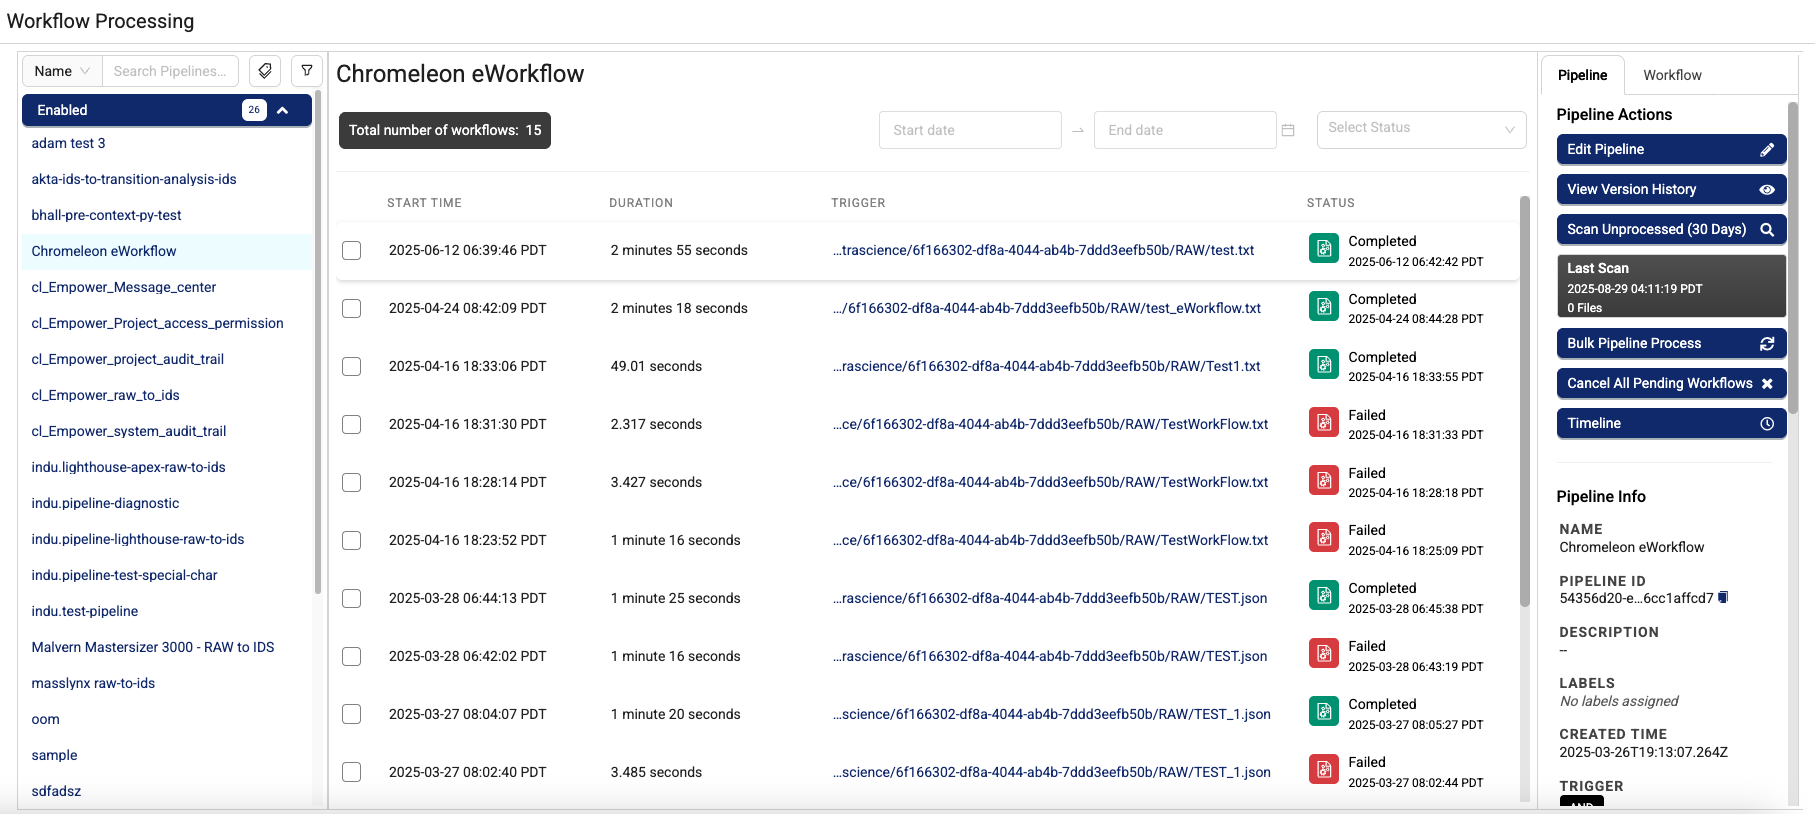
There are two tabs in the right panel:
- In the Pipeline tab, you can click a link that will take you to a page where you can edit your pipeline, scan for unprocessed files, create a bulk pipeline process job, cancel pending workflow, and view high-level trigger, protocol, and step details.
- In the Workflow tab, you can click links to open workflows, files, and a file workflow history. You can also use it to reprocess files, view workflow logs, manage files, and more.
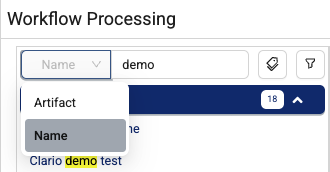
Find a Pipeline
To find a specific pipeline, you can do either of the following:
- To search for a pipeline by name, type the information in the upper left Search field. Select the drop-down menu to search for a specific pipeline by its name or artifact.
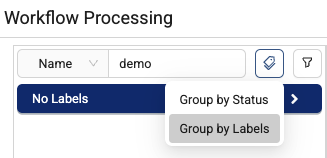
- To browse pipelines by either their status (Enabled or Disabled) or assigned labels, hover over the tag icon next to the Search field and select either Group by Status or Group by Labels. The pipelines in your organization appear in the list on the left, organized by either their status or assigned labels.
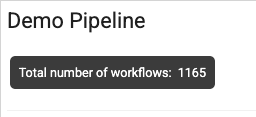
Review a Pipeline's Workflows
After you select a pipeline, its total number of workflows is shown near the top of the screen.
Use the API to Monitor Pipeline Processing
You can use the API to monitor pipeline processing. See Search Workflows API for more details.
Set Up Pipeline Processing Notifications
You can have emails sent that indicate whether a pipeline is successful or has failed. For more information, see Set Notifications.
Troubleshooting
A python-exec Pipeline Returns an invalid non-printable character U+00A Error
python-exec Pipeline Returns an invalid non-printable character U+00A ErrorTo resolve invalid non-printable character U+00A errors, check the Python code in your python-exec pipeline configuration for non-printable characters, such as white spaces, carriage returns, tabs, and line breaks. Then, remove the non-printable characters and redeploy the pipeline.
Documentation Feedback
Do you have questions about our documentation or suggestions for how we can improve it? Start a discussion in TetraConnect Hub. For access, see Access the TetraConnect Hub.
NOTEFeedback isn't part of the official TetraScience product documentation. TetraScience doesn't warrant or make any guarantees about the feedback provided, including its accuracy, relevance, or reliability. All feedback is subject to the terms set forth in the TetraConnect Hub Community Guidelines.
Updated 2 months ago