Tetra IoT Agent Box Local Setup and Configuration
Once you have created a Tetra IoT Agent in the Tetra Data Platform (TDP), you must set up the Tetra IoT Agent Box locally to ensure outbound network connectivity to the TDP.
To set up the Tetra IoT Agent Box locally, do the following.
Step 1: Connect to the Box
To access the Local Configuration user interface of the Tetra IoT Agent Box, you can connect by using either of the following methods:
NOTEIf you can't access the box after replacing the battery, make sure that the remote access button (item 2 in the box's Hardware documentation) is centered in its hole and not depressed. For more information, see Replace Battery in the Tetra IoT Agent Box in the TetraConnect Hub. For access, see Access the TetraConnect Hub.
Wi-Fi Hotspot Box Access
To access the Tetra IoT Agent Box user interface by using a Wi-Fi hotspot, do the following:
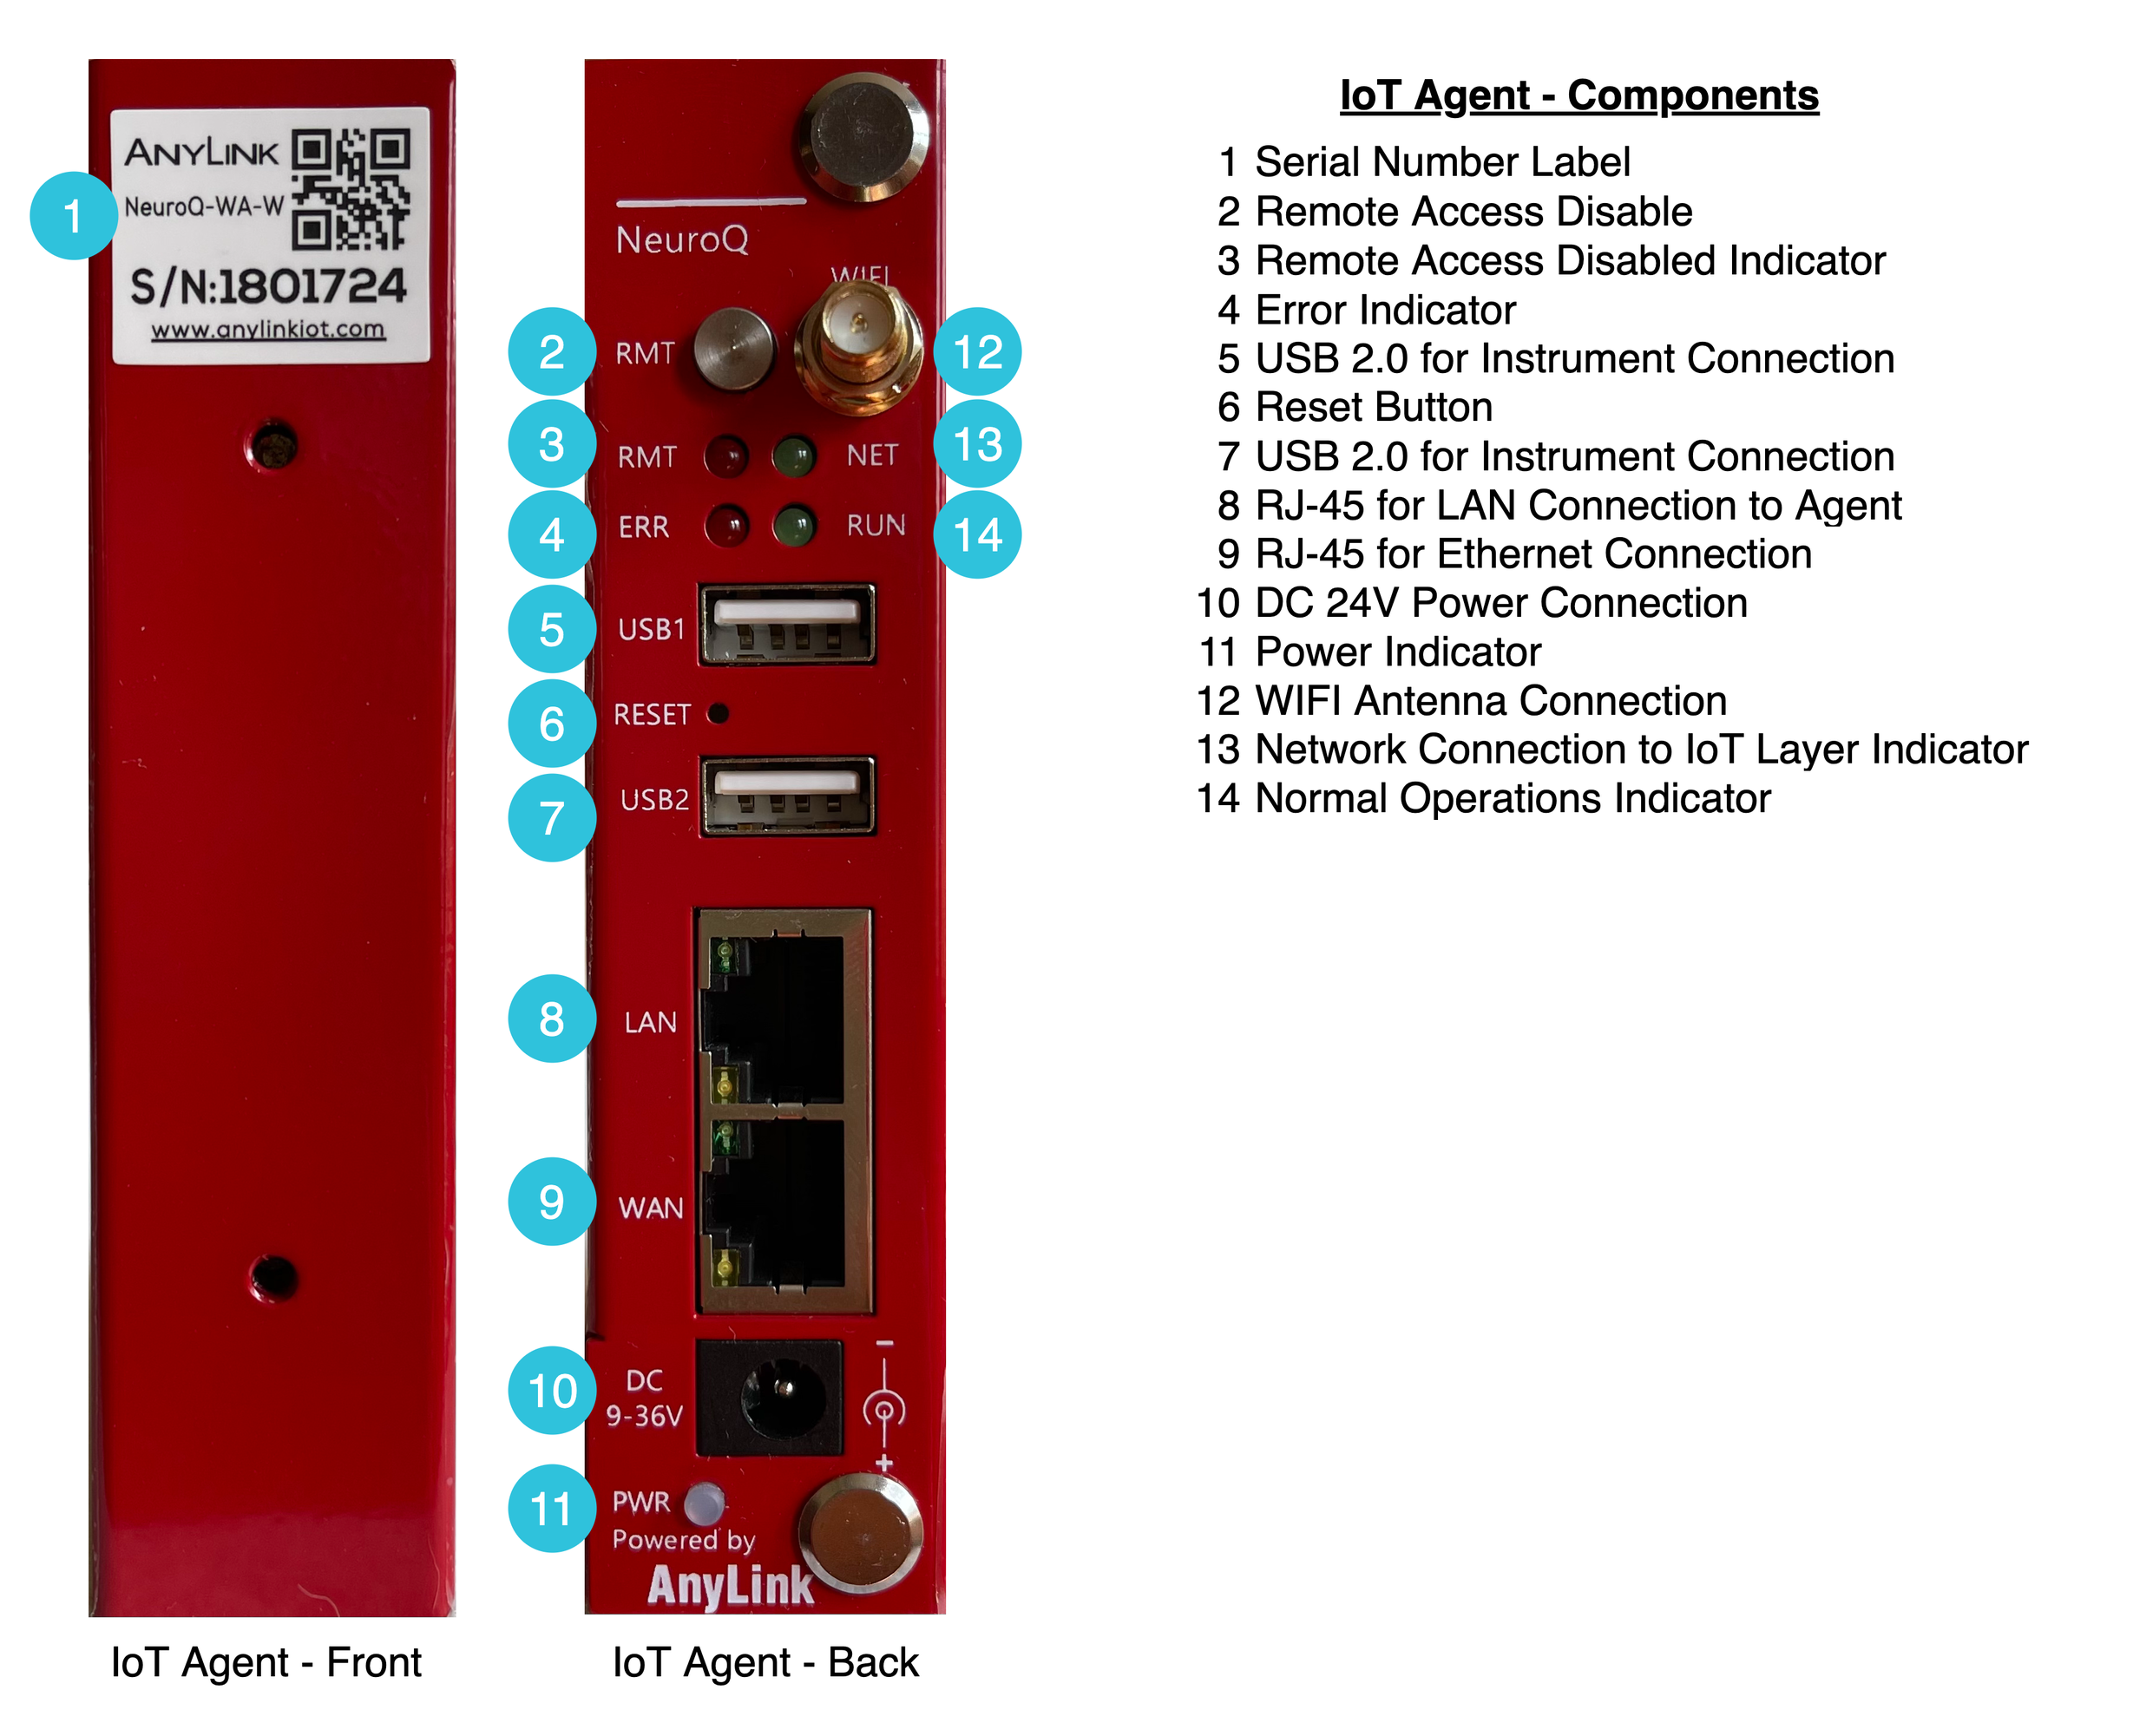
- Connect the provided power supply to component 10 on the IoT NeuroQ Box in Figure 1.
- The Tetra IoT box ships with a USB adapter that broadcasts a Wi-Fi signal. Connect the USB adapter to components 5 or 7 as illustrated in Figure 1.
- Connect your computer or laptop to the Wi-Fi SSID associated with the USB adapter by using the provided credentials. Please contact your TetraScience Customer Success Manager (CSM) if you can't connect.
LAN Port Box Access
To access the Tetra IoT Agent Box user interface by using a LAN port, do the following:
- Connect provided the power supply to component 10 in Figure 1.
- Connect your computer to the Tetra IoT box through component 8 in Figure 1 with an ethernet cable (CAT5e or newer standards).
- If you have custom or restrictive networking settings on your computer, make sure that the IP address and subnet range allows you to connect to
192.168.101.204(the default Tetra IoT Agent Box IP).
Step 2: Configure Tetra IoT Agent Box
Once you've connected to the box, configure it by doing the following:
- Open http://192.168.101.204 in your browser and enter the username and password provided by TetraScience.
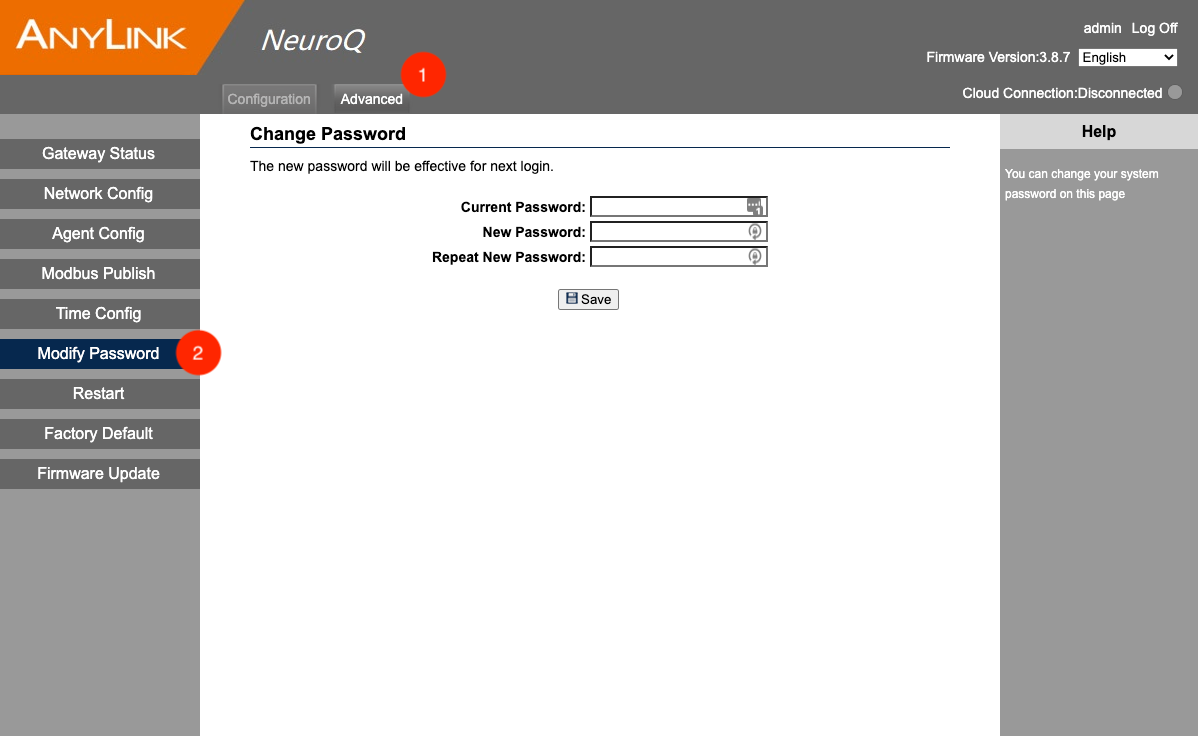
- If you want to change the default password, click Advanced > Modify Password. Enter data in the required fields, and choose Save to confirm.
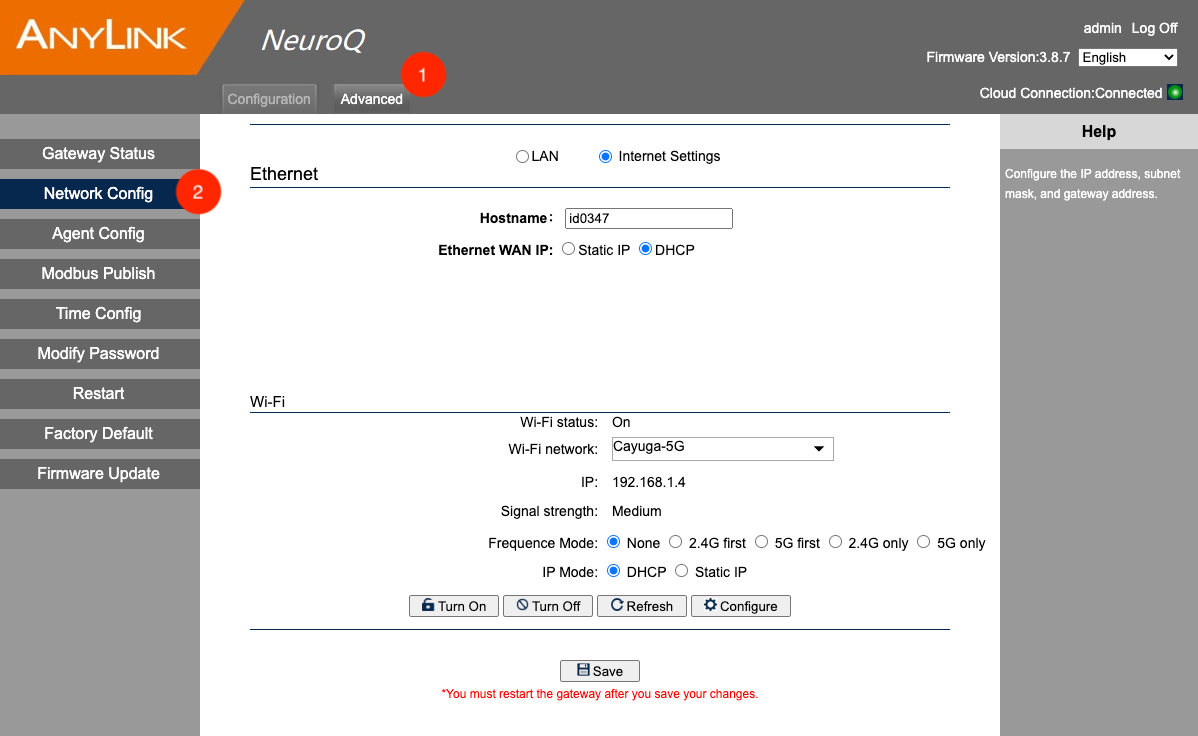
- Click Advanced > Network Config and set up the method that you would like the Tetra IoT Agent Box to use for connecting to the public internet so that it can reach the TDP. You can choose either of the following connection options:
- Wi-Fi
- LAN Connection
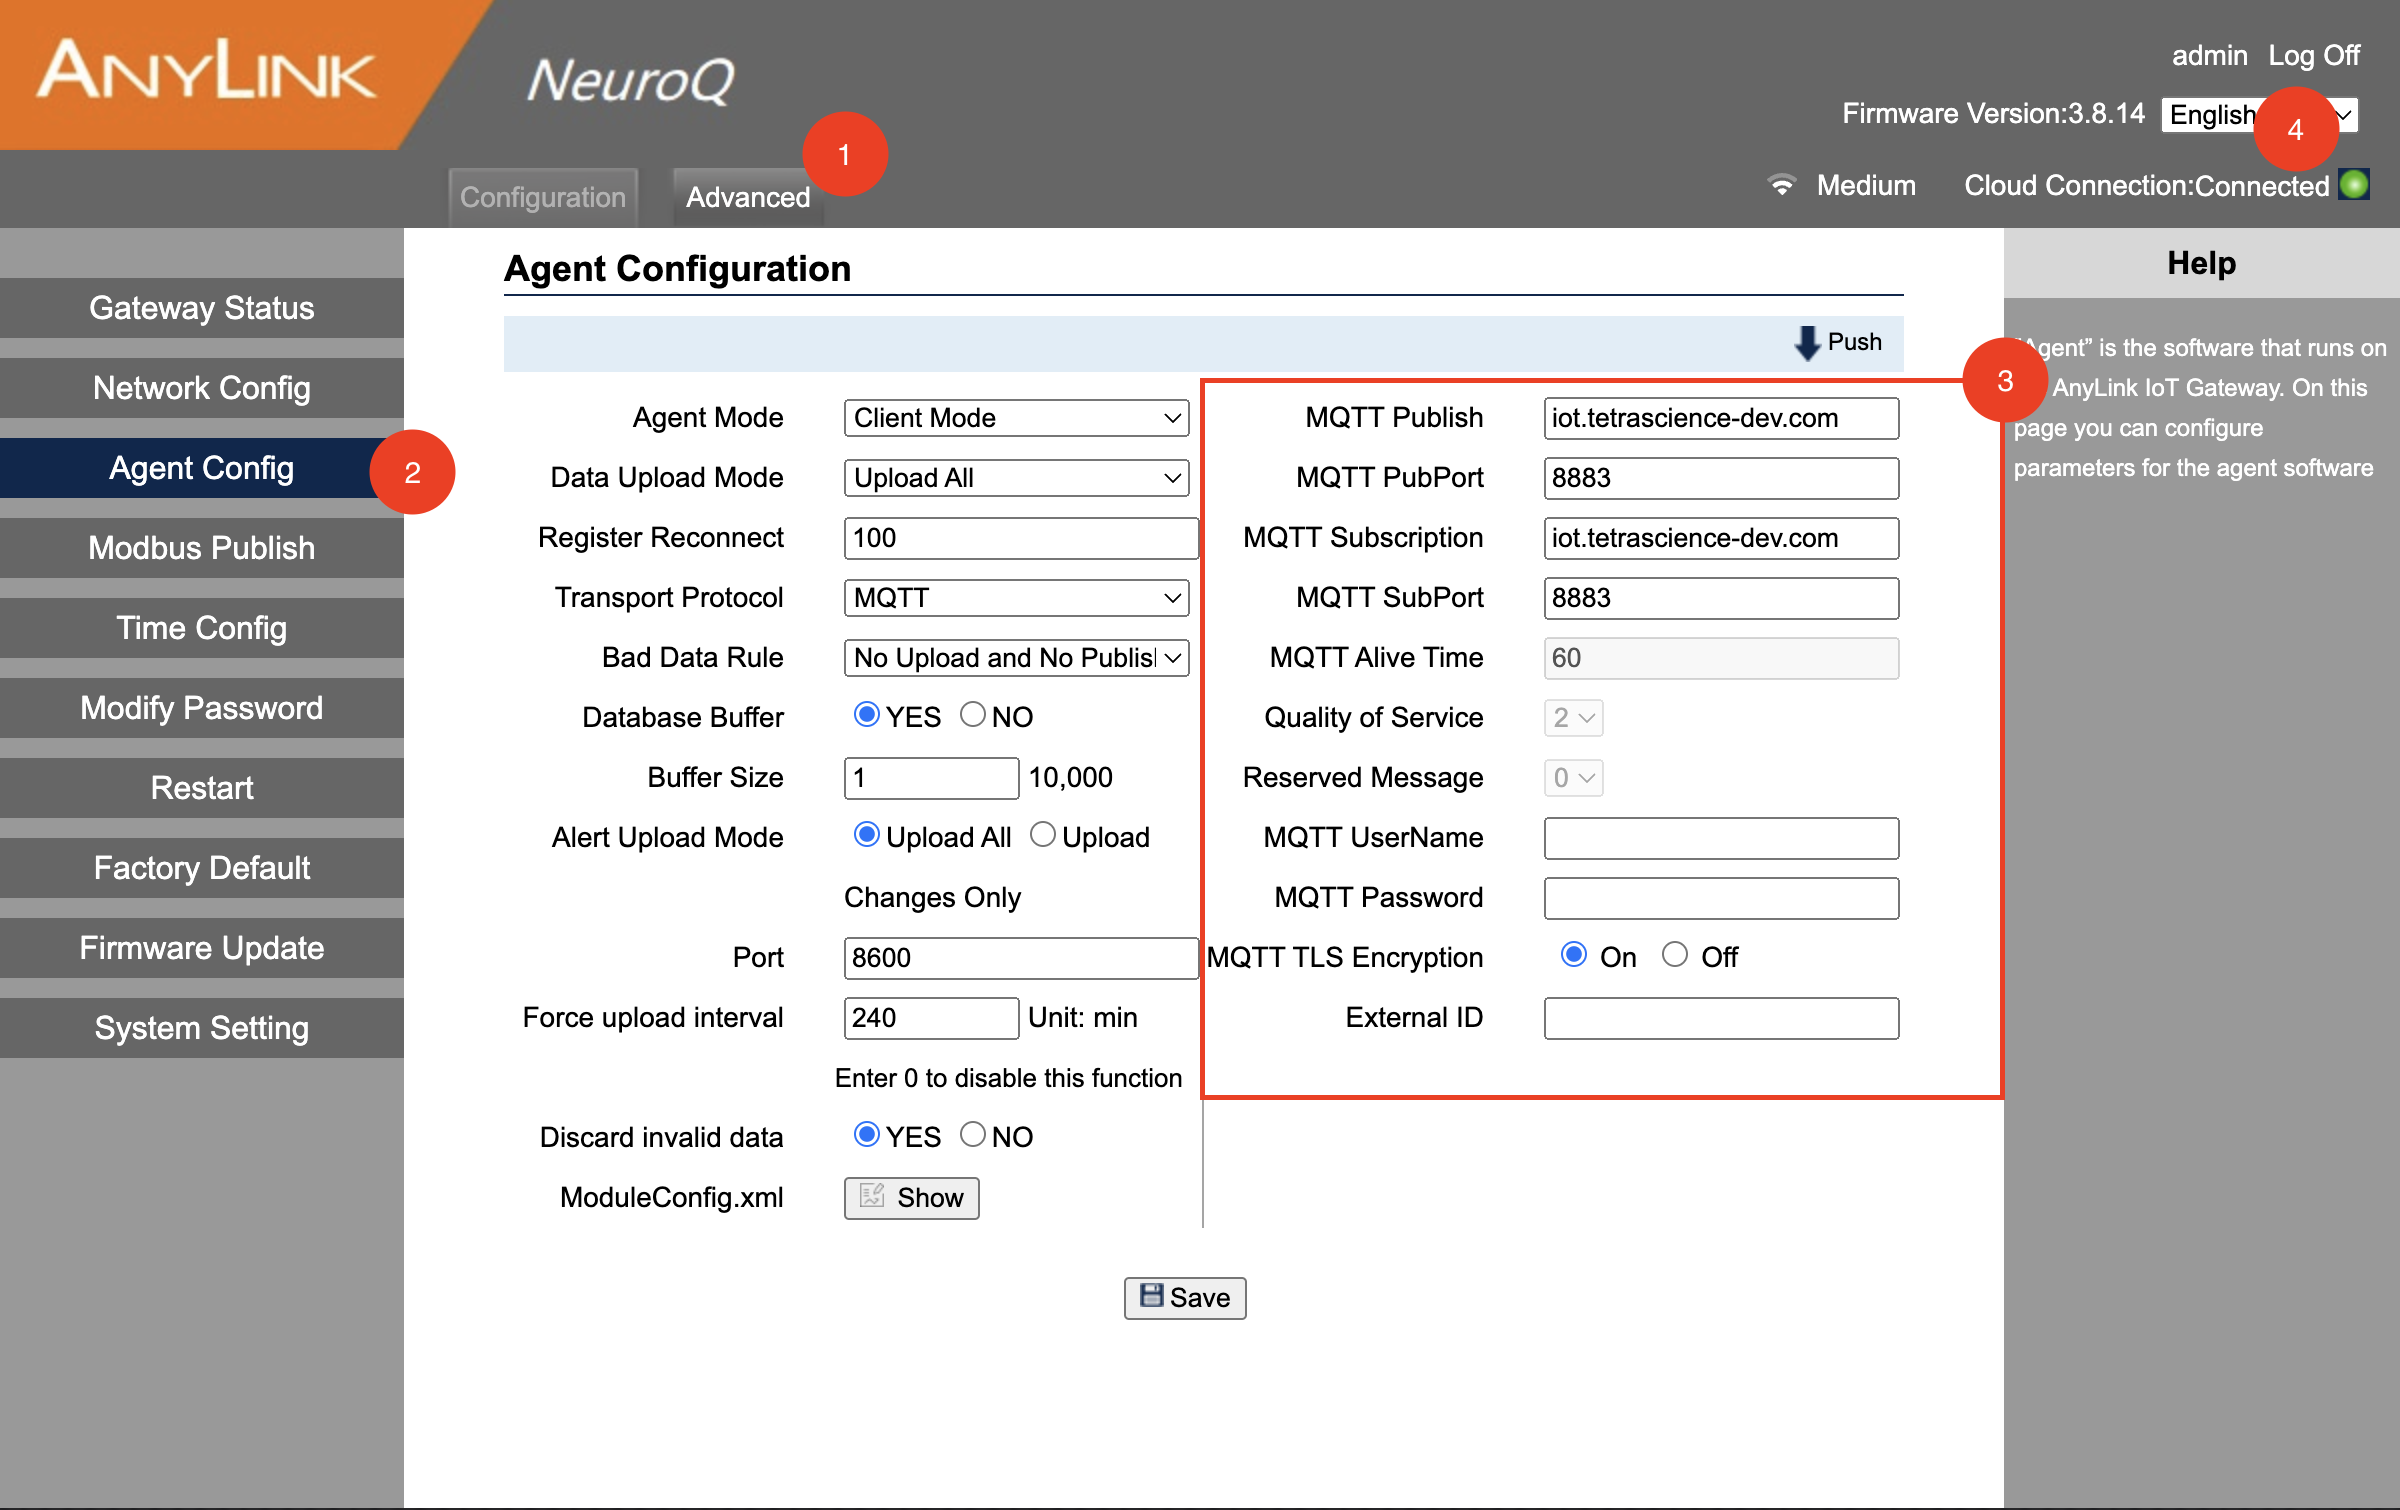
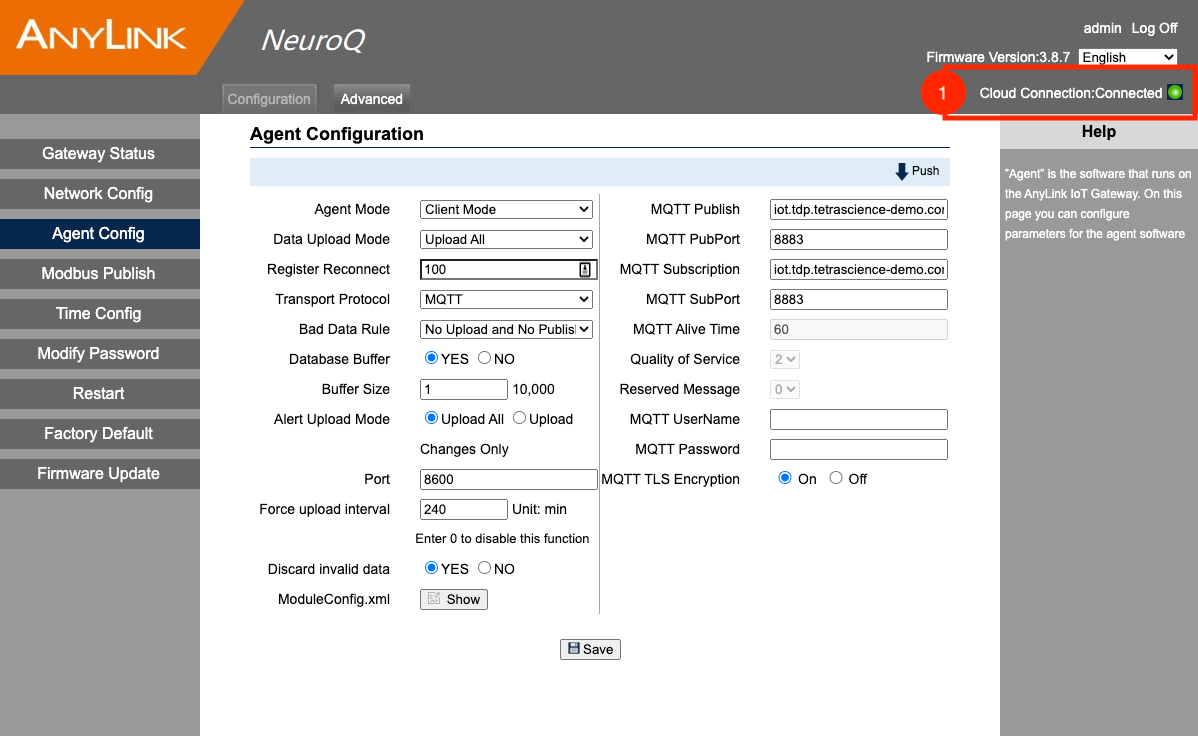
- Click Advanced > Agent Config and configure the following fields with default settings:
- MQTT Publish: iot.<TDP domain>
- MQTT PubPort: 8883
- MQTT Subscription: iot.<TDP domain>
- MQTT SubPort: 8883
- MQTT TLS Encryption: On
- External ID: enter the agent ID of the TDP agent you have created
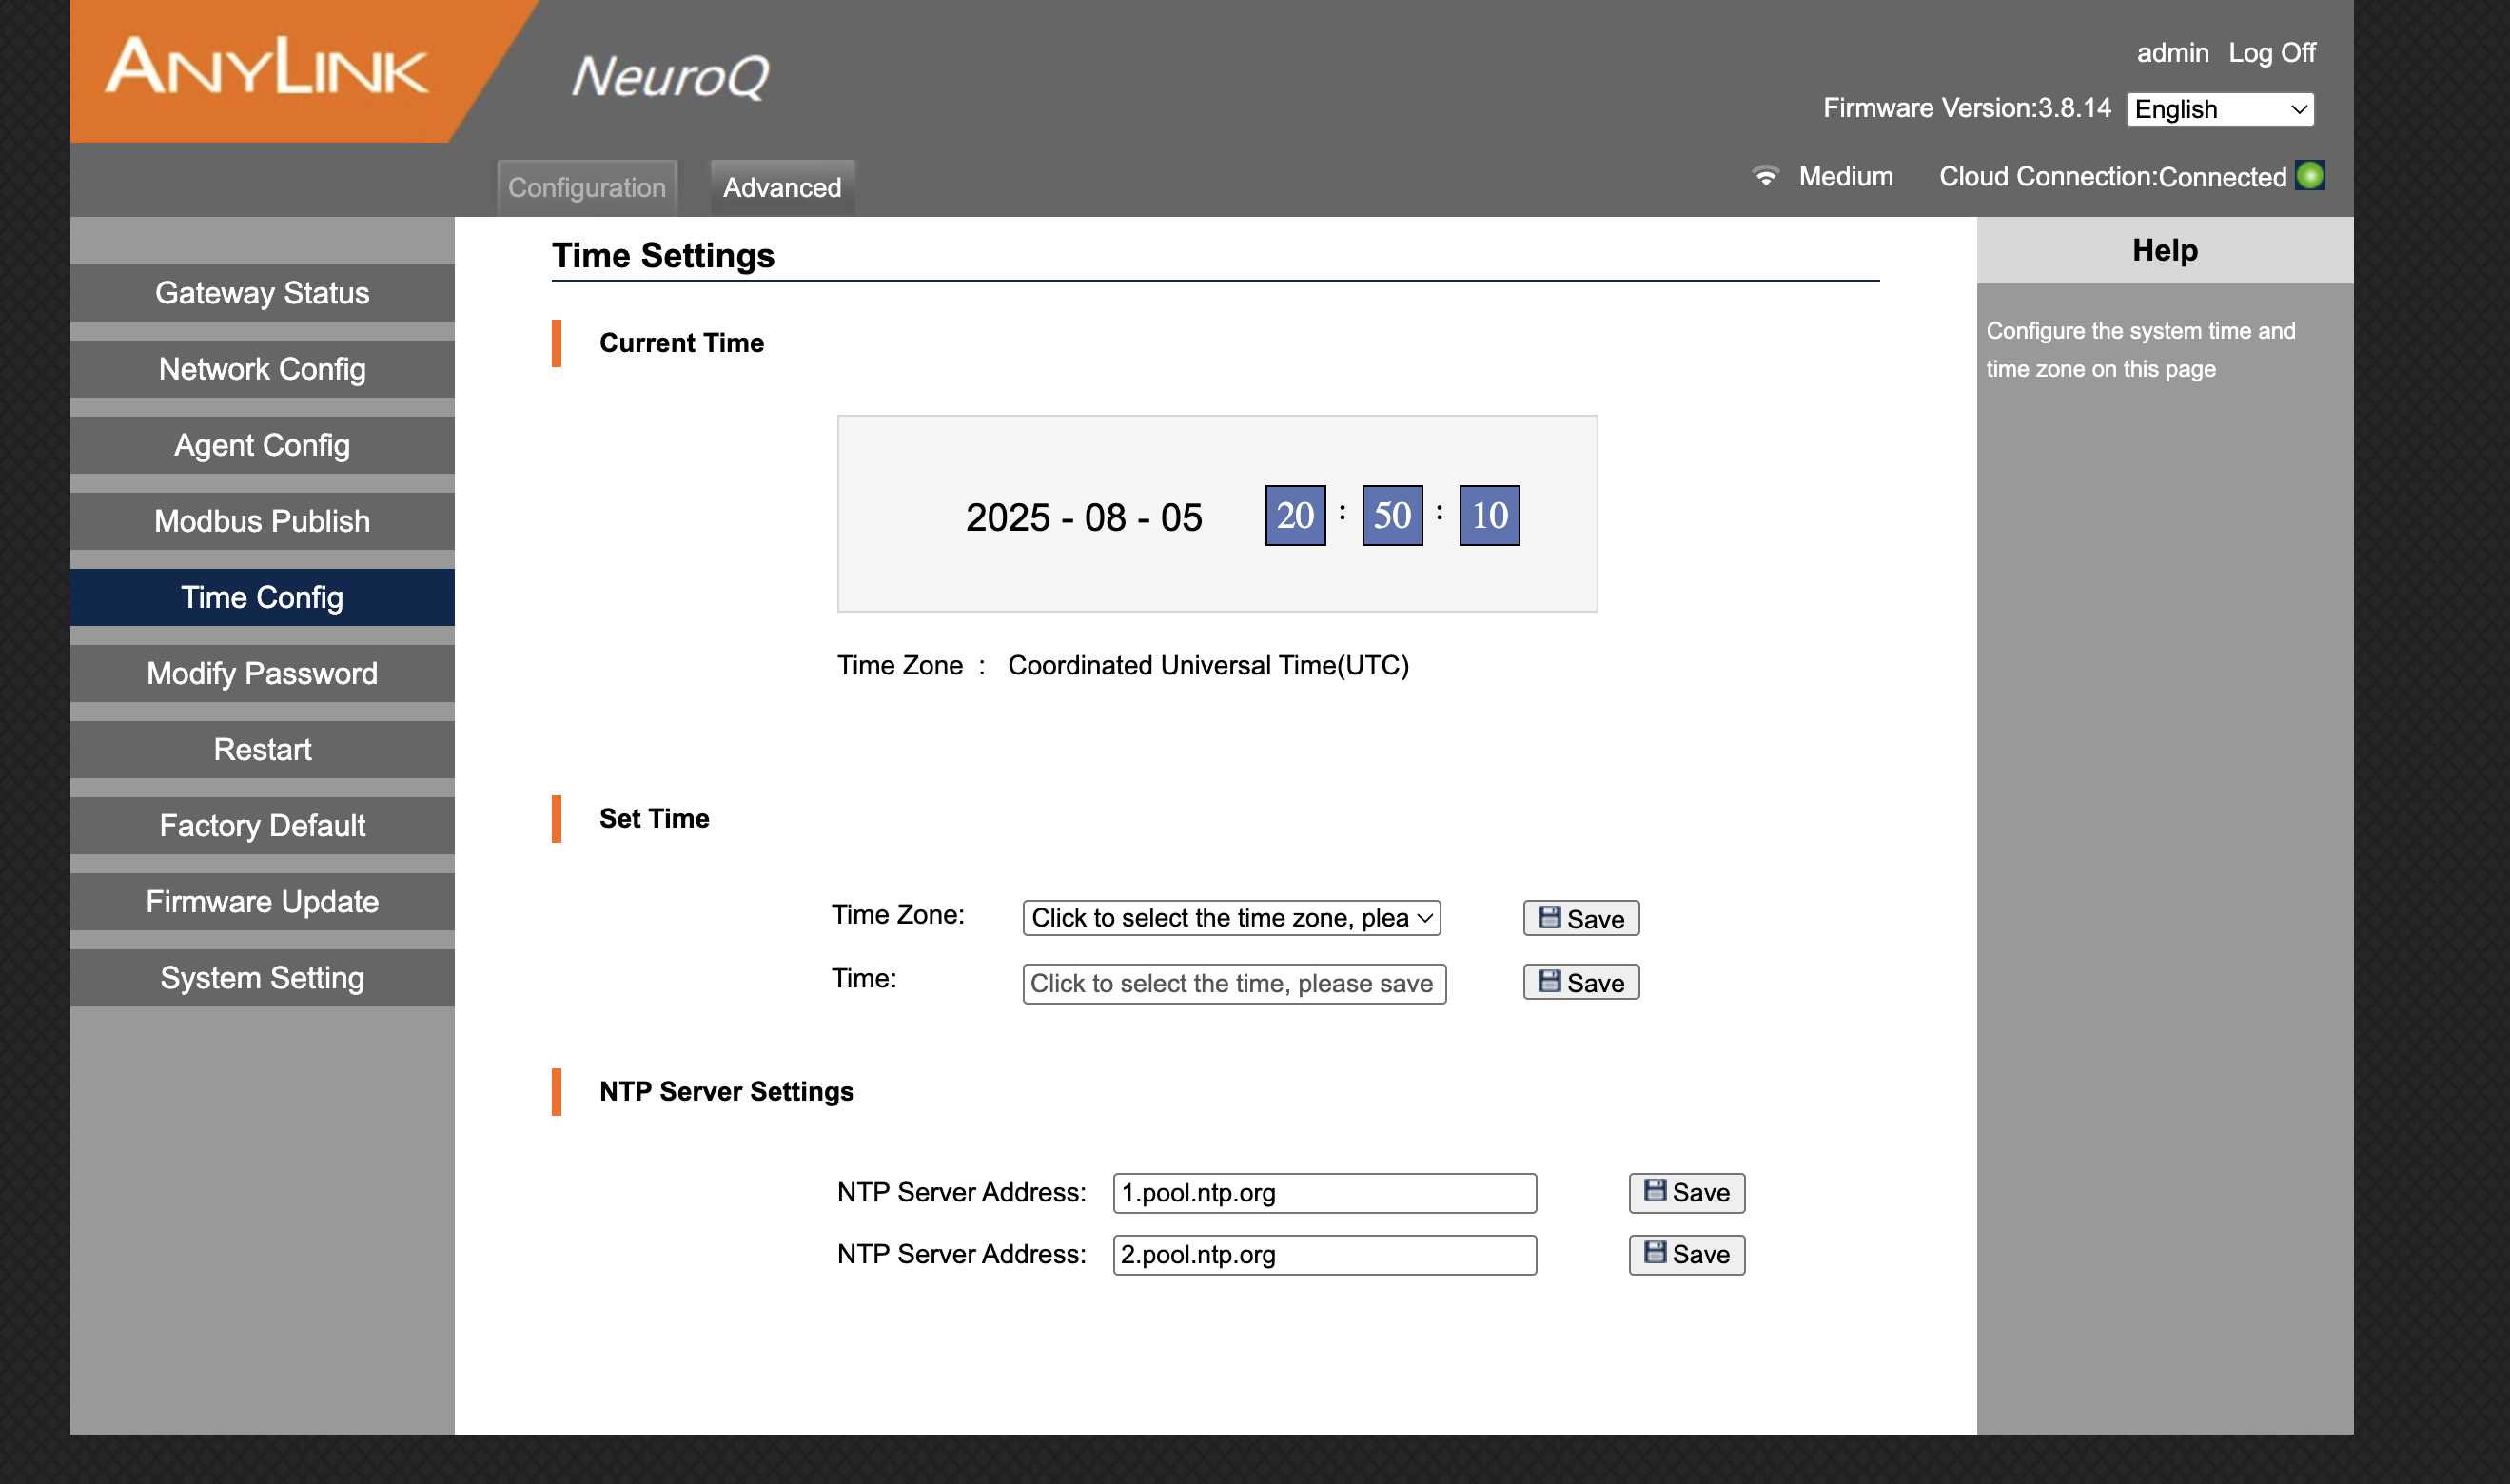
- Check connectivity to the default Network Time Protocol (NTP) servers (
1.pool.ntp.organd2.pool.ntp.org) by running the following command:
ping 1.pool.ntp.org
NOTEMake sure that you run the command from a machine on the network where the Tetra IoT Agent Box is connected. If the ping is successful, the response shows information about the round-trip time it takes for a packet to travel to the server and back. A
Request timed outorDestination host unreachableresponse indicates a connection error.
- (Optional) If your network can't reach the default Network Time Protocol (NTP) servers (
1.pool.ntp.organd2.pool.ntp.org), specify alternative NTP servers in the Time Config tab. The IoT Agent Box uses NTP servers to synchronize its clock with an external reference. If the time is out of sync, it may result in connection problems with the IoT layer. For more information, see Network Specifications in the Tetra IoT Technical Specifications.
- After a few minutes, verify the connectivity of your Tetra IoT Agent Box to the TDP by looking at the Connected indicator.
Next StepProceed to Tetra IoT Agent Cloud Setup and Management to continue the setup process through the IoT Agent Cloud Configuration.
(Optional) Configure a Tetra Hub as a Proxy for a Tetra IoT Agent Box
NOTEThe following procedure requires you to have a Tetra IoT Agent Box and Tetra Hub installed and configured. Tetra Data Hub doesn’t support proxy settings for Tetra IoT Agents. If you do not wish to use a Tetra Hub, you can set up an alternative reverse proxy to the IoT layer. In that case, skip step 1 in the setup below and begin at step 2.
To configure an existing Tetra Hub to act as a proxy server for a Tetra IoT Agent, do the following.
Step 1: Configure the Hub’s IoT Proxy Settings
- Sign in to the TDP with admin or organization owner credentials.
- In the left navigation menu, choose Data Sources. Then, choose Hubs. The Hubs page appears.
- Find the Hub that you want to use as a proxy, and then select the Hub’s name. The Hub Details page appears.
- Select the Configuration tab. Then, at the bottom of the page, move the Show IoT Proxy Settings toggle to the right. A list of fields for IoT proxy settings appears.
- Enter the following:
- For IOT PROXY PORT, enter
8883(or another port value, if needed for your environment). - For IOT TUNNEL PORT, enter
1883
- For IOT PROXY PORT, enter
- Choose Update. After a few minutes the Hub is updated with the new proxy settings.
Step 2: Configure the Tetra IoT Agent to Use the Hub as a Proxy
- Open the Local Configuration UI of the Tetra IoT box .
- Select the Advanced tab. Then, in the left navigation menu, choose Agent Config. The Agent Configuration page appears.
- Enter the following settings:
- For MQTT Publish and MQTT Subscription, enter your Hub’s IP address.
- For MQTT PubPort and MQTT SubPort*, enter the IOT PROXY PORT** value that you configured when setting up the Hub’s IoT proxy settings (
8883is recommended).
- Choose Save.
Step 3: Verify the Setup
- Open the Local Configuration UI of the Tetra IoT box .
- In the upper right, next to Cloud Connection, make sure that it shows Online. If the status is Disconnected, then verify that your Hub’s and IoT box’s proxy settings are configured correctly.
NOTEIf you have configured the box to use a proxy, you must also configure the IoT Agent in TDP accordingly. See Tetra IoT Agent Cloud Setup and Management for details.
Documentation Feedback
Do you have questions about our documentation or suggestions for how we can improve it? Start a discussion in TetraConnect Hub. For access, see Access the TetraConnect Hub.
NOTEFeedback isn't part of the official TetraScience product documentation. TetraScience doesn't warrant or make any guarantees about the feedback provided, including its accuracy, relevance, or reliability. All feedback is subject to the terms set forth in the TetraConnect Hub Community Guidelines.
Updated 2 months ago