Tetra Data Assistant User Guide (v1.0.x)
This guide shows how you can set up and use Tetra Data Assistant versions 1.0.x to quickly design, build, and deploy complete Raw-to-IDS data transformation pipelines for the TetraScience Data Platform (TDP).
NOTE
To access AI coding assistants with specialized tools for working with Tetra Data, you can also use the Tetra Data Assistant MCP Server. The MCP server extends AI-powered development environments with tools and prompts that help developers build, validate, and maintain IDSs and task scripts.
Prerequisites
Tetra Data Assistant requires the following:
- Tetra Data Platform (TDP) v4.4.1 or higher
- TetraScience AI Services v1.1.1 or higher must be activated in your TDP environment
- TDP permissions to deploy artifacts to your organization's namespace
- Supported input file formats: CSV, TSV, JSON, or XLSX (up to five files per session)
Key Concepts
| Term | Definition |
|---|---|
| Raw data | Your original instrument or source files (CSV, TSV, JSON, XLSX) that need to be transformed |
| IDS | Intermediate Data Schema (IDS): a standardized JSON schema that defines the structure of your transformed data |
| Task Script | A Python package that transforms raw input files into IDS-formatted JSON output |
| Protocol | A configuration file that tells TDP how to run your task script |
| Artifact | digital objects in the TDP, such as IDS, task script, and protocol files, that form a data transformation pipeline |
Activate the Tetra Data Assistant
To activate the Tetra Data Assistant, follow the instructions in Activate an Embedded Data App.
Access the Tetra Data Assistant
To access the Tetra Data Assistant, do the following:
- Sign in to the TDP.
- In the left navigation menu, choose Data & AI Workspace. The Data & AI Workspace page appears.
- Find the Tetra Data Assistant tile and select Open app. The Overview tab appears.
Create New Artifacts
To create a new IDS, task script, and protocol, do the following.
Step 1: Describe Your Use Case
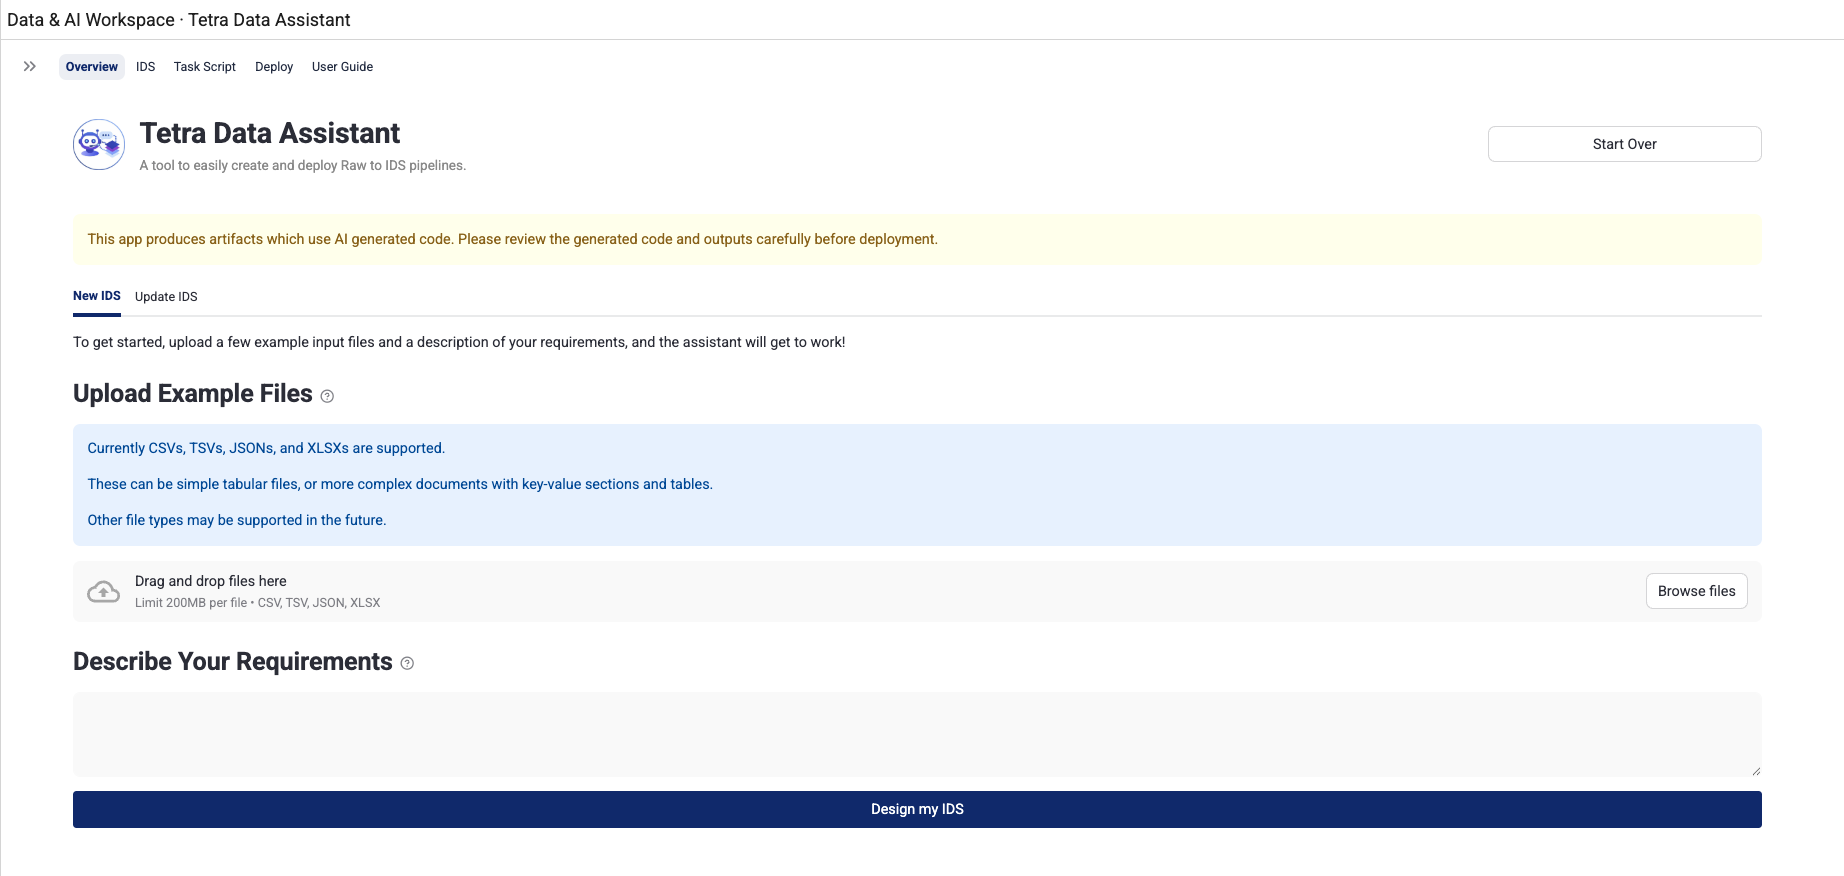
Describe your use case by doing the following:
- On the Overview tab, select the New IDS tab.
- Upload your example input files by dragging and dropping them, or using the file browser. You can upload one to five files in
CSV,TSV,JSON, orXLSXformat. These files represent the raw instrument data you want to transform. - In the text area, write a requirements description that includes the following:
- What the files contain
- What data you want to extract
- Any relevant context about the instrument or data format
- Click Design my IDS. A workspace is created from a template, your files are copied to it, and you are redirected to the IDS tab.
Step 2: Design Your IDS
Design your IDS by doing the following:
-
When you first arrive on the IDS tab, a dialog appears asking you to set an IDS slug: a short, lowercase, hyphenated identifier for your IDS (for example,
my-spectrophotometry-instrument). Enter the slug and click Save. -
After you save the IDS slug, the AI agent automatically starts designing your IDS based on your example files and requirements description. You will see the agent's activity in the sidebar chat.
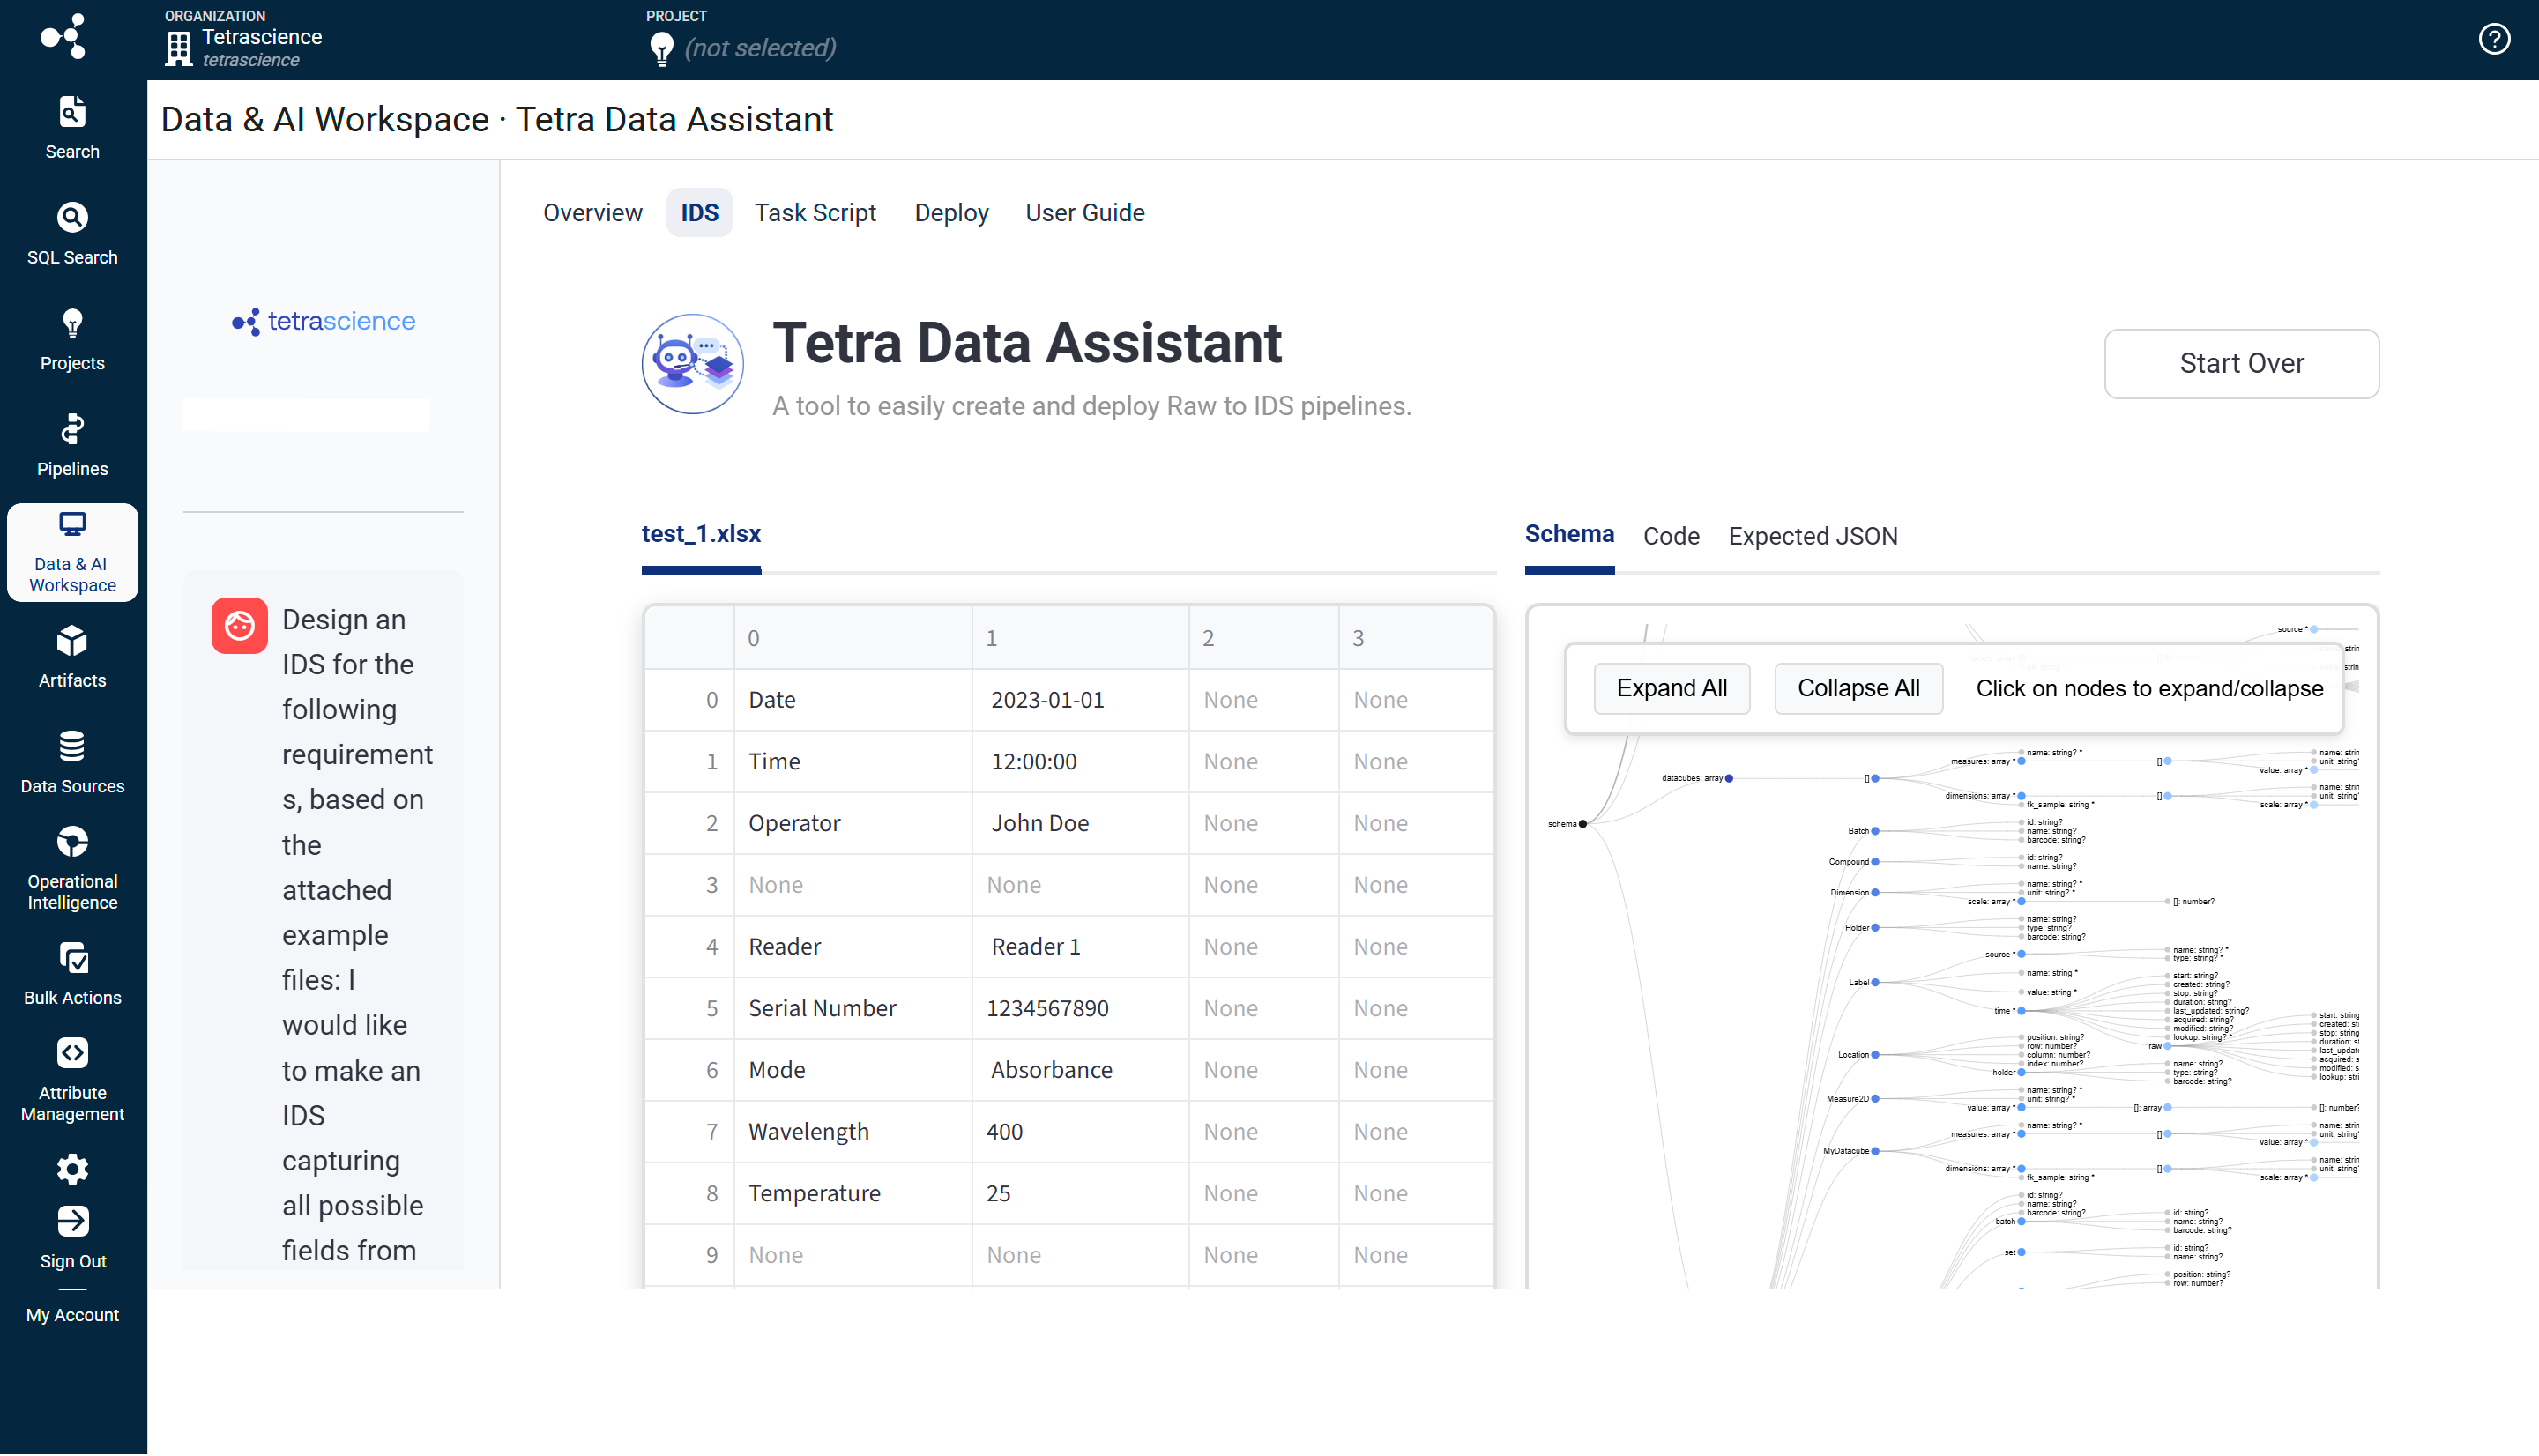
-
Review the generated IDS using the right panel, which has three tabs:
- Schema: Interactive JSON schema tree and table view of all fields
- Code: The generated
schema.pysource file - Expected JSON: An example JSON document that conforms to the IDS
-
To request changes to the IDS, type instructions in the sidebar chat (for example, "Add a field for the instrument serial number" or "Remove the raw_data field"). The agent updates the code and re-validates automatically.
-
When you're satisfied with the IDS, click Validate IDS. This action runs checks, including syntax validation, security scanning, and IDS convention validation. Any errors appear in the chat. You can chat with the agent to fix any errors.
-
When validation passes, the Approve IDS button appears. Click it to lock in the IDS and advance to the Task Script tab.
NOTEThe IDS version starts at v1.0.0. The agent may go through several error and fix cycles automatically before producing valid output. This is normal behavior.
Step 3: Build the Task Script Parser
Build your task script parser by doing the following:
-
When you first arrive on the Task Script tab, a dialog appears asking you to set a Task Script slug (for example,
my-spectrophotometry-instrument-raw-data-to-ids). Enter the slug and click Save. -
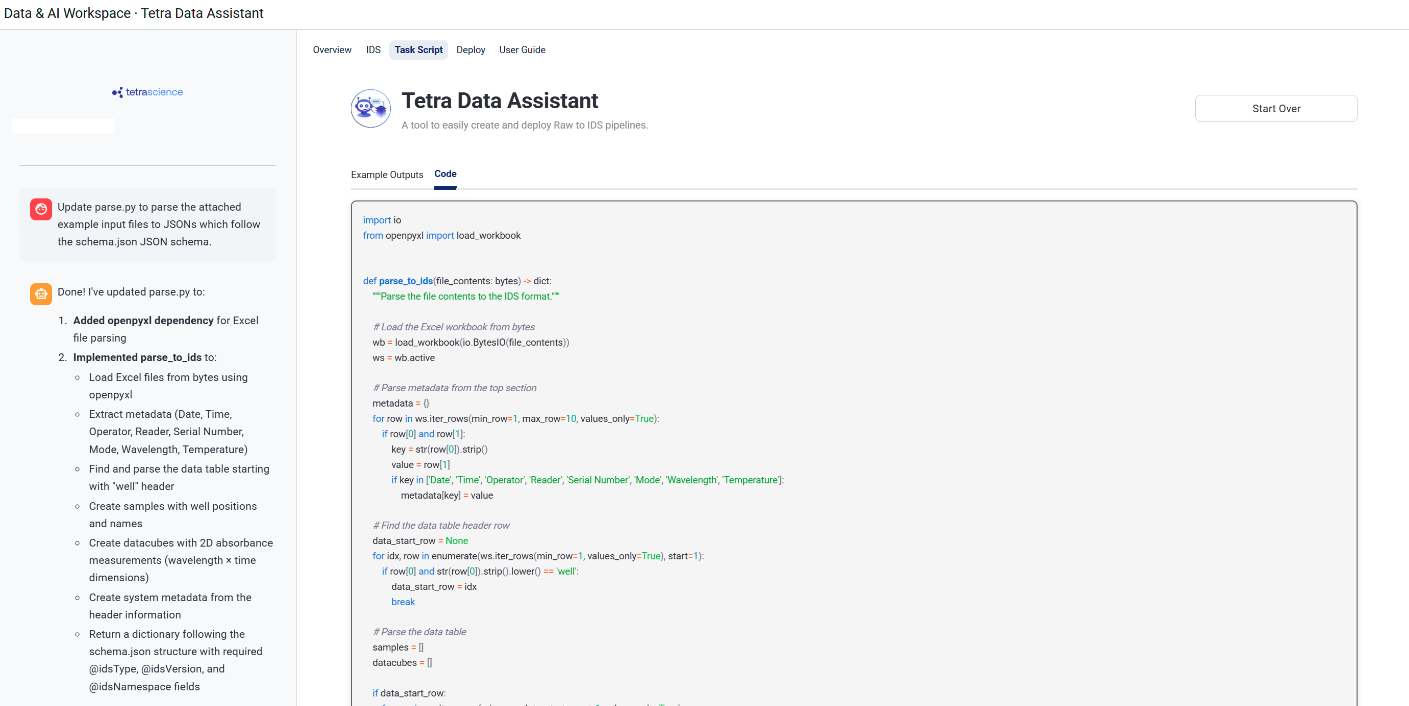
After you save the Task Script slug, the AI agent automatically starts writing a task script (
parse.py) file, a Python function that transforms your raw input files into IDS-compliant JSON. -
Review the generated parser using the sidebar and tabs:
- Sidebar: Chat interface for communicating with the Task Script agent
- Example Outputs tab: Side-by-side view of each input file (
raw) and its parsed JSON output. This populates after the first successful validation run. - Code tab: The generated task script (
parse.py) source file
-
To request changes to the task script, type instructions in the sidebar chat (for example, "The timestamp field should be in ISO 8601 format" or "Parse all rows, not just the first one"). The agent updates the code and re-runs the tests automatically.
-
When you are satisfied with the parser, click Validate Task Script. This action runs syntax validation, security scanning, and integration tests that verify the task script produces output matching your approved IDS.
-
When validation passes, click Approve Task Script to lock in the task script and advance to the Deploy tab.
NOTEThe task script version starts at v1.0.0. Integration tests run the parser against your example input files and validate the output against your approved IDS.
Step 4: Build a Protocol and Package and Publish Your Artifacts
Build your protocol and package and publish your artifacts by doing the following:
-
When you arrive on the Deploy tab, a dialog appears asking you to set a Protocol slug (for example,
my-spectrophotometry-instrument-raw-to-ids). Enter the slug and click Save. -
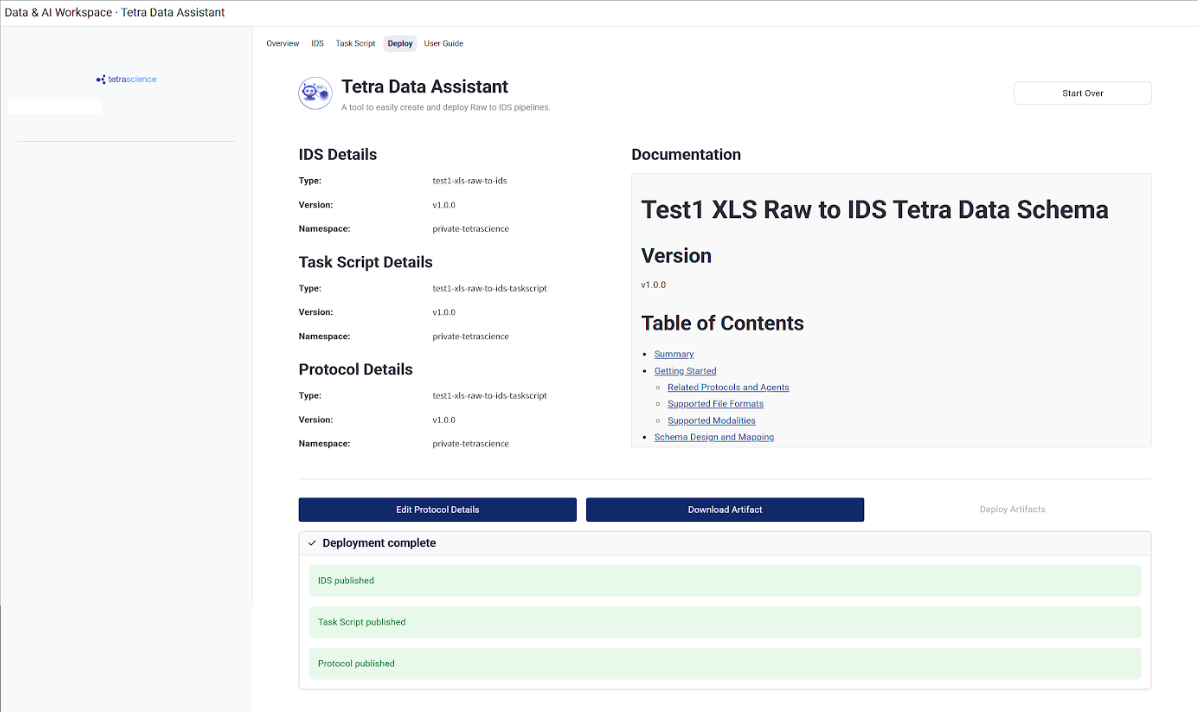
Review the artifact details in the left panel, which shows the
type,slug,version, andnamespacefor all three artifacts (IDS, task script, and protocol). -
Click Approve Protocol. The documentation agent automatically starts generating a README for your IDS artifact.
-
Once the agent finishes, the README appears in the right panel. Toggle between Preview (rendered markdown) and Edit (raw text) modes. Make any manual edits as needed.
NOTEManual README edits are not automatically re-validated.
-
If the agent fails, click Retry Documentation to try again.
-
Click Approve Documentation when you are satisfied with the README.
-
Click Deploy Artifacts to publish all three artifacts to the TDP. Progress indicators show the status for each artifact as it deploys.
-
On success, all three artifacts are available in your
privateTDP namespace. The Deploy Artifacts button is disabled after deployment completes.
Update Existing Artifacts
To modify existing IDS, task script, and protocol artifacts that were previously created with the Tetra Data Assistant, do the following.
NOTEOnly artifacts created with Tetra Data Assistant are available for selection. Artifacts created by other tools can't be updated through the app.
Step 1: Select Artifacts to Update
Select artifacts to update by doing the following:
- Open the Overview tab, and then select the Update IDS tab.
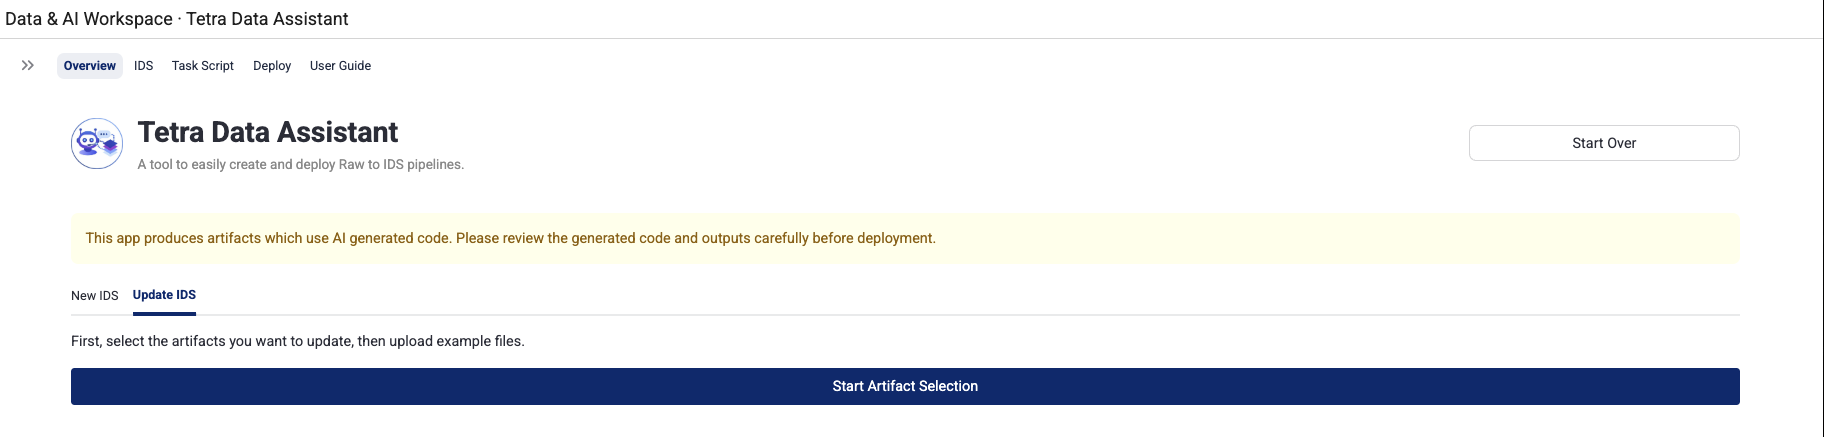
- Click Start Artifact Selection.
- Select your artifacts by using the cascading selection dropdowns:
- Select IDS (required): Choose the IDS you want to update from your
privatenamespace. Only Tetra Data Assistant-created artifacts appear. Click the expander to preview the current README before selecting. - Select Task Script (optional): Automatically filtered to task scripts related to your selected IDS. Choose one, or select None (will create new from template) to start fresh from a template.
- Select Protocol (optional): Automatically filtered to protocols related to your selected task script. If no task script was selected, this is automatically set to None.
- Select IDS (required): Choose the IDS you want to update from your
- Upload new example input files by dragging and dropping or using the file browser. Upload one to five files in CSV, TSV, JSON, or XLSX format. These should represent the updated or new data formats you want to handle.
- Click Load Artifacts for Editing. The selected artifacts are downloaded from the TDP, test files are added from templates, and the workspace is set up. You are then redirected to the IDS tab.
Step 2: Modify the IDS
Modify your IDS by doing the following:
-
On first load, dependencies for the downloaded IDS artifact are installed automatically. A banner displays: Update Mode: Loaded "slug version". Unlike New IDS mode, the agent does not start automatically.
-
Type your update request in the sidebar chat to initiate changes (for example, "Add a new field for sample temperature" or "Remove the deprecated raw_data field").
-
Review the IDS using the right panel tabs:
- Schema: Interactive JSON schema tree and table view
- Code: The current
schema.pysource file - Expected JSON: An example JSON document conforming to the IDS
-
Continue chatting with the agent to make additional changes. The agent preserves existing IDS structure unless you explicitly ask for changes.
-
When you are satisfied with the changes, click Validate IDS.
-
When validation passes, click Approve IDS to lock in the IDS and advance.
IMPORTANTIf you change the IDS slug to a value different from the loaded TDP artifact's slug, the artifact is treated as a new artifact. The version resets to v1.0.0 and it will be deployed as a new artifact, not an update.
Step 3: Update the Task Script Parser
Update your task script parser by doing the following:
-
On first load, dependencies are installed automatically. If the IDS was not modified, existing example outputs are generated by running the current tests. You will see input and output pairs in the Example Outputs tab.
-
If the IDS was modified, a warning appears: IDS was modified — Task Script must be updated to write the new IDS version. You must update the task script to match the new schema.
-
Type your update request in the sidebar chat to begin (for example, "Update the parser to handle the new temperature field" or "Add support for .tsv files").
-
Review the parser using the sidebar and tabs:
- Sidebar: Chat interface for communicating with the Task Script agent
- Example Outputs tab: Side-by-side view of each input file and its parsed JSON output
- Code tab: The current task script (
parse.py) source file
-
When you are satisfied with the changes, click Validate Task Script.
-
When validation passes, click Approve Task Script to commit the changes and advance.
Step 4: Deploy Updated Artifacts
To deploy your updated artifacts, do the following:
-
When you arrive on the Deploy page, the protocol slug is pre-populated from the loaded TDP artifact (if one was selected). Click Edit Protocol Details to modify it if needed.
-
Click Approve Protocol.
-
The documentation agent behavior depends on what was modified:
- IDS or Task Script was modified: The agent automatically runs and updates the README to reflect your changes, including updating the version, adding new file format support, updating the field mapping table, and adding a changelog entry.
- Nothing was modified: The existing README from TDP is loaded and shown for approval. No agent invocation is needed.
-
Review the README in the right panel. Use the Edit and Preview toggle to make manual edits if needed. Click Approve Documentation when satisfied with the updates.
-
Click Deploy Artifacts. Only artifacts that were modified are deployed. Unchanged artifacts are skipped.
-
The progress indicator shows deployment status for each artifact.
NOTEIf you edited the README but did not modify the IDS code, the IDS is still deployed using a force flag to overwrite the existing version in TDP. The IDS version number does not change in this case.
Use Your IDS in a Data Transformation Pipeline
To use your IDS in a data transformation pipeline, see Set up and Edit Pipelines. When configuring your pipeline, make sure that you select the protocol you created.
Tips for Best Results
-
Use small, representative files: The AI agent reads your example files in full. Smaller files reduce token usage and improve output quality. Choose small files that are representative of your real data.
-
Write specific requirements: Vague descriptions like "parse my data" produce generic results. Describe the instrument, the measurement type, what each column or field means, and any domain-specific context.
-
Use the chat sidebar to iterate: If the generated IDS or task script is not quite right, do not start over — use the chat sidebar on the IDS or Task Script page to give the agent targeted instructions (for example, "rename the
valuefield toabsorbanceand add units in nanometers"). -
Download at any step: Use Download Artifact on the IDS, Task Script, or Deploy pages to save a local ZIP of everything generated so far.
-
Start over if needed: The Start Over button at the top of any page stops any running agent tasks, clears the workspace, and returns you to the Overview page.
Limitations
- A maximum of five input files can be uploaded per session.
- These files will take up tokens in the agent's context window. Use small files to reduce token usage and improve output quality.
- In update mode, when updating an existing IDS with new example files, the
expected.jsonis used directly from the TDP artifact and is not regenerated based on the new example files. The AI agent can still modifyexpected.jsonthrough chat interactions if needed.
Troubleshooting
Validation fails on the IDS or Task Script page
The agent will automatically retry when validation fails. If it continues to fail, use the chat sidebar to provide additional guidance, or click Download Artifact to inspect the generated files.
Deployment errors
Check the deployment status messages on the Deploy page. If an artifact fails to deploy, the error message will indicate the cause. Use Download Logs and Download Artifact buttons to capture details for further investigation.
Agent appears stuck or produces no output
Click Start Over to reset the session. If the problem persists, contact your TDP administrator for assistance.
Documentation Feedback
Do you have questions about our documentation or suggestions for how we can improve it? Start a discussion in TetraConnect Hub. For access, see Access the TetraConnect Hub.
NOTEFeedback isn't part of the official TetraScience product documentation. TetraScience doesn't warrant or make any guarantees about the feedback provided, including its accuracy, relevance, or reliability. All feedback is subject to the terms set forth in the TetraConnect Hub Community Guidelines.
Updated 14 days ago