Legacy Tetra Box Connector
Box is a service that offers secure file sharing. The Tetra Data Platform (TDP) has a built-in integration that allows users to pull raw data files from their secure Box storage and into the Tetra Data Lake.
How Does the Box Connector Work
TetraScience leverages Box's API to constantly detect file change events in your Box account and upload the files into our Data Lake and then trigger Data Pipelines.
Our Box Connector currently tracks file creation events, including different versions of the same file. If you remove your file from Box, Tetra Data Lake will not mirror that and will not delete the files we collected.
Box integration will track (listen) for new file creations and file version changes in the Box account and sync upon a detected change.
The integration will detect for changes in Box every 60 seconds.
When you first create a Box integration, it will pull all existing files that match the provided file pattern and put the files in our Data Lake.
How to Configure the Connector
IMPORTANTBefore configuring a Tetra Box Connector, you must contact you customer success manager (CSM) to activate the integration. Customers can’t activate Box Connectors directly.
The following subsections show you how to set up your box account, then how to configure the connector.
Set up your Box account
First, create a dedicated API user for this integration. For production usage, the best practice is to create an API user (standard user) dedicated to this integration. We recommend you name it: [email protected].
After the user is created, share the Box folder that you would like the integration to track with the API user with read-only permissions.
Organize your Box foldersIt is always a good idea to leverage the folder structure to organize your data, the best practice is to include your study number, project name/id, instrument name/id and etc in the folder path. For example:
Shared/instruments-data/plate-reader-1
Shared/instruments-data/plate-reader-2If you are organizing data from your CRO, you can consider something like the following:
Shared/study-1/CRO-A/assay-x
Shared/study-1/CRO-A/assay-y
Shared/study-1/CRO-A/assay-z
Create and Configure a Box Connector
- Sign in to the TDP.
- In the left navigation menu, choose Data Sources. Then, select Box.
- Click Add Your Box Account.
- In Login to your Box account, click Authorize.
- Follow the prompts to log into the Box Account. When complete, the Box Account will appear at the top of the Box Source Management screen.
Adding a Box Folder
After you've added the Box account, you must add a folder by doing the following:
- In the Box Source Management page, click the Add Source button.
- In the Add a new source screen, choose the folder to track. Then, click Next.
- Type a name and description. Then, click Next.
- Add attributes, if there are any.
- Choose Finish.
View Details about the Box Resource/Folder
To view details about the Box folder, do the following:
- To the right of the folder, you'll see a hamburger menu (three lines). Right-click the menu.
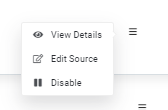
- Select View Details.
- Details about the resource, folder, and custom attributes appear in the View Details window.
Edit the Source
To edit the Box source, do the following:
- To the right of the folder, you'll see a hamburger menu (three lines). Right-click the menu.
- Select Edit Source from the menu that appears.
- The Edit Information page appears. You can edit the name and description, selected folder, or existing attributes. You can also delete existing attributes or add new attributes.
Disable the Source
To disable the Box source, do the following:
- To the right of the folder, you'll see a hamburger menu (three lines). Right-click the menu.
- Select Disable from the menu that appears.
- Click OK to confirm disabling the source. The label Disabled appears to the right of the source.
Edit Box Account login/authorization
To edit the Box account login/authorization information, do the following:
- To the right of the folder, you'll see a hamburger menu (three lines). Right-click the menu.
- Select Edit Source from the menu that appears.
- The Login page appears.
Disable the Box Account
To disable the Box account, do the following:
- To the right of the folder, you'll see a hamburger menu (three lines). Right-click the menu.
- Select Disable from the menu that appears.
- Click OK to confirm disabling the account
- The label Disabled appears to the right of the account.
Documentation Feedback
Do you have questions about our documentation or suggestions for how we can improve it? Start a discussion in TetraConnect Hub. For access, see Access the TetraConnect Hub.
NOTEFeedback isn't part of the official TetraScience product documentation. TetraScience doesn't warrant or make any guarantees about the feedback provided, including its accuracy, relevance, or reliability. All feedback is subject to the terms set forth in the TetraConnect Hub Community Guidelines.
Updated 2 months ago