Manage and Apply Attributes
You can use labels, metadata, and tags (attributes) to annotate files and trigger pipelines, without changing the actual data in your files.
You can add, edit, and delete attributes in multiple places in the Tetra Data Platform (TDP), such as when you do the following:
- View search results
- Add files from a Tetra Agent (you can add metadata, but not labels)
- View pipeline processing details for a file
- Add or edit a Connector
- Edit labels in bulk
For more information about the different types of attributes, see Attributes.
For a list of optional labels that TetraScience recommends using when you first onboard data to the Tetra Data Platform (TDP), see Recommended Labels in the TetraConnect Hub. For access, see Access the TetraConnect Hub.
IMPORTANTYou can’t use a new attribute as a pipeline trigger until you add a file to the TDP that includes the attribute. For instructions on how to manually upload files, see Upload a New File or New Version of the File.
How to Manage Attributes
You can view, add, and manage all of your organization's attributes on the Attribute Management page. Custom labels, metadata, and tags are available to all users.
NOTETo manage labels for more than one file at a time, see the Edit Labels in Bulk section of this topic.
Access the Attribute Management Page
To view Attribute Management page, do the following:
- Sign in to the TDP.
- In the left navigation menu, choose Attribute Management. The Attribute Management page appears.
View Attributes
The Attribute Management page displays all of your organization's available attributes. To view a complete list of a specific type of attribute, select either the Labels, Metadata, or Tags tab.
Download Attributes
To download a list of the attributes that are currently displayed on the page you're viewing as a CSV file, select the Download button on the Attribute Management page.
IMPORTANTThe Download button on the Attribute Management page creates and downloads a list of the attributes that are currently being displayed only. For example, selecting the Download button on the Labels tab downloads a list of your organization's labels only. If you filter the list and then select the Download button, then the filtered list of attributes is downloaded only.

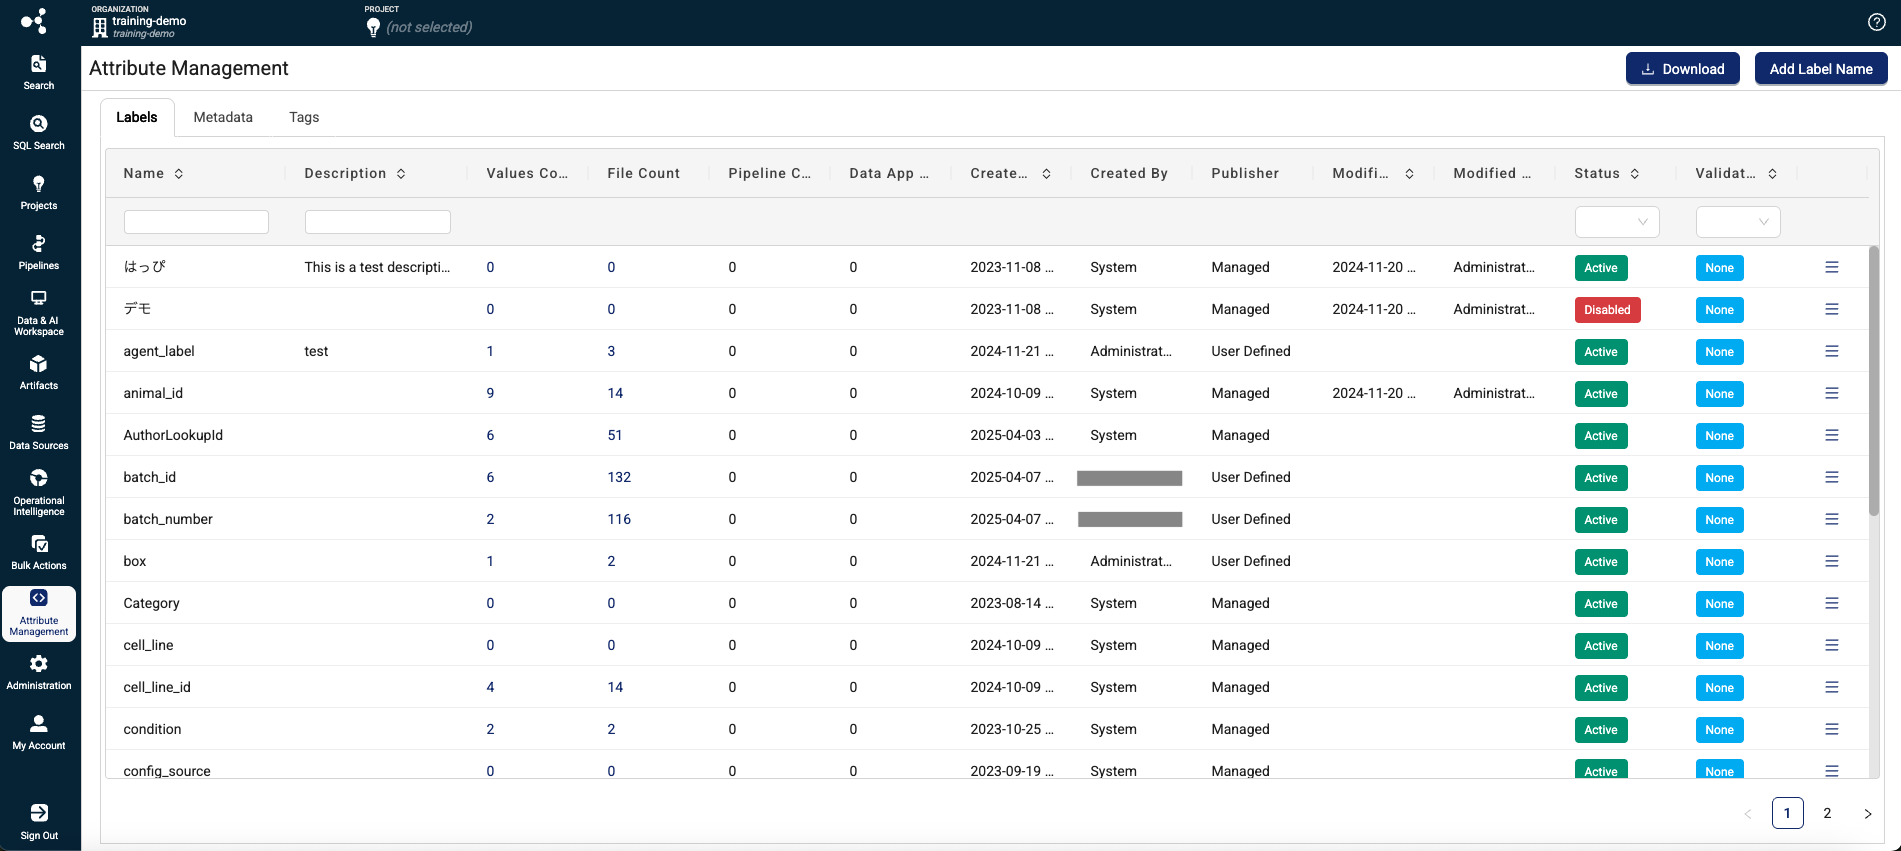
Review and Manage Labels
The Labels tab on the Attribute Management page displays all of your organization's labels. You can review the following information about each label and edit their descriptions and statuses.
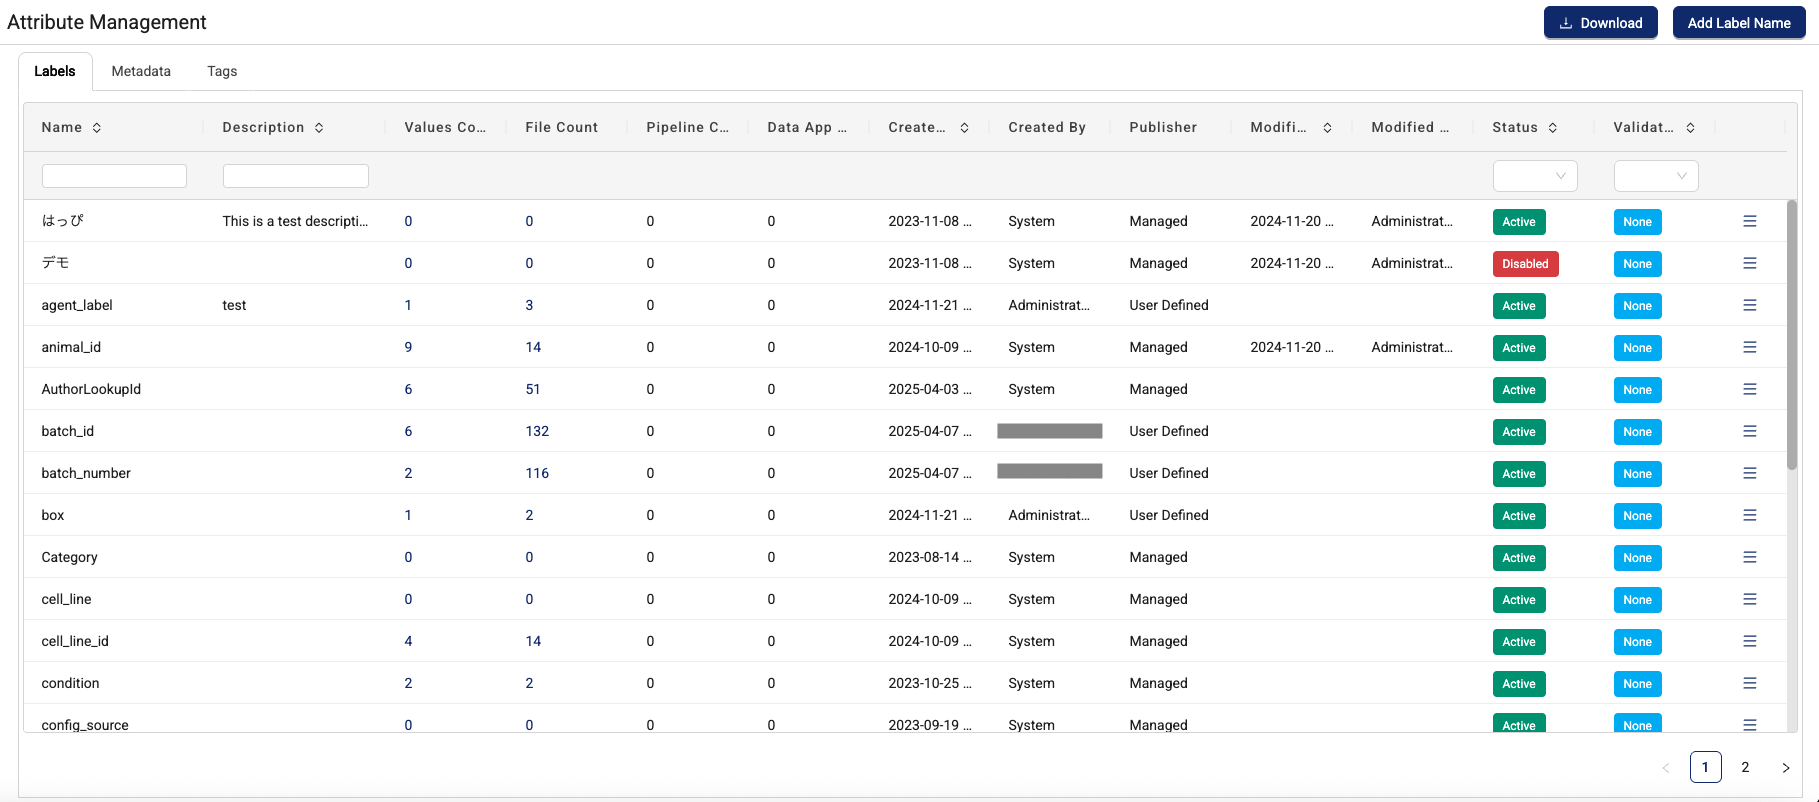
Filter Options for Labels
The list of labels that displays on the Labels tab of the Attribute Management page includes the following information about each label, divided into columns. You can filter by any of the following information by using the filter options at the top of each column.
| Filter | Description |
|---|---|
| Name | Label name |
| Description | Label description, if one was created Note: To edit a label description, select the hamburger menu icon next to the label's Status column, and then choose Edit Label Description |
| File Count | The number of files that have the label Note: Selecting a label's File Count number opens the Search page and displays a complete list of files that include the selected label |
| Values Count | The number of values assigned to the label. After uploading a file with a new label value, the Values Count on the Attribute Management page may not update immediately. The count can take up to 10 minutes to reflect newly created label values. Note: Selecting a label's Value Count number opens the Label Details page and displays a complete list of the selected attribute's values. Selecting the Files Count for each value on this page also opens the Search page, which filters the files by only the selected label value. |
| Created At | When the label was first created |
| Created By | The entity that first created the label |
| Publisher | The source of each label, enabling clear identification of whether labels come from user-defined sources or semantic services. |
| Modified At | When the label was last modified |
| Modified By | The entity that modified the label last |
| Status | Shows if the label is Active or Disabled. |
Create a New Label
To create a new label, do the following:
- Open the Attribute Management page. The Labels tab appears.
- Select the upper right Add Label Name button. The Create Label Name dialog appears.
- For NAME, enter a name for the new label.
- (Optional) For DESCRIPTION, enter a label description.
- Choose Save. The new label is created and Enabled by default.
Label ValuesLabel names must be less than 128 characters. Label values must be less that 256 characters. All UTF-8 and Kanji characters are supported. Labels don't support leading or trailing spaces, or empty strings. The Tetra File-Log Agent doesn't support backslashes (
\). For more information, see Label Formatting.
Disable or Re-enable a Label
To disable or re-enable an existing label, do the following:
- Open the Attribute Management page. The Labels tab appears.
- Find the label that you want to disable or enable. Then, select the hamburger menu icon to the right of that label's Status column.
- Choose one of the following:
- Disable Label: disables the label
- Enable Label: enables the label
What Happens When You Disable a Label?
When you disable a label, keep in mind the following:
- You'll no longer be able to add disabled labels to files or other TDP entities, except pipeline triggers. However, disabled labels are still available for remove and update operations and can still be used as pipeline triggers.
- The TDP will display disabled labels in a lighter blue. Hovering over the label makes a (Disabled) prefix appear next to the label.
- Pipeline triggers that use a disabled label will include a (Disabled) prefix in the label name.
NOTEAll new labels are enabled by default.
Review and Manage Metadata
The Metadata tab on the Attribute Management page displays all of your organization's metadata.
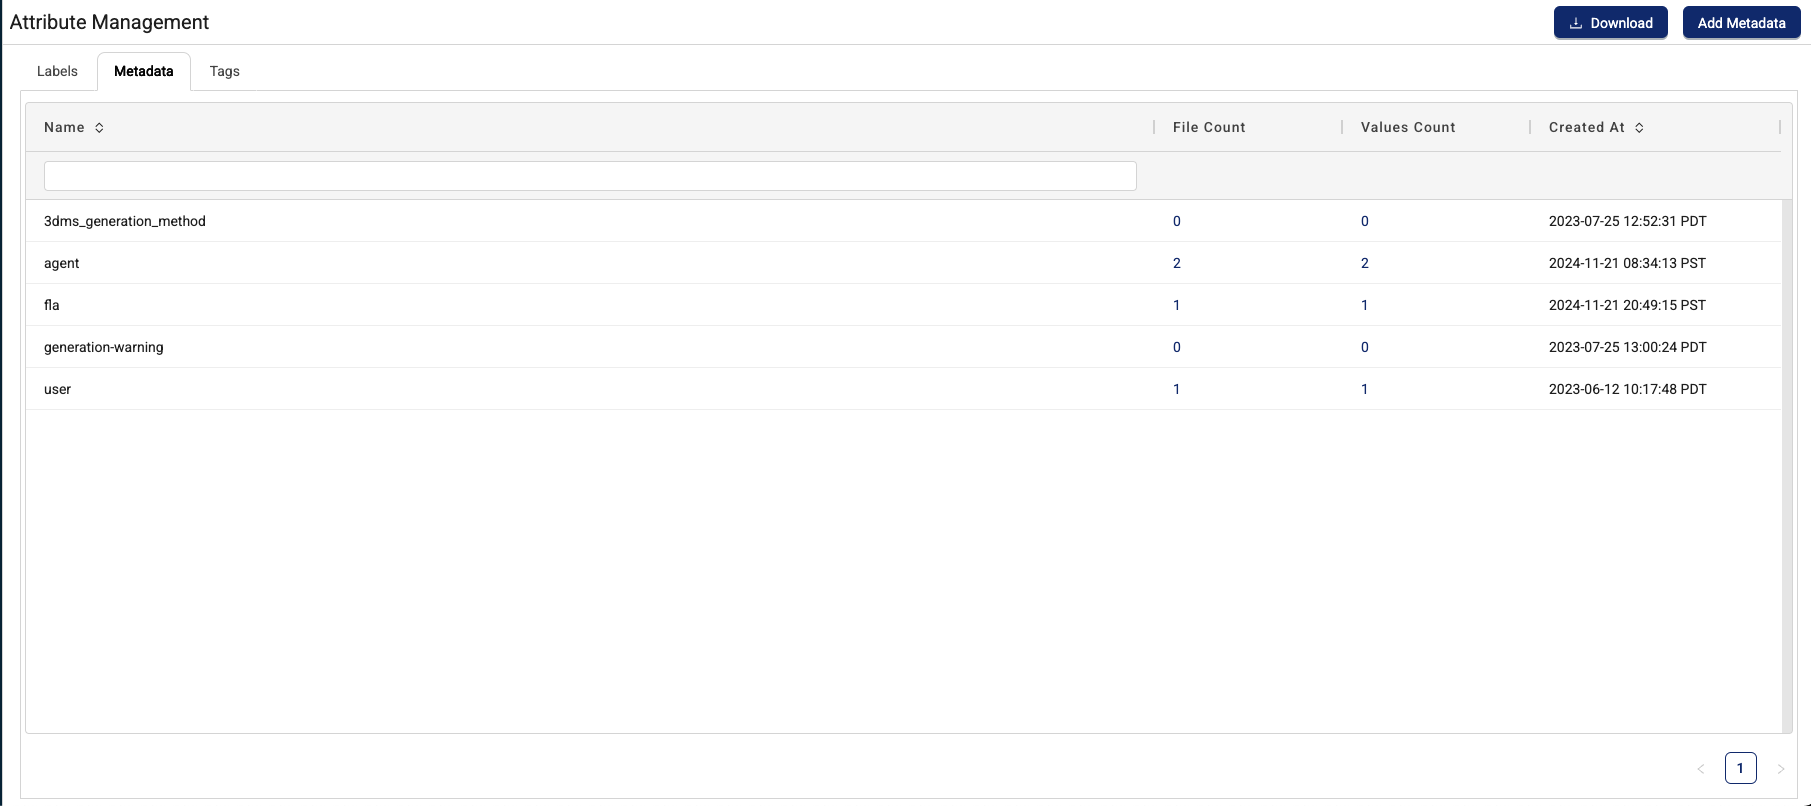
Filter Options for Metadata
The list of metadata that displays on the Metadata tab of the Attribute Management page includes the following information about each metadata field, divided into columns. You can filter by any of the following information by using the filter options at the top of each column.
| Filter | Description |
|---|---|
| Name | Metadata name |
| File Count | The number of files that have the metadata Note: Selecting a metadata's File Count number opens the Search page and displays a complete list of files that include the selected metadata |
| Values Count | The number of values assigned to the metadata Note: Selecting a metadata's Value Count number opens the Metadata Details page and displays a complete list of the selected attribute's values. Selecting the Files Count for each value on this page also opens the Search page, which filters the files by only the selected metadata value. |
| Created At | When the metadata was first created |
Add a New Metadata Field
There are two types of metadata used within the TDP:
- Default metadata is collected automatically and is immutable within the TDP. Examples include File ID, Created Date, and Source Type. These fields are related to the TDP. As a result, the Created Date represents when the file was first uploaded to the Data Lake; not when the file was created by its original source.
- Custom metadata is user-defined and editable. You can use custom metadata to enhance the default metadata by adding organization-specific information.
You can apply custom metadata to files automatically and manually. When setting up any new data source (for example, IoT or Data Hub) you can specify a custom metadata field and value to attach to all incoming files from that source. After you complete this set up, it will continue to run automatically until you edit the source and remove the custom metadata.
Custom metadata is available to all users. However, you can set it to a more restrictive level for data integrity based on your use case (for example, only accessible to privileged users or admins).
IMPORTANTApplying metadata to files larger than 5 GB isn't supported and will return a
500error. For large files, you should apply labels instead. This limitation is because of a hard limit on theCopyObjectAPI operation in Amazon Storage Service (Amazon S3), which has a maximum source size of 5 GB. When a file's metadata is updated, the TDP copies the Amazon S3 object with new metadata, and this copy operation fails for files 5 GB or larger.
To add a new metadata field, do the following:
- Open the Attribute Management page. Then, select the Metadata tab.
- Select the upper right Add Metadata button. The Create New Metadata dialog appears.
- Enter a name for the new metadata field.
- Choose Save.
Metadata ValuesMetadata field names can consist of the following characters: * ^ing characters:+$
Review and Manage Tags
The Tags tab on the Attribute Management page displays all of your organization's tags.
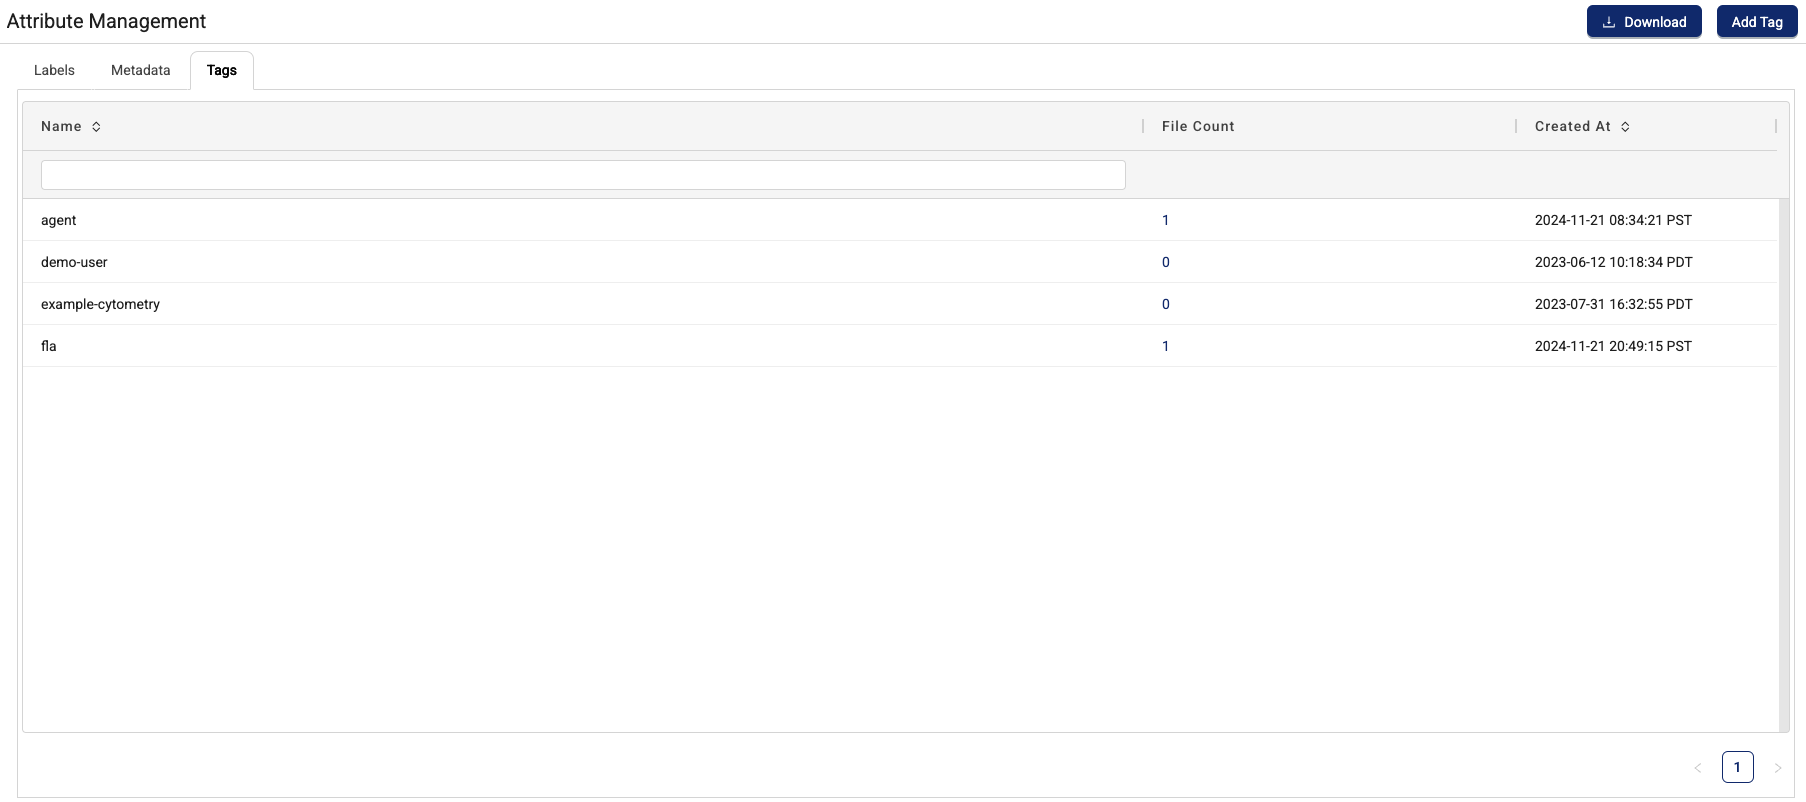
Filter Options for Tags
The list of tags that displays on the Tags tab of the Attribute Management page includes the value of each tag attribute. You can filter for specific tags by their values in the Name filter field.
Add a New Tag
You can use custom tags to organize datasets and perform batch operations. You can apply custom tags to files automatically and manually. When setting up any new data source (for example, IoT or Data Hub) you can specify a custom tag to attach to all incoming files from that source. After you complete this set up, it will continue to run automatically until you edit the source and remove the custom tag.
Custom tags are available to all users. However, you can set it to a more restrictive level for data integrity based on your use case (for example, only accessible to privileged users or admins).
IMPORTANTApplying tags to files larger than 5 GB isn't supported and will return a
500error. For large files, you should apply labels instead. This limitation is because of a hard limit on theCopyObjectAPI operation in Amazon Storage Service (Amazon S3), which has a maximum source size of 5 GB. When a file's tags are updated, the TDP copies the Amazon S3 object with new tags, and this copy operation fails for files 5 GB or larger.
To add a new tag, do the following:
- Open the Attribute Management page. Then, select the Tags tab.
- Select the upper right Add Tag button.
- Enter a name for the new tag.
- Choose Save.
Tag ValuesTag names can consist of the following characters:
- All alphanumeric characters
- spaces
- plus sign
- dash
- period
- underscore
- forward slash
Apply Attributes to Specific Files
To apply labels, metadata, and tags to specific files, you can use either the Search or Search (Classic) page to select a file and then open the Edit Attributes dialog by doing the following:
-
To open the Edit Attributes dialog on the Search page, select a file that you want to apply attributes to. Then, in the right Actions pane that appears, choose Edit Attributes.
- or -
To open the Edit Attributes dialog on the Search (Classic) page, hover over the file that you want to apply attributes to (or select the row). A list of menu icons appears on the right of the file's row. From the list of menu icons, choose More. Then, choose Add/Edit Attributes.
-
Add attributes to the file by doing one of the following:
To Add a Label to a Specific File
- In the LABELS section of the Edit Attributes dialog, select the upper right plus sign (+) icon.
- For Label Name, either select a label from the drop-down list or choose + Add Label Name from the bottom of the list to add a new label name.
- Choose Save.
To Add Metadata to a Specific File
- In the Edit Attributes dialog, select Advanced Fields. The section expands to show the METADATA and TAGS fields.
- In the METADATA section, for file name, either select metadata from the drop-down list or choose + Add Metadata from the bottom of the list to add new metadata.
- Choose Save.
To Add Tags to a Specific File
- In the Edit Attributes dialog, select Advanced Fields. The section expands to show the METADATA and TAGS fields.
- In the TAGS section, select tags from the drop-down list or choose + Add Tag from the bottom of the list to add a new tag.
- Choose Save.
Edit Labels in Bulk
You can use the Bulk Edit of Labels feature to add, remove, or update labels for more than one file at a time. This functionality can help you quickly fix a large number of files that have incorrect or incomplete labels, or enrich your data after it’s in the Tetra OS.
IMPORTANTWhen editing labels in bulk, keep in mind the following:
- Bulk label edits don't trigger pipelines. To run a pipeline based on bulk label edits, you must run the pipeline manually after the bulk label edit job completes.
- Before running a bulk label edit operation on 500,000 or more files, customers must contact their CSM to verify the action.
- If a file has more than 4,000 labels (or its labels are 256k+ in size) Pipelines might not properly index the file for search in the TDP. To make sure that your labels are properly indexed and available for search, it's recommended that you do the following:
- Reduce the size of your label data as much as possible.
- Limit the number of labels applied to each file.
To edit labels in bulk, do the following:
- Sign in to the TDP with an admin account to update or remove labels in bulk. Any TDP user can add labels.
- In the left navigation menu, choose Search.
- Search for the files that you’d like to edit. For instructions, see Search.
- Decide if you want to modify the labels on all of the files returned by your search or modify labels on the files you select only. To modify a subset of files, select the check boxes next to each file’s name.
- Next to BULK OPERATIONS, select the Create a Bulk Label Change Job option (shown as a chevron icon). A Create Bulk Label Change Job dialog appears.
- To edit labels on the files you select only, choose Only the<#> Selected Files. To edit labels on all of the files returned by your search, choose All<#> files that match your search criteria.
- Choose Next.
- In the left drop-down list (default setting is Add), choose the type of edit operation that you want to perform by selecting one of the following:
- Add: Creates a new label that’s applied to each file
- Update Name: Modifies a label’s name for each file
- Update Value: Modifies a label’s value for each file
- (For TDP v4.2.0 and earlier only) Update: Modifies either label names or label values for each file
- Remove Value: Deletes a specific label value for each file
- Remove Label: Removes a label and its values from each file
NOTEYou can run up to 200 bulk label edit operations on each search. To add another edit operation, choose the plus icon (+) in the upper right of the dialog. Then, select the type of edit operation that you want to perform from the drop-down list.
- Based on the option(s) you select, do one or more of the following:
To Add a New Label in Bulk
- For Label Name, select an existing label name or enter a new one.
- For Value, select an existing label value or enter a new one.
To Update a Label in Bulk
- For from, select an existing label name and/or value that you want to update or enter it directly.
- For to, select an existing label name and/or value that you want to make the label’s new name or value, or enter a new one.
To Remove a Label Value in Bulk
- For Label Name, select an existing label name that you want to remove a value from or enter one directly.
- For Value, select the label value that you want to remove or enter it directly.
To Remove a Label in Bulk
- For Label Name, select the existing label name that you want to remove or enter it directly.
- Choose Create Job. A dialog appears notifying you that your bulk label edit job was created. To view the status of the job, either choose View Jobs in the dialog or follow the instructions in the Monitor a Bulk Label Edit Job's Status section of this topic.
NOTEThe amount of time it takes to process a bulk label edit job depends on the number of files that you’re modifying and the size of those files. The more files that you modify and the larger that those files are, the longer the operation takes.
Monitor a Bulk Label Edit Job's Status
To monitor a bulk label edit job's status, do the following:
- In the left navigation menu, choose Bulk Actions.
- Choose Labels. The Labels page appears and displays a list of all your active and inactive bulk label edit jobs, which includes the following information:
- STATE—shows the job’s status (Cancel Requested, Deleted, Process Requested, Processed, Processing, Processing Cancelled, or Processing Failed)
- NAME—shows the job’s name
- COMPLETION—shows how much of the job has been processed (measured as a percentage)
- STARTED—shows the date and time the job started processing
- COMPLETED—shows the date and time the job completed
- JOB ID—shows the job ID
- DETAILS—opens a dialog that shows the job’s label updates and a link that displays all of the files affected by the operation (View bulk label job details).
Documentation Feedback
Do you have questions about our documentation or suggestions for how we can improve it? Start a discussion in TetraConnect Hub. For access, see Access the TetraConnect Hub.
NOTEFeedback isn't part of the official TetraScience product documentation. TetraScience doesn't warrant or make any guarantees about the feedback provided, including its accuracy, relevance, or reliability. All feedback is subject to the terms set forth in the TetraConnect Hub Community Guidelines.
Updated 2 months ago