Managing Organization Details and Accounts
If you have the appropriate level of administrative access, you can manage your organization's details and user accounts. You can also change password policies and configure single sign on.
NOTE:If you are interested in learning about how to manage your own personal account, see the Managing Your Personal Account topic.
Viewing Organization Details
You can view your organization's account details, such as your name and the organization's slug (org slug). The org slug is very important because it is used for many purposes, including API calls. To view your organization details, complete the following steps.
- Click the profile icon.
- Click Account.
- On the left side of the screen, select the Organization option.
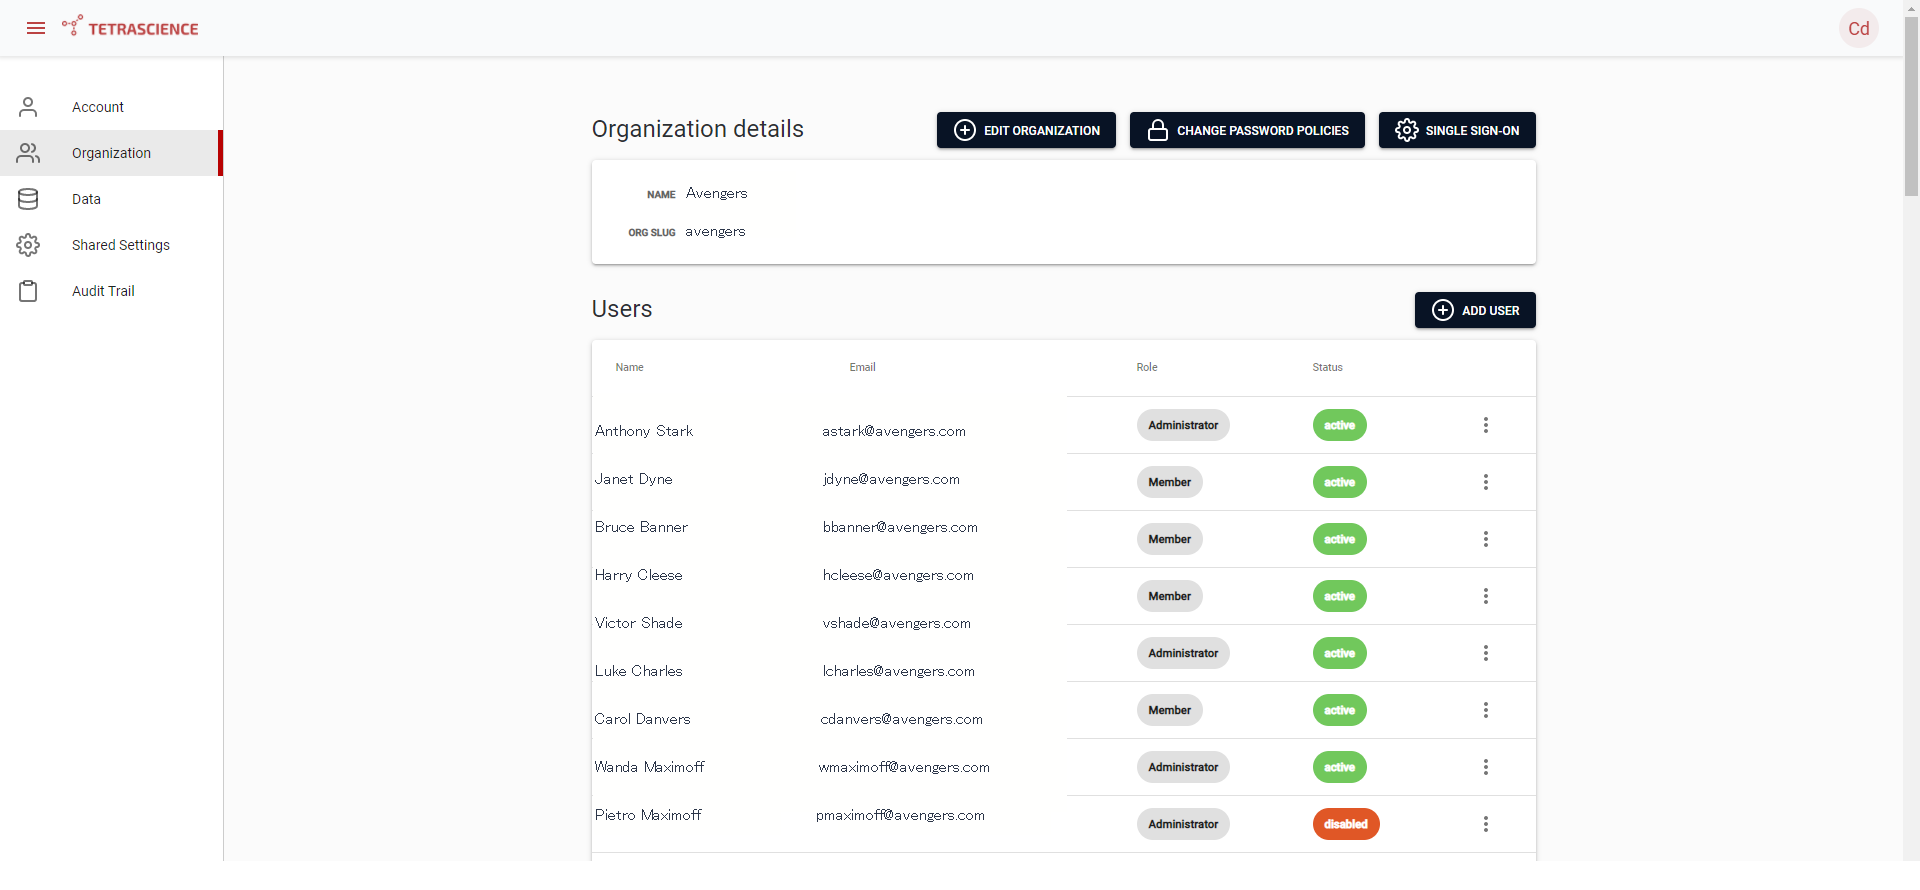
Organization Details
- The organizational details (name and slug) appear near the top of the page. Users appear in a table in the bottom section of the page.
Adding a Regular User Account
To add a user, complete the following steps.
- Click the Add User button in the Organization details page.
- In the Add a New User page, add the first name, last name, email, password, and assign a role.
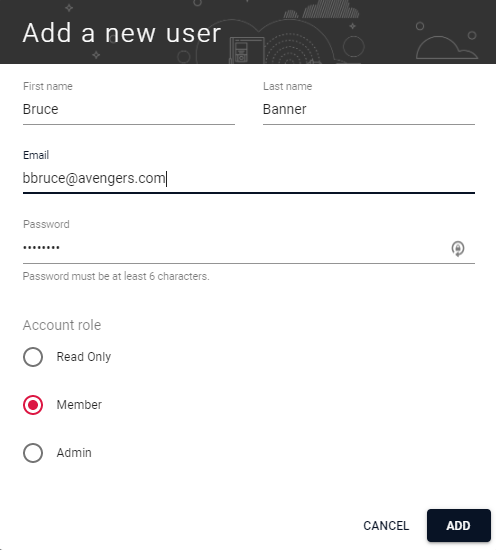
Add a New User
- The new user is added.
Adding a Service User Account
To add a service user, do the following.
- Click the Add User button in the Organization details page.
- In the Add a New Service User page, add the service user's name and assign a role.
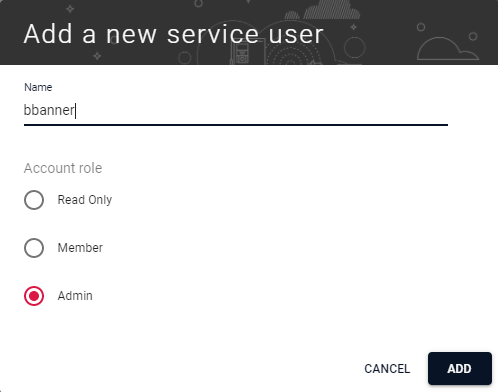
Add a New Service User
- The new service user is added.
Editing the User Role
To edit either a regular or service user's role, complete the following steps.
- In the Organizational Details page, click the menu button next to the entry, and select Edit.

Organizational User Menu
- In the Edit User window, select the role that you want to assign the user to, then click Update.
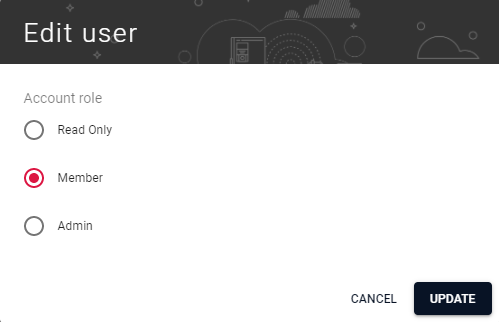
Edit User Role
The user's role is changed.
Disabling a User Account
To disable a user's account for a regular user or service user, complete the following steps.
- In the Organizational Details page, select Disable from the menu options that appear at the right side of the entry.
- The warning message appears. Click Disable to disable the user's account.
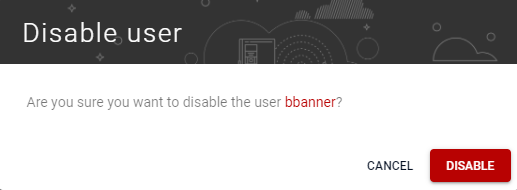
Disable User Account Warning
The user's account is disabled.
Activating a User Account
If a user account has been disabled, activate it by following these steps.
- In the Organizational Details page, select Activate from the menu options that appear at the right side of the entry.
- The user account is activated.
Generating a JSON Web Token (JWT) for a Service User Account
You can generate a JWT Token for a service account, regardless of role. To generate the token, complete the following steps.
- In the Organizational Details page, select Generate Token from the menu options that appear at the right side of the service user account entry.
- In the Create New Token page enter the number of days the token should be valid (1 - 180 days), then click the Generate Token button.

Create New Token page
- The token appears in the next window. Click the Copy Token button. The token is now on your clipboard and is ready for you to paste it where it is needed.
- Click the Close button.
Editing Your Organization
To edit your organization, complete the following steps.
- Click the Edit Organization button in the Organization details page.
- The Edit Organization page appears.
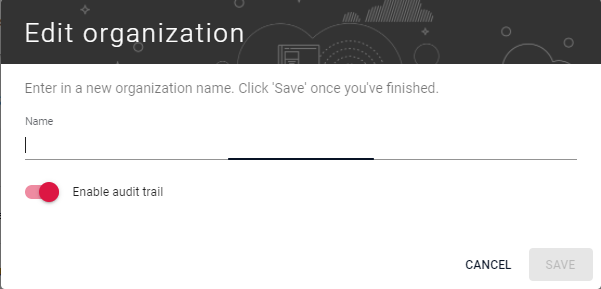
- Type the name of your organization in the box.
- Indicate whether you want to enable the audit trail.
- Click Save to save the information.
Change Password Policies
To change password policies, do the following.
- Click the Change Password Policies button in the Organization details page.
- Make the changes in the page that appears.
- When complete, select Save.
Single Sign-On
Single-sign on is covered in more detail in this topic.
Updated 4 months ago
