IE PRO 200: Tutorial - Connecting your PC to the Tetra IoT Agent
To connect your PC to the Tetra IoT Agent, you will need to access Tetra IoT Agent's local configuration page.
Each Tetra IoT Agent has a configuration page that you can use to change Tetra IoT Agent settings such as Ethernet or Wi-Fi, or to restore factory settings. This tutorial describes how to access this configuration page and walk you through the different options.
WarningPlease consult with a TetraScience Customer Success member to change settings. Please refrain from changing other settings without understanding the consequences; otherwise the Tetra IoT Agent may operate in an unexpected way.
How to Access the Local Configuration Page
You can access the local configuration page using one of these methods:
- If the Tetra IoT Agent's IP address is available, open your browser and enter the Tetra IoT Agent's IP address in your browser's search bar to visit the configuration page (please verify that your computer is in the same network as the Tetra IoT Agent).
- If the Tetra IoT Agent's IP address is not available, then you must establish a local connection between your computer and the Tetra IoT Agent. Please follow the next section to configure your computer.
Access the Configuration Page Through a Local Connection
- Follow Operating System Setups to configure your computer's Ethernet connection.
- Connect your computer with the Tetra IoT Agent's LAN port using an Ethernet cable.
- Open a browser window and enter: "192.168.101.204" in the search bar. You should be directed to the login page:
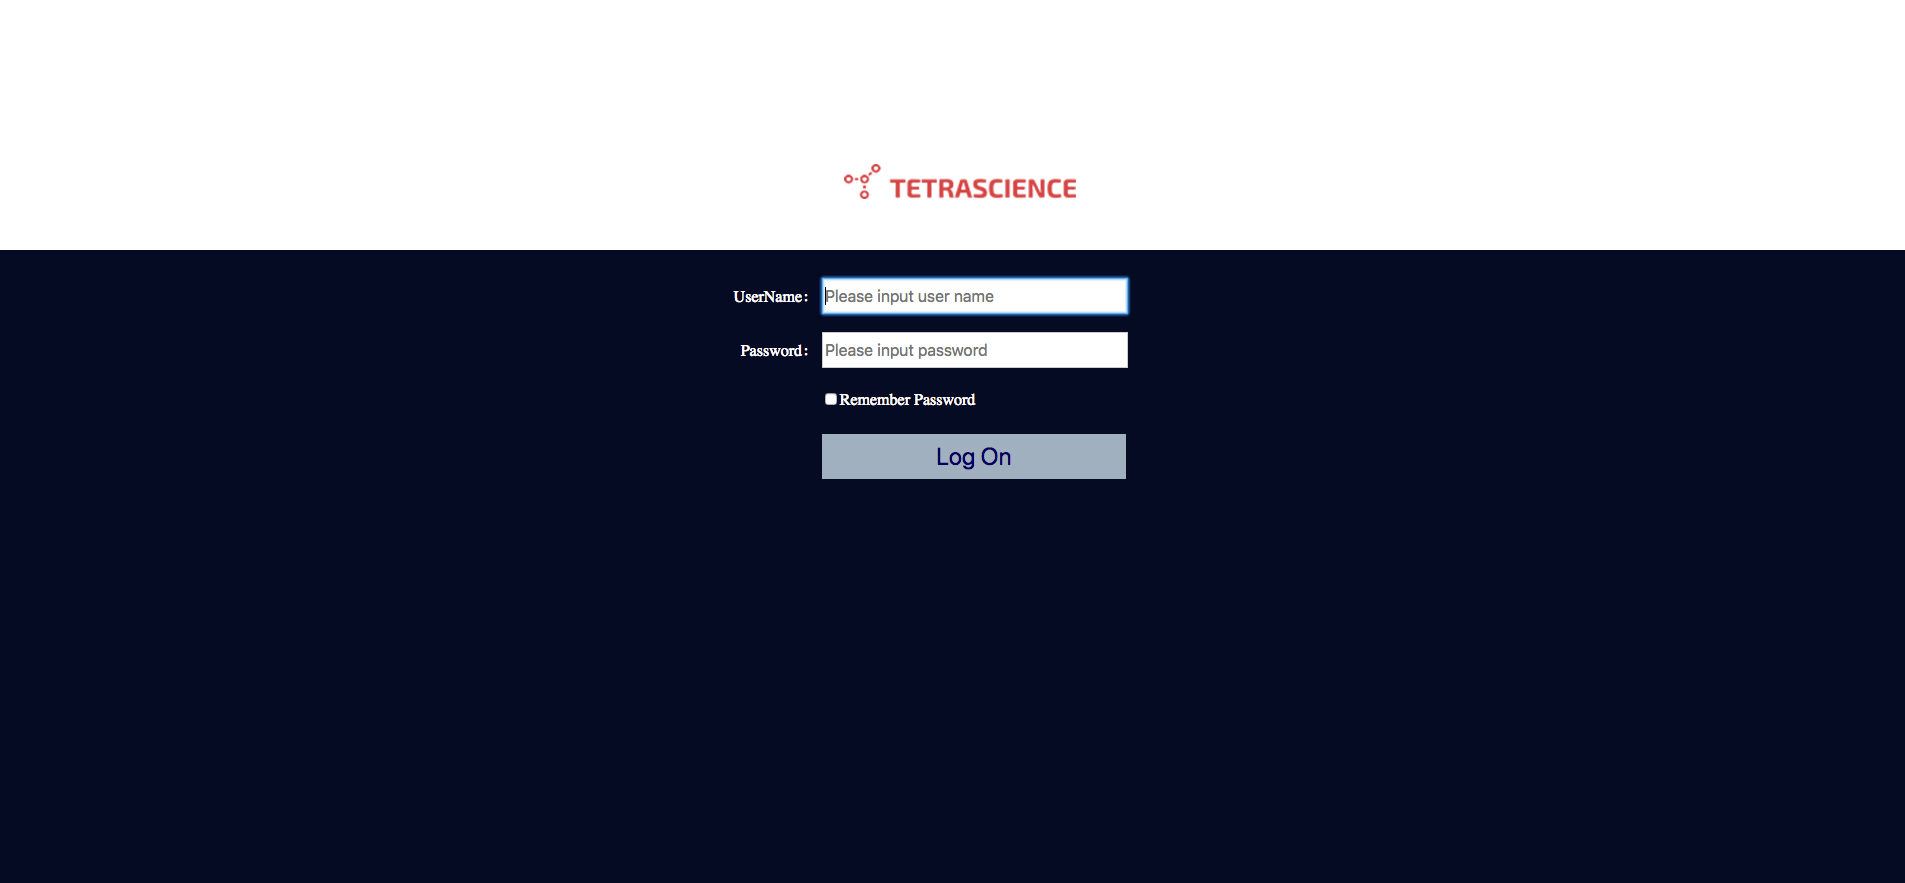
Login page
- Enter the login credential: username: admin, password: admin
Set Up the Operating System
To complete the operation set up, please follow the procedure best suited for your computer's operating system. Although TetraScience lists only these operating system configurations, other operating systems will also work if you set the Ethernet adapter to use the same IP address and subnet mask.
- Windows 7
- Windows 10
- macOS
- Ubuntu 14.04
Operating System Set Up QuestionsPlease do not hesitate to contact our Customer Success Team for any questions.
Windows 7
- Plug the Ethernet cable into the LAN port on the Tetra IoT Agent and to the Ethernet port on your computer
- Navigate to Control Panel.
- Click "Network and Internet".
Control Panel
- Click "Network and Sharing Center".
Network and Sharing Center
- Click "Change adapter settings".
Change adapter settings
- Right-click "Local Area Connection", and then click "Properties".
Properties
- Select "Internet Protocol Version 4 (TCP/IPv4)", and then click "Properties".
Internet Protocol Version
- Change the settings in the pop-up using this image:
General Settings
Windows 10
- Plug the Ethernet cable into the LAN port on the Tetra IoT Agent and to the Ethernet port on your computer
- Navigate to Settings.
- Click "Network and Internet".
Windows Settings
- Click "Ethernet" on the left sidebar.
Network Status
- Click "Change adapter options" on the right sidebar.
Change adapter settings
- Right-click "Ethernet", and then click 'Properties".
Ethernet Properties
- Select "Internet Protocol Version 4 (TCP/IPv4)", and then click "Properties".
Properties
- Change the settings in the pop-up using this image:
General Settings
macOS
- Plug the Ethernet cable into the LAN port on the Tetra IoT Agent and to the Ethernet port on your Mac. You may need an Ethernet to Thunderbolt adapter for the connection.
- Navigate to System Preferences > Networks > Thunderbolt Ethernet.
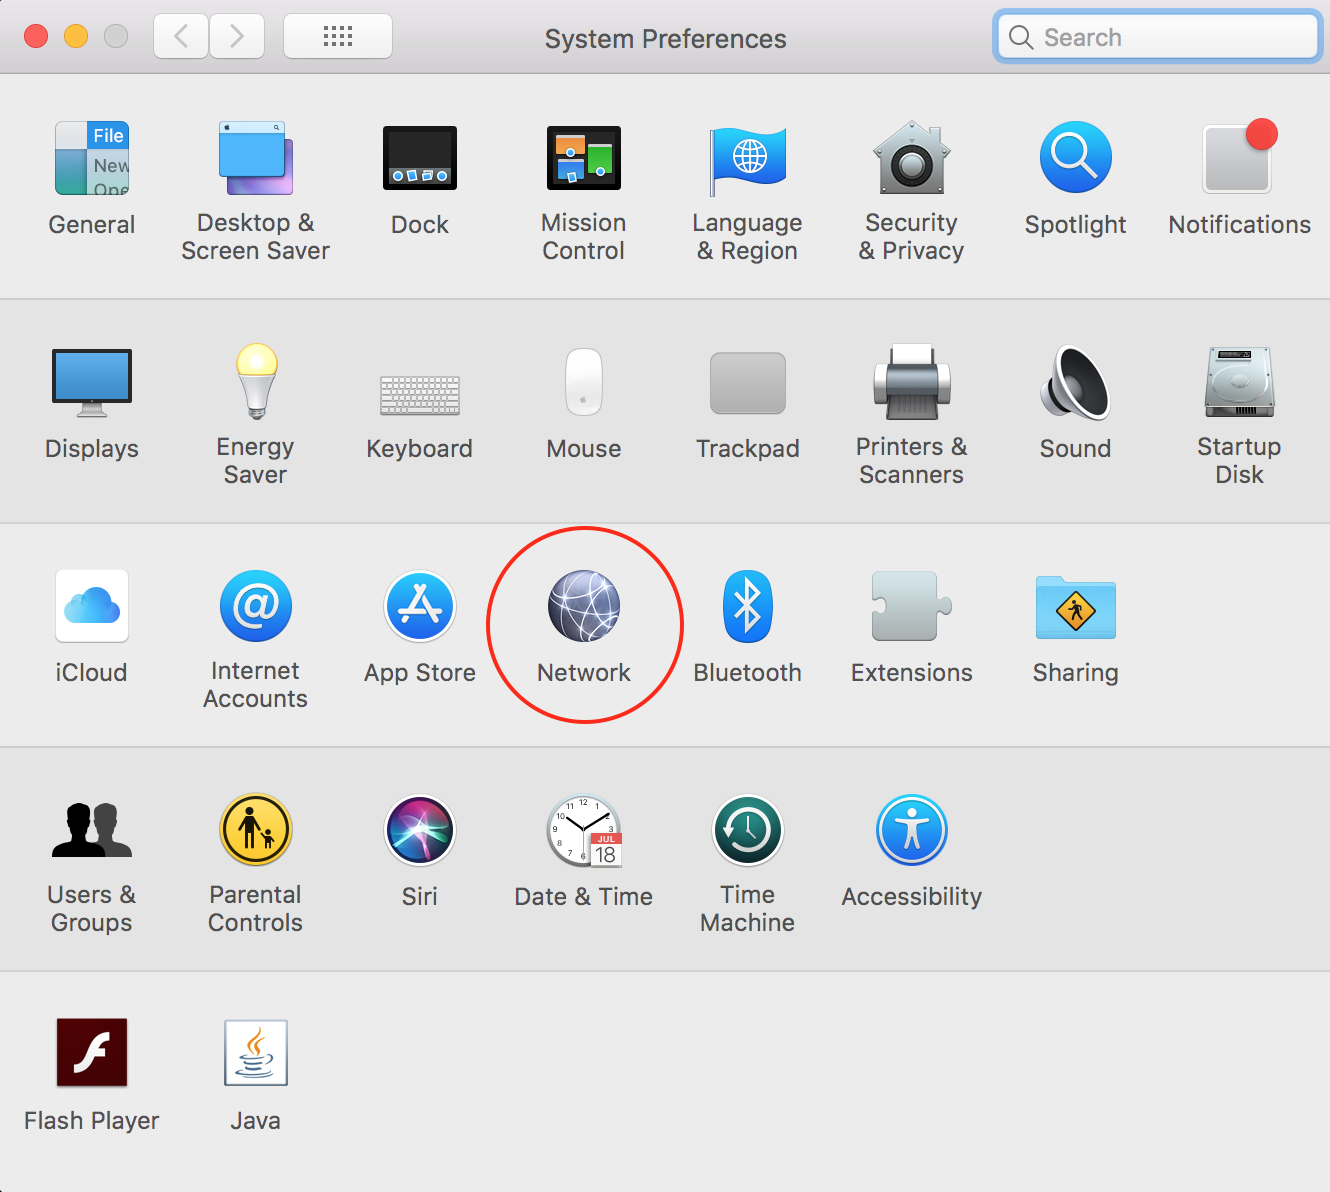
System Preferences
- Configure the network settings using this image:
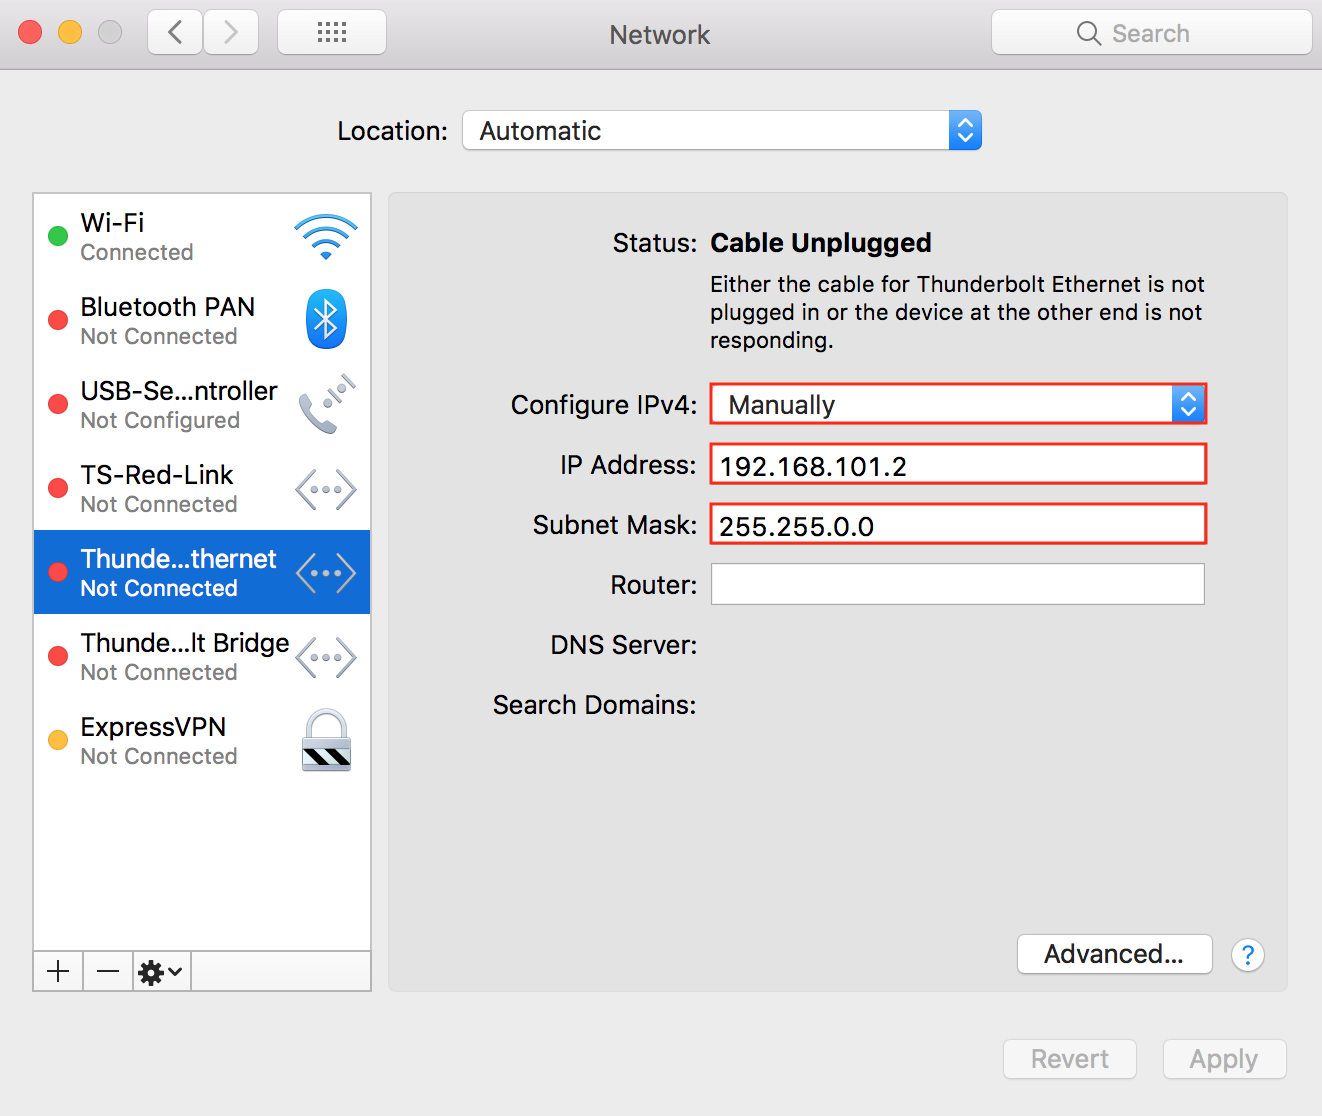
Network Status
- Click "Apply".
Ubuntu 14.04
- Plug the Ethernet cable into the LAN port on the box and to the Ethernet port on your Ubuntu machine.
- Navigate to System Settings > Networks > Wired.
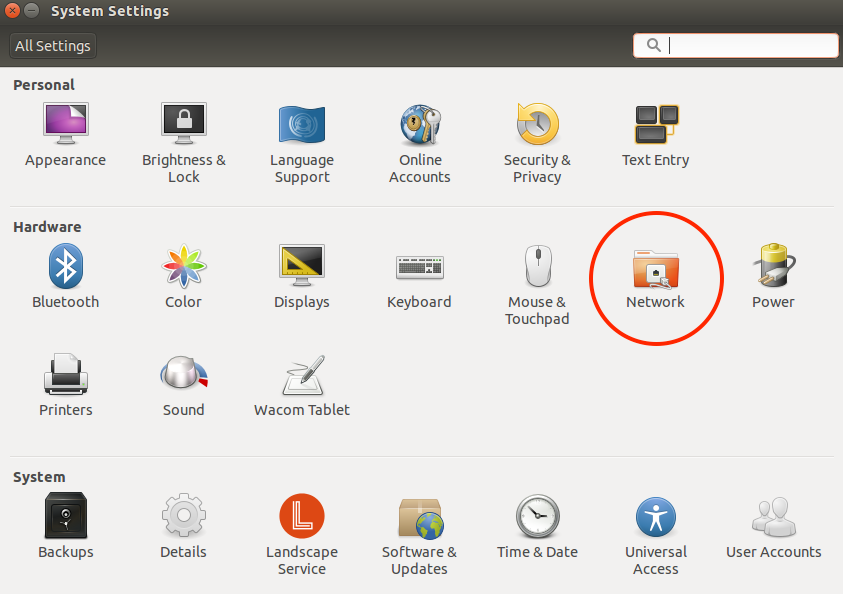
System Settings
- Click "Options".
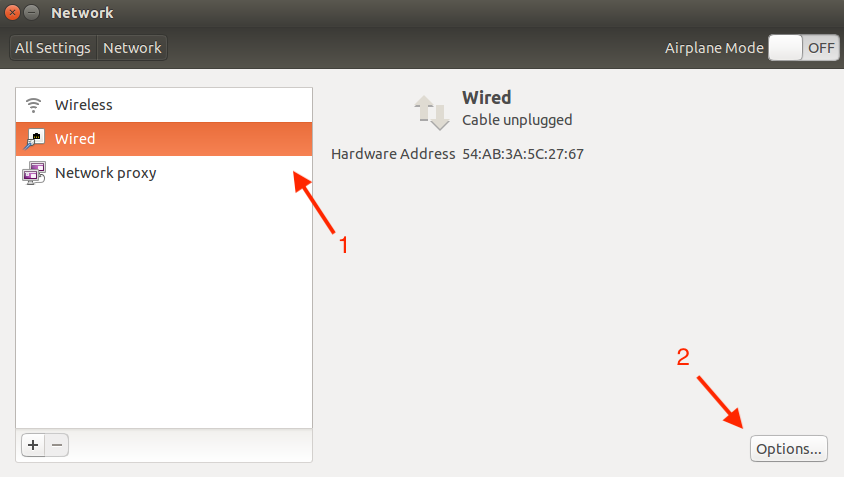
Network Options
- Select the "IPv4 Settings" tab.
- Configure the values using this image:
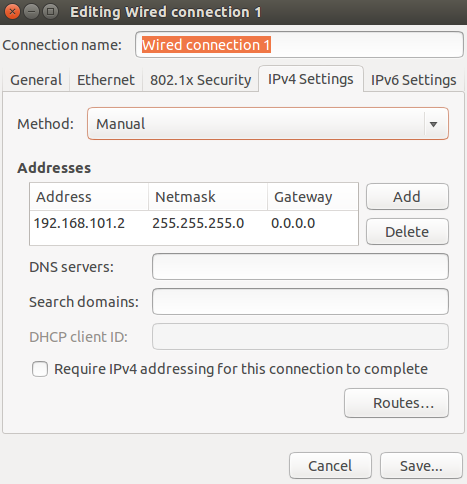
Connection Settings
- Click "Save".
Updated 3 months ago
