Data Sync Utility User Guide (v2.0.x)
How to configure and use the Data Sync Utility to sync, upload, and manage files
This guide shows how to configure and use the Data Sync Utility after it's installed.
For initial setup instructions, see the Data Sync Utility Setup Guide.
Sync Data
There are two ways to sync data from the Tetra Data Platform (TDP) locally by using the Data Sync Utility:
- Search: helps you sync specific data in the TDP based on relevant search criteria
- Saved Searches: helps you sync predefined sets of data in the TDP
IMPORTANTKeep in mind the following limitations:
- The Data Sync Utility has a limit of 10,000 files per sync. For saved searches containing more than 10,000 files, only the first 10,000 files are downloaded (sorted by creation date, with the newest files first).
- When switching between TDP organizations, your saved searches are cleared. To avoid this issue, set a default organization in your TDP account settings.
Sync Files with a New Search
NOTEThe search functionality in the Data Sync Utility supports the same query syntax and filters as the TDP Search interface.
To set up a sync using the Data Sync Utility Search page, do the following:
- Open the Data Sync Utility. The Search page appears.
- Apply one or more of the available filter options for search. Files that match the search criteria you enter display as results in the file list. For example searches, see Search Query Examples and Results.
NOTEBy default, results are sorted by relevance instead of by upload date. However, you can organize the result set chronologically by selecting the Uploaded At column heading.
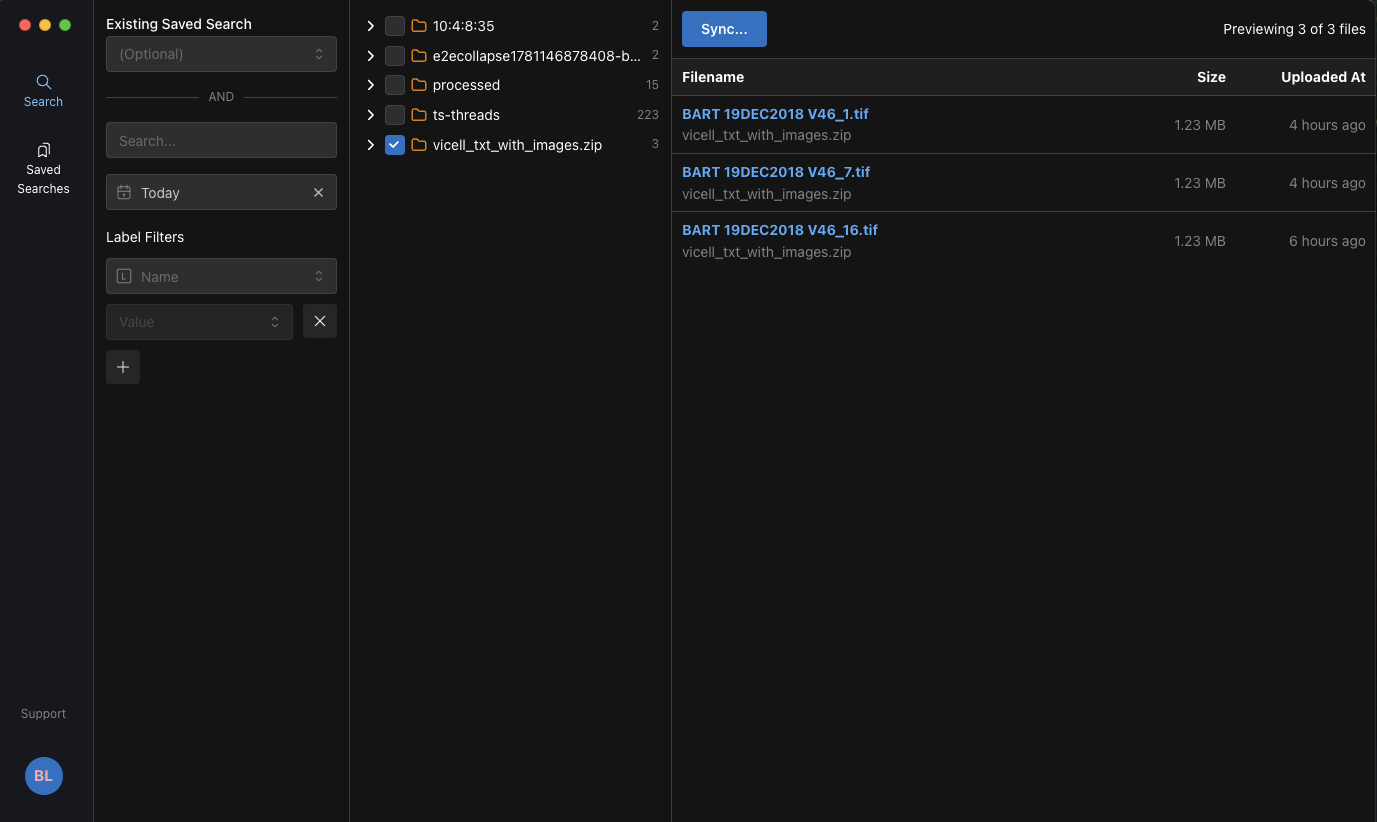
- (Optional) Check the boxes next to specific files to sync only those files. If no files are selected, all files matching the search criteria are included in the sync.
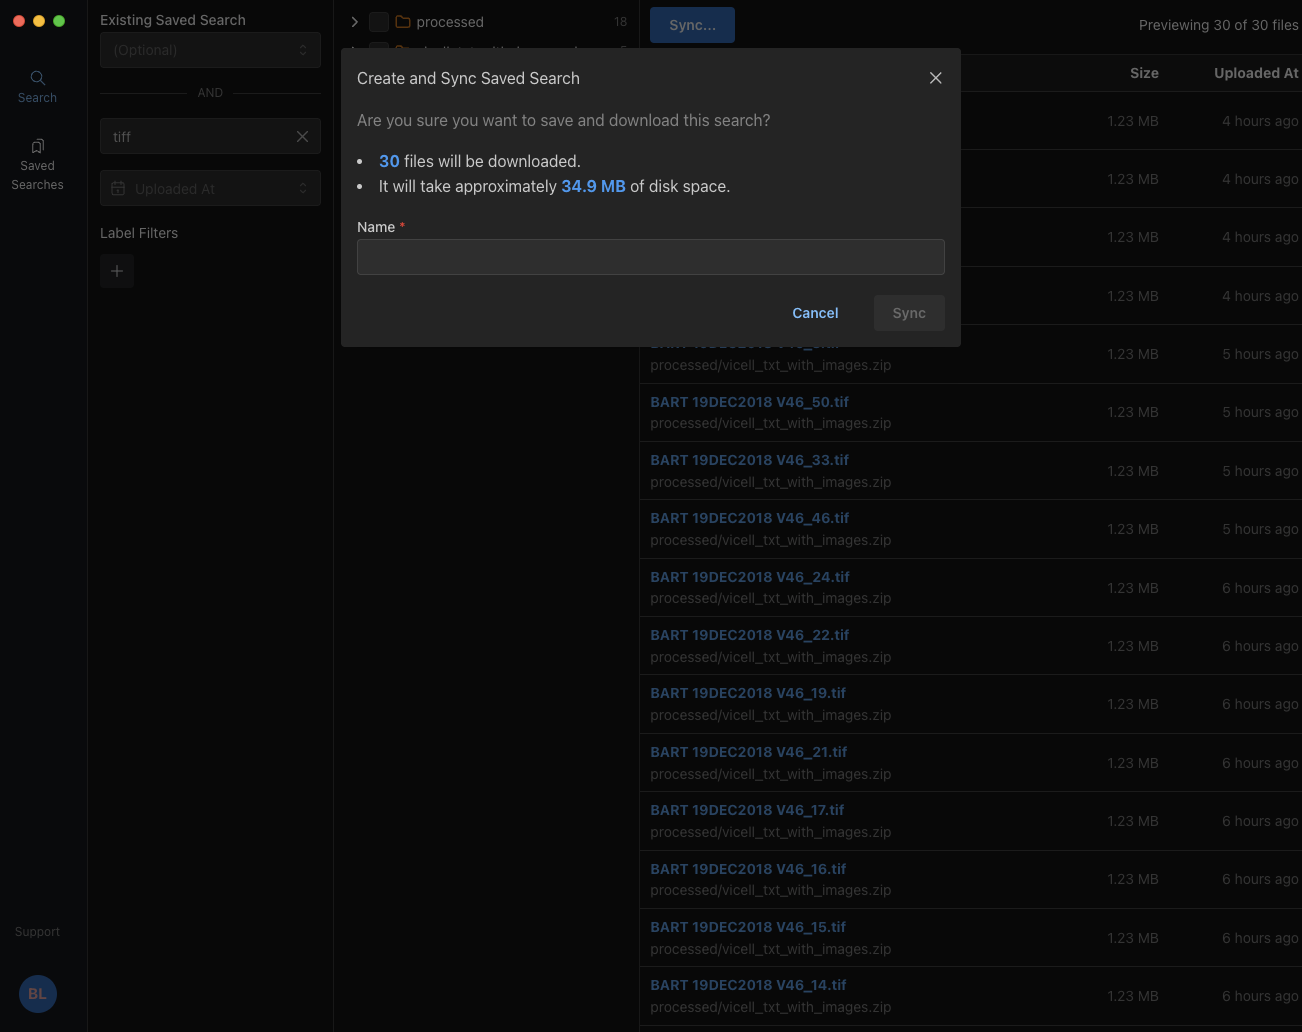
- Choose Sync. The Create and Sync Saved Search dialog appears and prompts you to confirm that you want to download the search results.
- In the dialog, do the following:
- For Name, enter a name for the new download folder. This folder is added to the
TetraSciencedirectory in your localDocumentsfolder. - Then, choose Sync. Choosing Cancel closes the dialog.
- For Name, enter a name for the new download folder. This folder is added to the
NOTETo customize the default download folder location, go to Settings and edit the Download Folder field.
Sync Files with an Existing Saved Search
To set up a sync with an existing saved search from the TDP, do the following:
- Open the Data Sync Utility. The Search page appears.
- Do one of the following:
- In the Existing Saved Search dropdown, select one of your organization's existing saved searches. Then, choose Sync.
- In the left navigation menu, choose Saved Searches. A list of your organization's saved searches appears. Then, select the menu icon for the saved search that you want to sync and choose Sync.
- A Sync Saved Search dialog appears and prompts you to confirm that you want to download the search results.
- In the Sync Saved Search dialog, choose Sync. Choosing Cancel closes the dialog. Synced files are automatically saved in your local
Documentsfolder under aTetraSciencedirectory.
NOTETo customize the default download folder location, go to Settings and edit the Download Folder field.
Download-Only Sync Mode
Starting in v2.0.0, you can sync a saved search in download-only mode. Download-only mode retrieves files from TDP without uploading local changes back. This is useful for scenarios such as deprecating centralized network drives in favor of cloud storage, or when users only need to consume data without contributing changes.
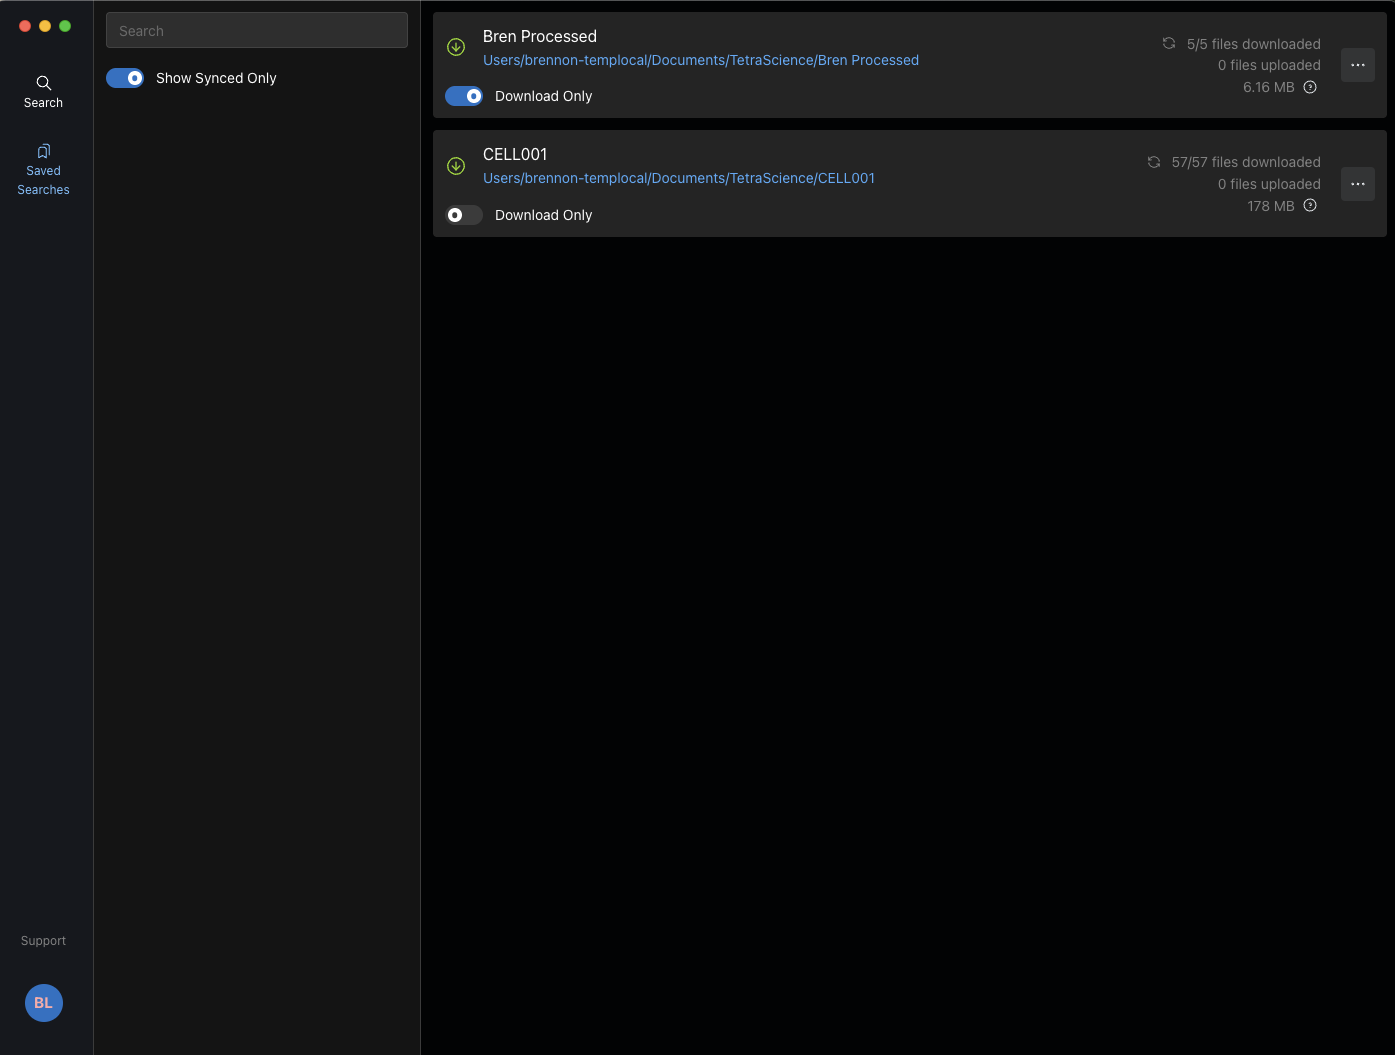
To enable download-only mode for a saved search, select the Download Only toggle on the saved search card on the Saved Searches page.
NOTEIf your administrator has enabled the global download-only mode through the organization's managed settings (
"globalDownloadOnly": trueindefault-settings.json), all saved searches are forced into download-only mode regardless of individual toggle settings. For more information, see Configure Org-Level Settings.
Upload Files
The Data Sync Utility automatically uploads new or modified files from your local, synced folders.
IMPORTANTFiles 200 MB or larger are skipped and aren't uploaded.
After you save new files to a synced folder, the Data Sync Utility does the following:
- File detection: scans synced folders for new or modified files
- Staging: marks files with newer timestamps than the last sync as staged
- Processing: processes staged files at one-minute intervals
- Checksum verification: prevents duplicate uploads through
checksumvalue comparison (supports SHA-256, MD5, and SHA-1 checksums) - Metadata handling: attaches common metadata to uploaded files, including operating system metadata
Operating System Metadata on Uploads
Starting in v2.0.0, uploaded files include the following additional operating system metadata as file metadata fields in TDP:
osCreatedTime— the file creation timestamp from the local operating systemosLastModifiedTime— the file's last modified timestamp from the local operating systemosSizeOnDisk— the file size on the local diskosFilePath— the full local file path from which the file was uploadedosType— the local operating system typeosVersion— the local operating system versionosCreatedUser— the user who created the file on the local operating system (included when the operating system user can be resolved)
The DSU automatically registers these fields in TDP attribute management on login. These metadata fields are visible on the file's details page in TDP under the file's metadata section.
NOTEThe Data Sync Utility automatically ignores temporary files, partial downloads, and system files. For more information, see Ignored Files.
Merge Conflicts
To prevent local file changes from being overwritten, the Data Sync Utility flags local files that have file conflicts against what is in the TDP. The most common scenario is editing a synced file locally while that file has had a new version uploaded to TDP.
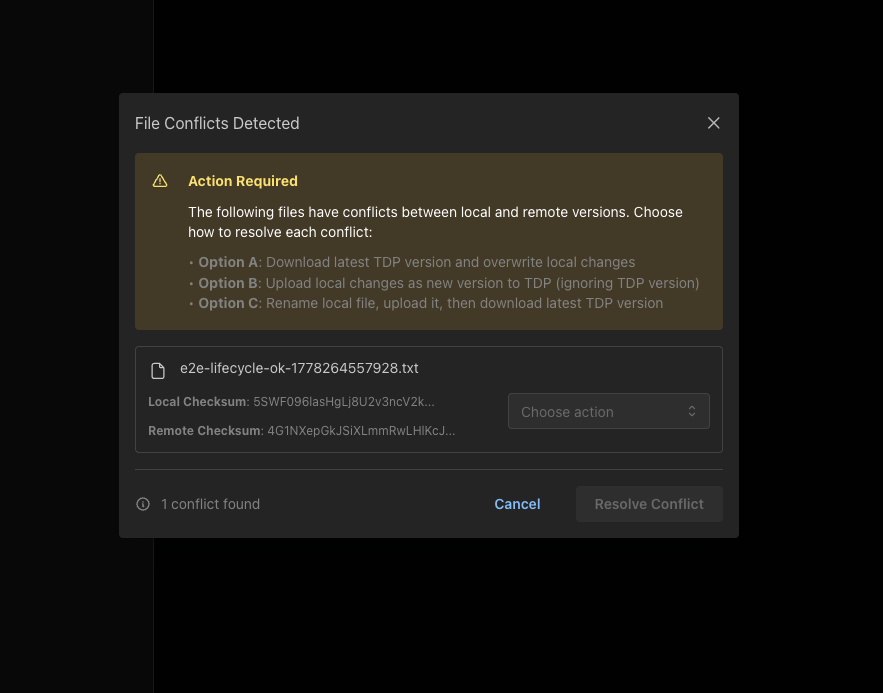
When the auto-sync detects a file conflict, an operating system-level notification displays along with an indicator on the saved search showing that a conflict was identified.
There are three options for resolving a merge conflict:
- Option A: Download the latest TDP version and overwrite local file changes.
- Option B: Upload the local file changes to TDP as a new version (ignoring the TDP version).
- Option C: Rename the local file, upload it as a new file, and then download the latest TDP version.
Manage Data Syncs
You can use the Saved Searches page in your local Data Sync Utility user interface to monitor sync status, pause and resume syncs, or delete a sync.
To open the Saved Searches page, open the Data Sync Utility, and then in the left navigation menu, choose Saved Searches.
Monitor Sync Status
Each sync's download and upload progress is displayed on the Saved Searches page. Each card shows the number of files downloaded and uploaded, and the total size on disk.
Pause and Resume Syncs
To pause or resume a sync, select the menu icon for the saved search that you want to either pause or resume. Then, do one of the following:
- To pause a running sync, select Disable Auto-Sync.
- To resume a paused sync, select Enable Auto-Sync.
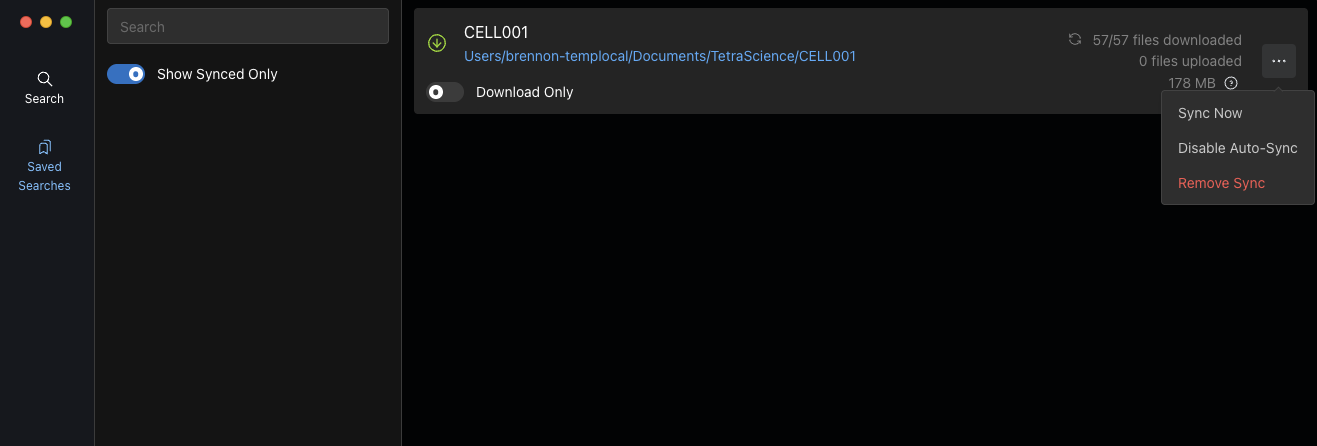
Delete a Sync
To delete a sync, select the menu icon for the sync that you want to delete. Then, choose Remove Sync.
View Synced Data in the TDP
After syncing your local data, you can access it from the TDP Search page by doing any of the following:
- Search by file name or content in the Search bar.
- Open the saved search associated with your sync.
- In the Filter pane, apply one of the following filters:
- For the Label filter, enter
ts-analysis:true(this label is automatically added to all synced files) - For the Source Type filter, enter
sourceType:data-sync-utility
- For the Label filter, enter
To view information about a specific file, including its file journey, see View the File Details Page.
Folder Paths
The Data Sync Utility includes special handling for folder paths to ensure compatibility with analysis software.
Path Shortening
For compatibility with analysis software that can't handle long file paths (more than 260 characters), the utility implements automatic path shortening by doing the following:
- Trivial folder detection: identifies folders that only contain a single subfolder
- Path condensing: condenses intermediate trivial folders into a 16-character hash
- Hash marking: surrounds hashes with tilde (
~) characters for identification
Shortened Path Example
Original: TetraScience/Downloads/Nested/DSU/DSU-1/example.xlsx

Shortened: TetraScience/~xxxx~/DSU-1/example.xlsx
Manage Local Paths
You can use the local Data Sync Utility user interface to view the paths of current syncs, change a sync's path, and move files to a new path.
View Sync Paths
Each sync's path is displayed on the main page of the Data Sync Utility user interface.
Change a Sync's Path
To change a sync's path, first delete the existing sync. Then, set up a new sync that includes the updated destination folder path.
Settings
To access the Settings page, select the settings icon in the left navigation menu. The Settings page appears.
On the Settings page, you can adjust any of the following configurations.
NOTESome settings may be locked by your organization's administrator through managed settings (
default-settings.json). If a setting appears greyed out or can't be changed, contact your IT administrator. For more information, see Configure Org-Level Settings.
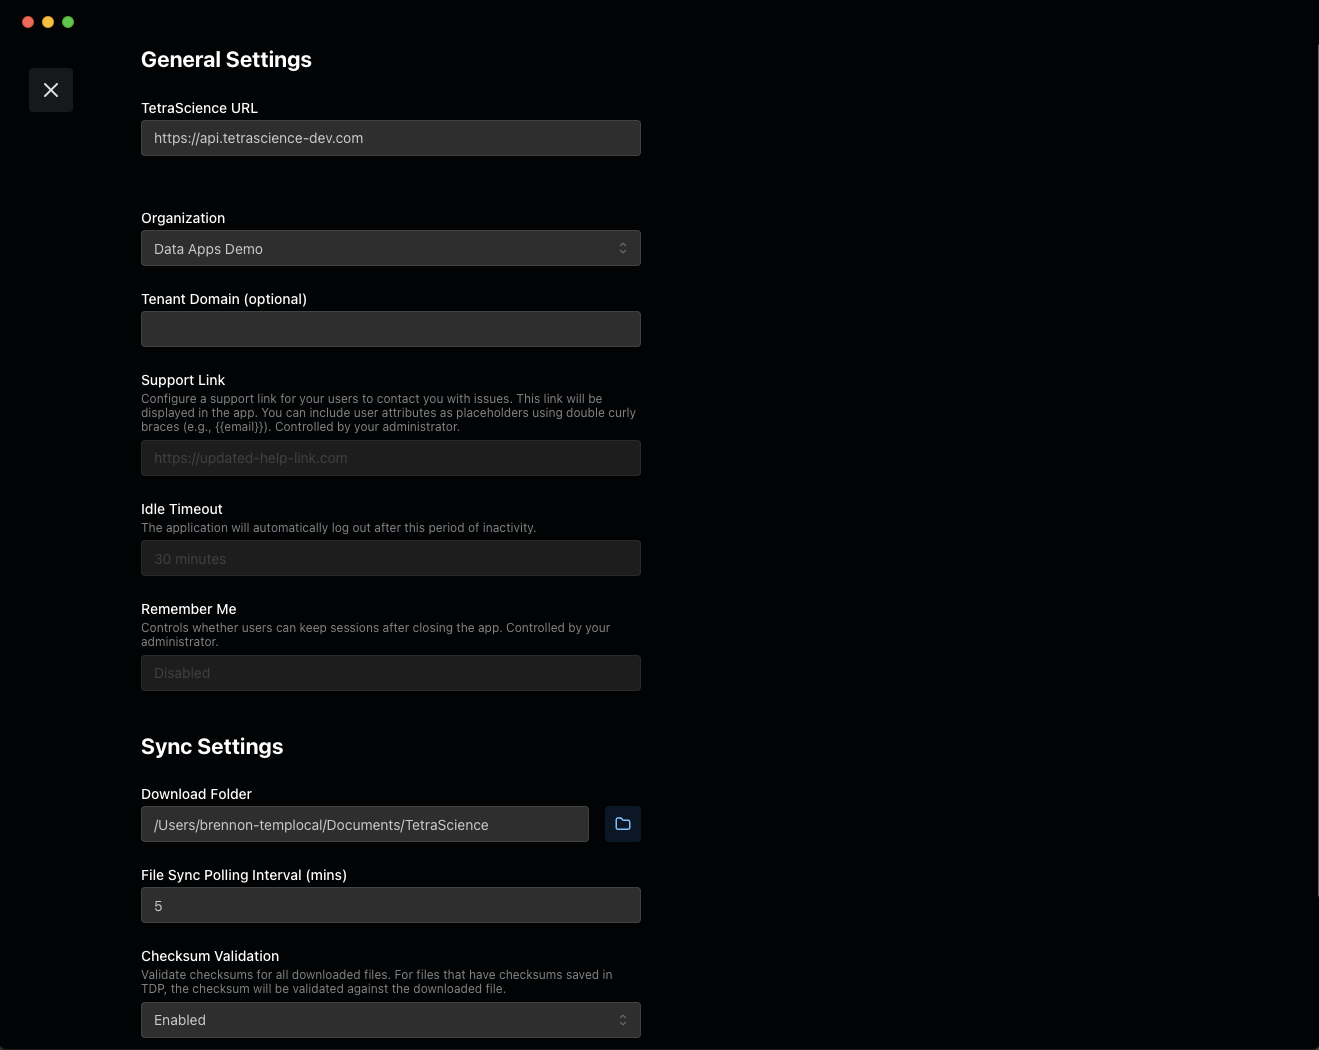
General Settings
| Setting | Description |
|---|---|
| TetraScience URL | Your TDP server URL (for example, tdp.tetrascience-demo.com) |
| Organization | Your TDP organization name |
| Tenant Domain (optional) | Your TDP tenant path (for example, <companyname>-sso) |
| Support Link | Optional support link for your users to contact you with issues. This link is displayed in the app. You can include user attributes as placeholders by using double curly braces (for example, {{email}}). |
Sync Settings
| Setting | Description |
|---|---|
| Download Folder | Default destination folder path for sync downloads |
| File Sync Polling Interval (mins) | How frequently the Data Sync Utility checks the TDP for new or updated files related to each active sync |
| Checksum Validation | Calculates validated checksums for all downloaded files. For files that have checksums saved in the TDP, the checksum is validated against the downloaded file. Supports SHA-256, MD5, and SHA-1 checksums. |
| Automatically Shorten File Paths | For folders that contain only one folder, file paths are automatically shortened. For example, TetraScience/Downloads/Nested/DSU/DSU-1/example.xlsx is shortened to TetraScience/~xxxx~/DSU-1/example.xlsx. |
FAQs
The following are answers to frequently asked questions about the Data Sync Utility.
How do I recover an experiment back to an instrument?
To recover experiment data for use on an instrument, do the following:
- Find the experiment data in the TDP by using the Search page in the Data Sync Utility.
- Create a sync to download the files to a local folder.
- Once downloaded, transfer the files to your instrument by using the instrument's import function. For specific instrument formats, consult your instrument documentation for import procedures.
How do I retrieve an old method from an instrument?
To retrieve an old method that was previously uploaded from an instrument, do the following:
- On the Search page in the Data Sync Utility, filter your search by the following:
- The instrument name (if labeled)
- File type that's specific to method files
- Date range when the method was active
- Create a sync to download the method files to a local folder.
- Import the method file into your instrument software by using the software's import function.
How do I select a set of data from an instrument for analysis?
To select specific instrument data for analysis, do the following:
- On the Search page in the Data Sync Utility, filter your search by the following:
- Instrument name or ID
- Experiment type
- Date range
- Specific metadata values
- Create a synced saved search that includes the filters you applied.
- Open the files in your analysis software after they've downloaded.
How do I set up an automatic data sync from an instrument for new, incoming data?
To automatically sync new data from an instrument, do the following:
- Make sure that the instrument can upload data to the TDP by using the appropriate Tetra Integration.
- On the Search page in the Data Sync Utility, create a new search that uses a relative time filter (for example, Last 7 days).
- Create a synced saved search that includes the filters you applied.
- In Settings, set the File Sync Polling Interval setting to your desired interval (minimum 5 minutes). The utility automatically downloads new files that match your search criteria to your synced local folder.
If I delete a record off my local drive, will it be deleted from the Tetra Data Platform as part of a sync?
No. The Data Sync Utility does not currently delete any records on Tetra Data Platform. Additionally, it uses the user permissions configured in the platform to govern data operations.
Troubleshooting
Windows OneDrive Syncs Won't Work
When syncing files to OneDrive on Windows, file size counts may be unreliable because of OneDrive's file virtualization.
Resolution
- Use a local folder outside of OneDrive
- Ensure files are fully downloaded from OneDrive before synchronization
- Use the Always keep on this device option in OneDrive for synced folders
Saved Searches are Cleared When Switching Organizations
When switching between organizations, your saved searches are cleared.
Resolution
- Set a default organization in your TDP account settings.
- Create organization-specific saved searches.
Login Won't Work After TDP Role Change
When role changes are made to your TDP user account, the changes don't immediately take effect in the Data Sync Utility.
Resolution
Log out of the Data Sync Utility. Then, log back in for the permissions changes to take effect.
Documentation Feedback
Do you have questions about our documentation or suggestions for how we can improve it? Start a discussion in TetraConnect Hub. For access, see Access the TetraConnect Hub.
NOTEFeedback isn't part of the official TetraScience product documentation. TetraScience doesn't warrant or make any guarantees about the feedback provided, including its accuracy, relevance, or reliability. All feedback is subject to the terms set forth in the TetraConnect Hub Community Guidelines.
Updated about 1 month ago