

Scientist Experience User Guide
Learn how to use the Scientist Experience to find, preview, analyze, share, and track scientific data in Tetra.
This guide shows how to use the Scientist Experience. The Scientist Experience provides a simplified Tetra interface designed for scientists who need to find, analyze, share, and track scientific data without needing to navigate IT Admin functionality.
NOTEThe Scientist Experience is separately versioned and deployed independently from Tetra. It is activated for your organization through the Artifact Version Manager.
Prerequisites
The Scientist Experience requires the following:
- An active Tetra account running TDP v4.5.0 or later
- The Artifact Version Manager deployed and activated for your organization, and the Scientific UX artifact activated through the Artifact Version Manager. For setup instructions, see Activate the Scientist Experience Through Artifact Version Manager.
Choose Your Workspace
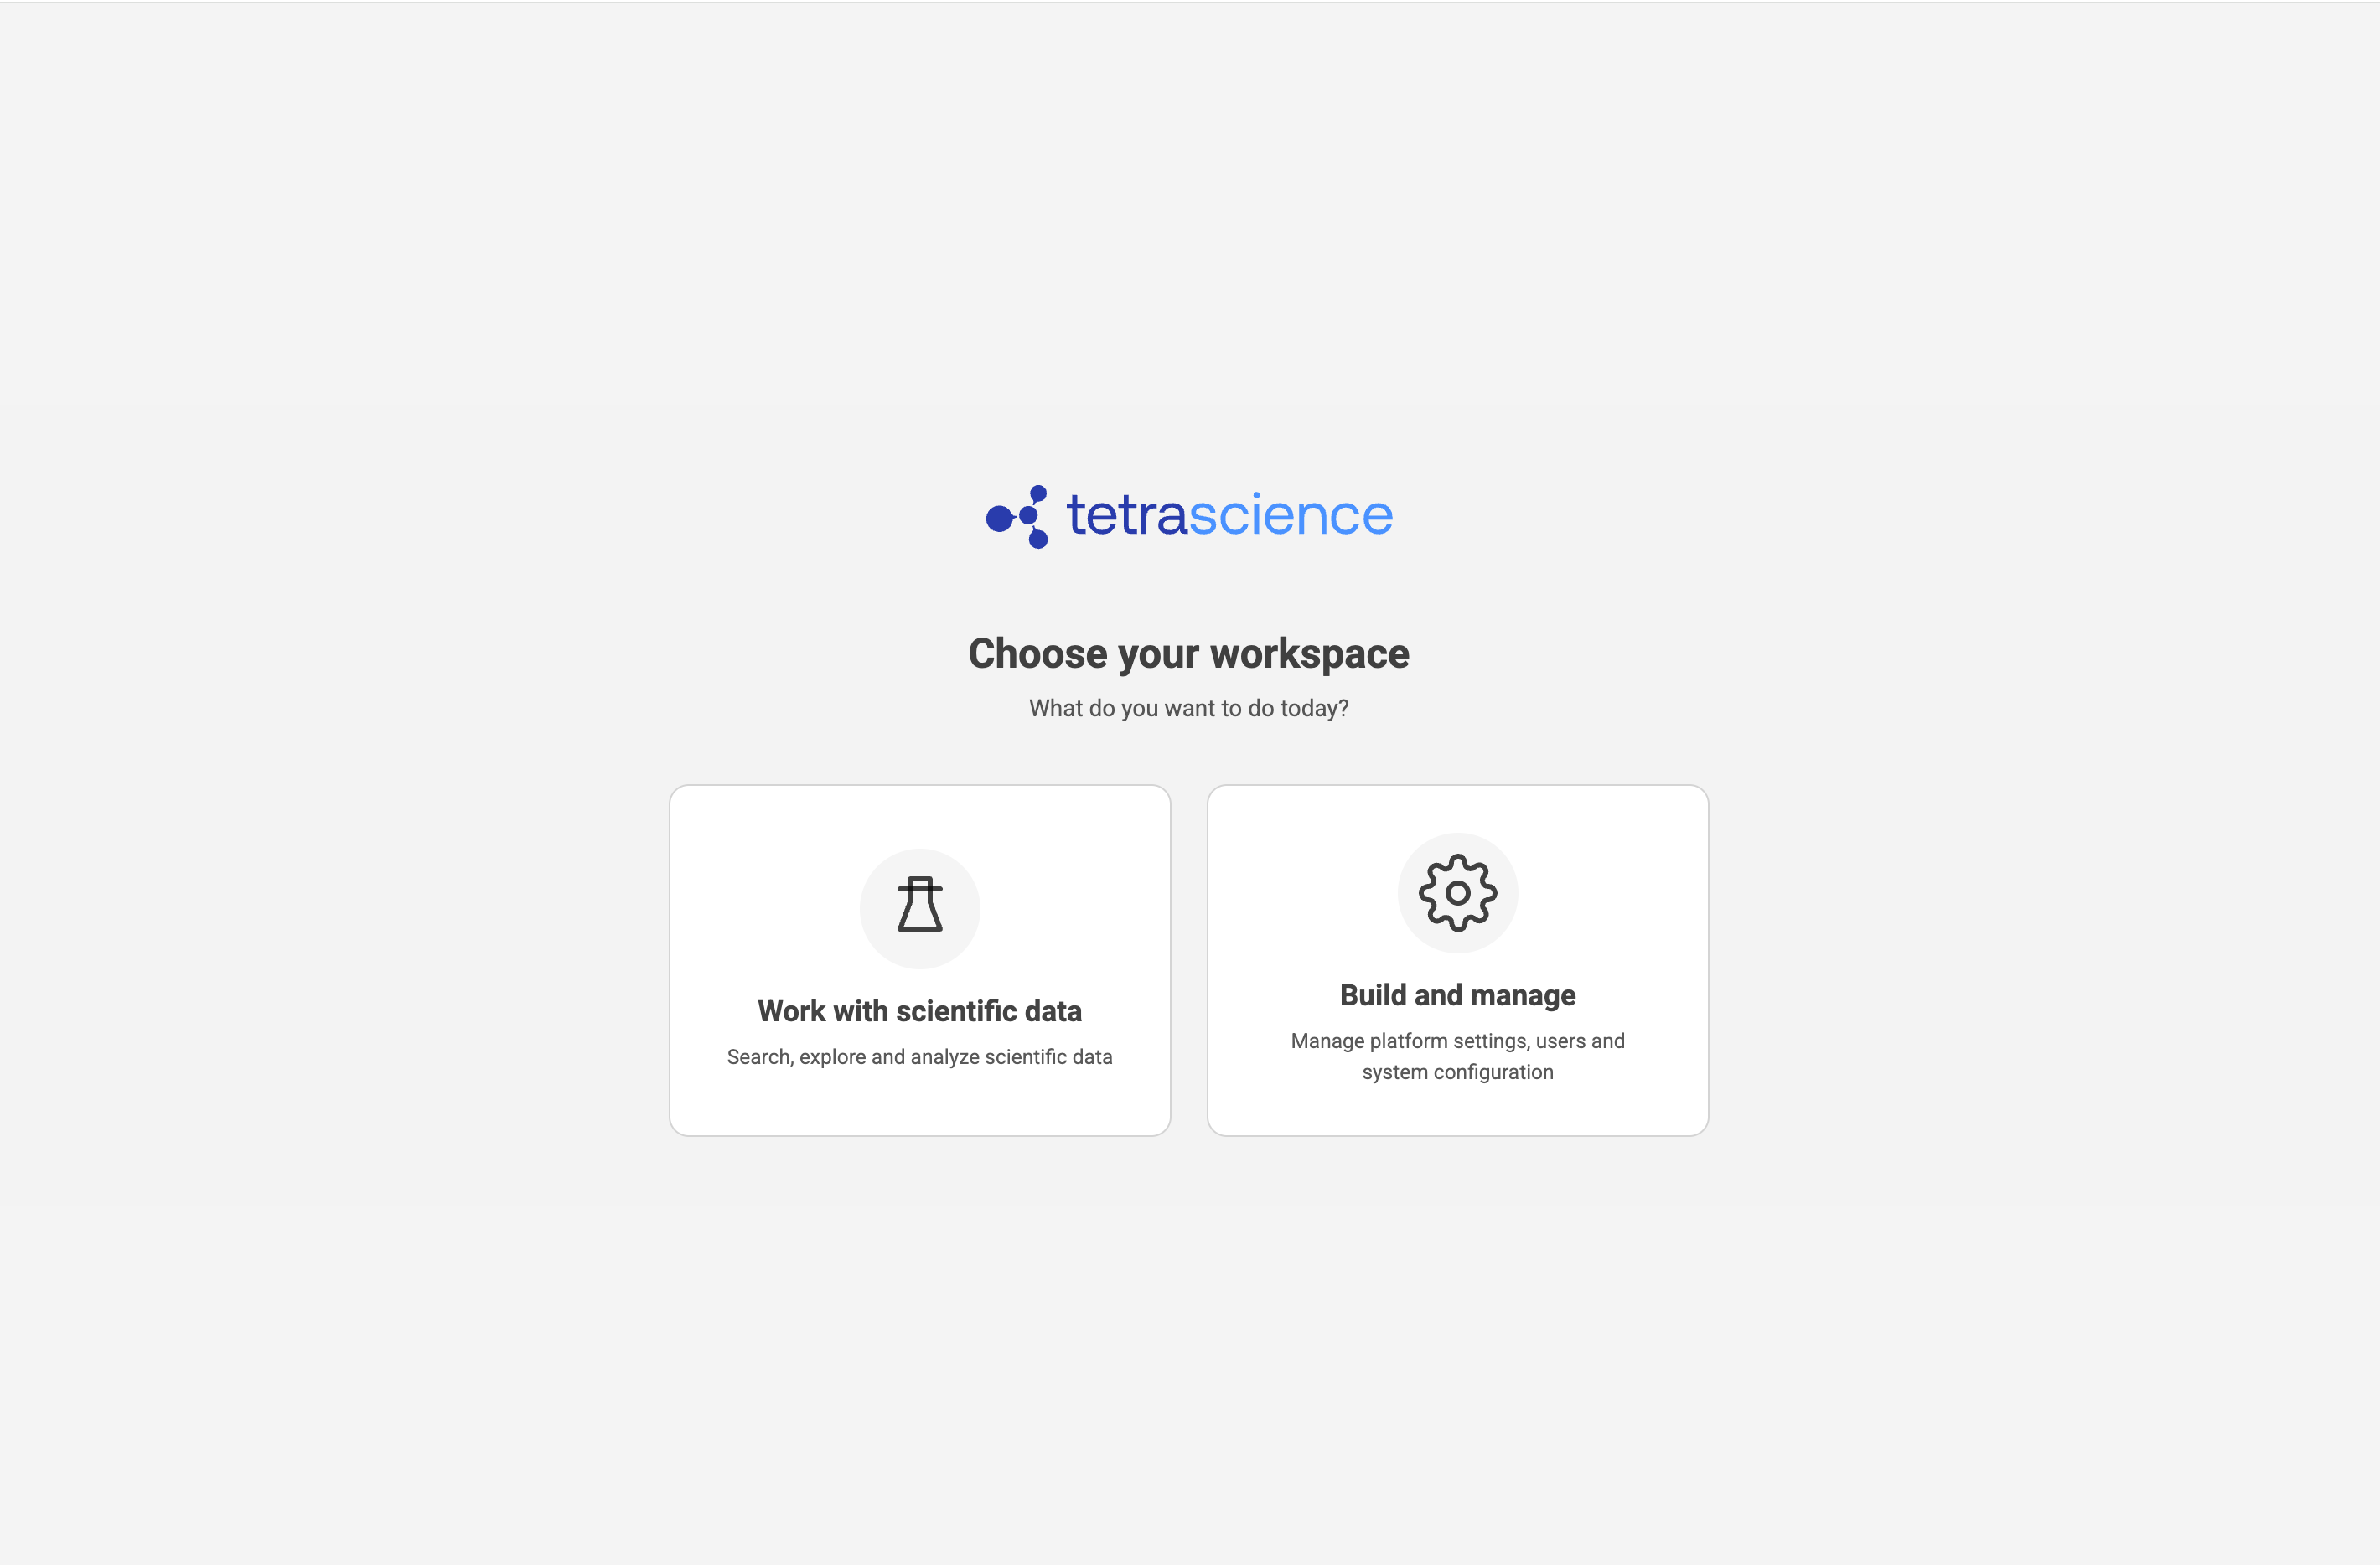
After the Scientist Experience is activated for your organization, the Choose your workspace page appears after you first sign in. This page lets you choose how you want to interact with Tetra by default when you sign in.
- Work with scientific data — (Scientist mode) Select this option to explore and analyze scientific data using the Scientist Experience.
- Build and manage — (IT mode) Select this option to manage platform settings, users, and system configuration using the full Tetra builder interface that includes all platform capabilities.
Switch Workspaces
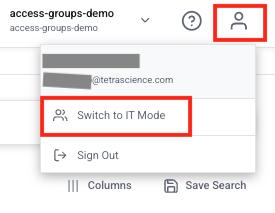
After you make your default workspace selection, you can switch between Scientist and IT modes at any time without signing out by selecting the upper right My Account icon.
Switch Between Light and Dark Mode
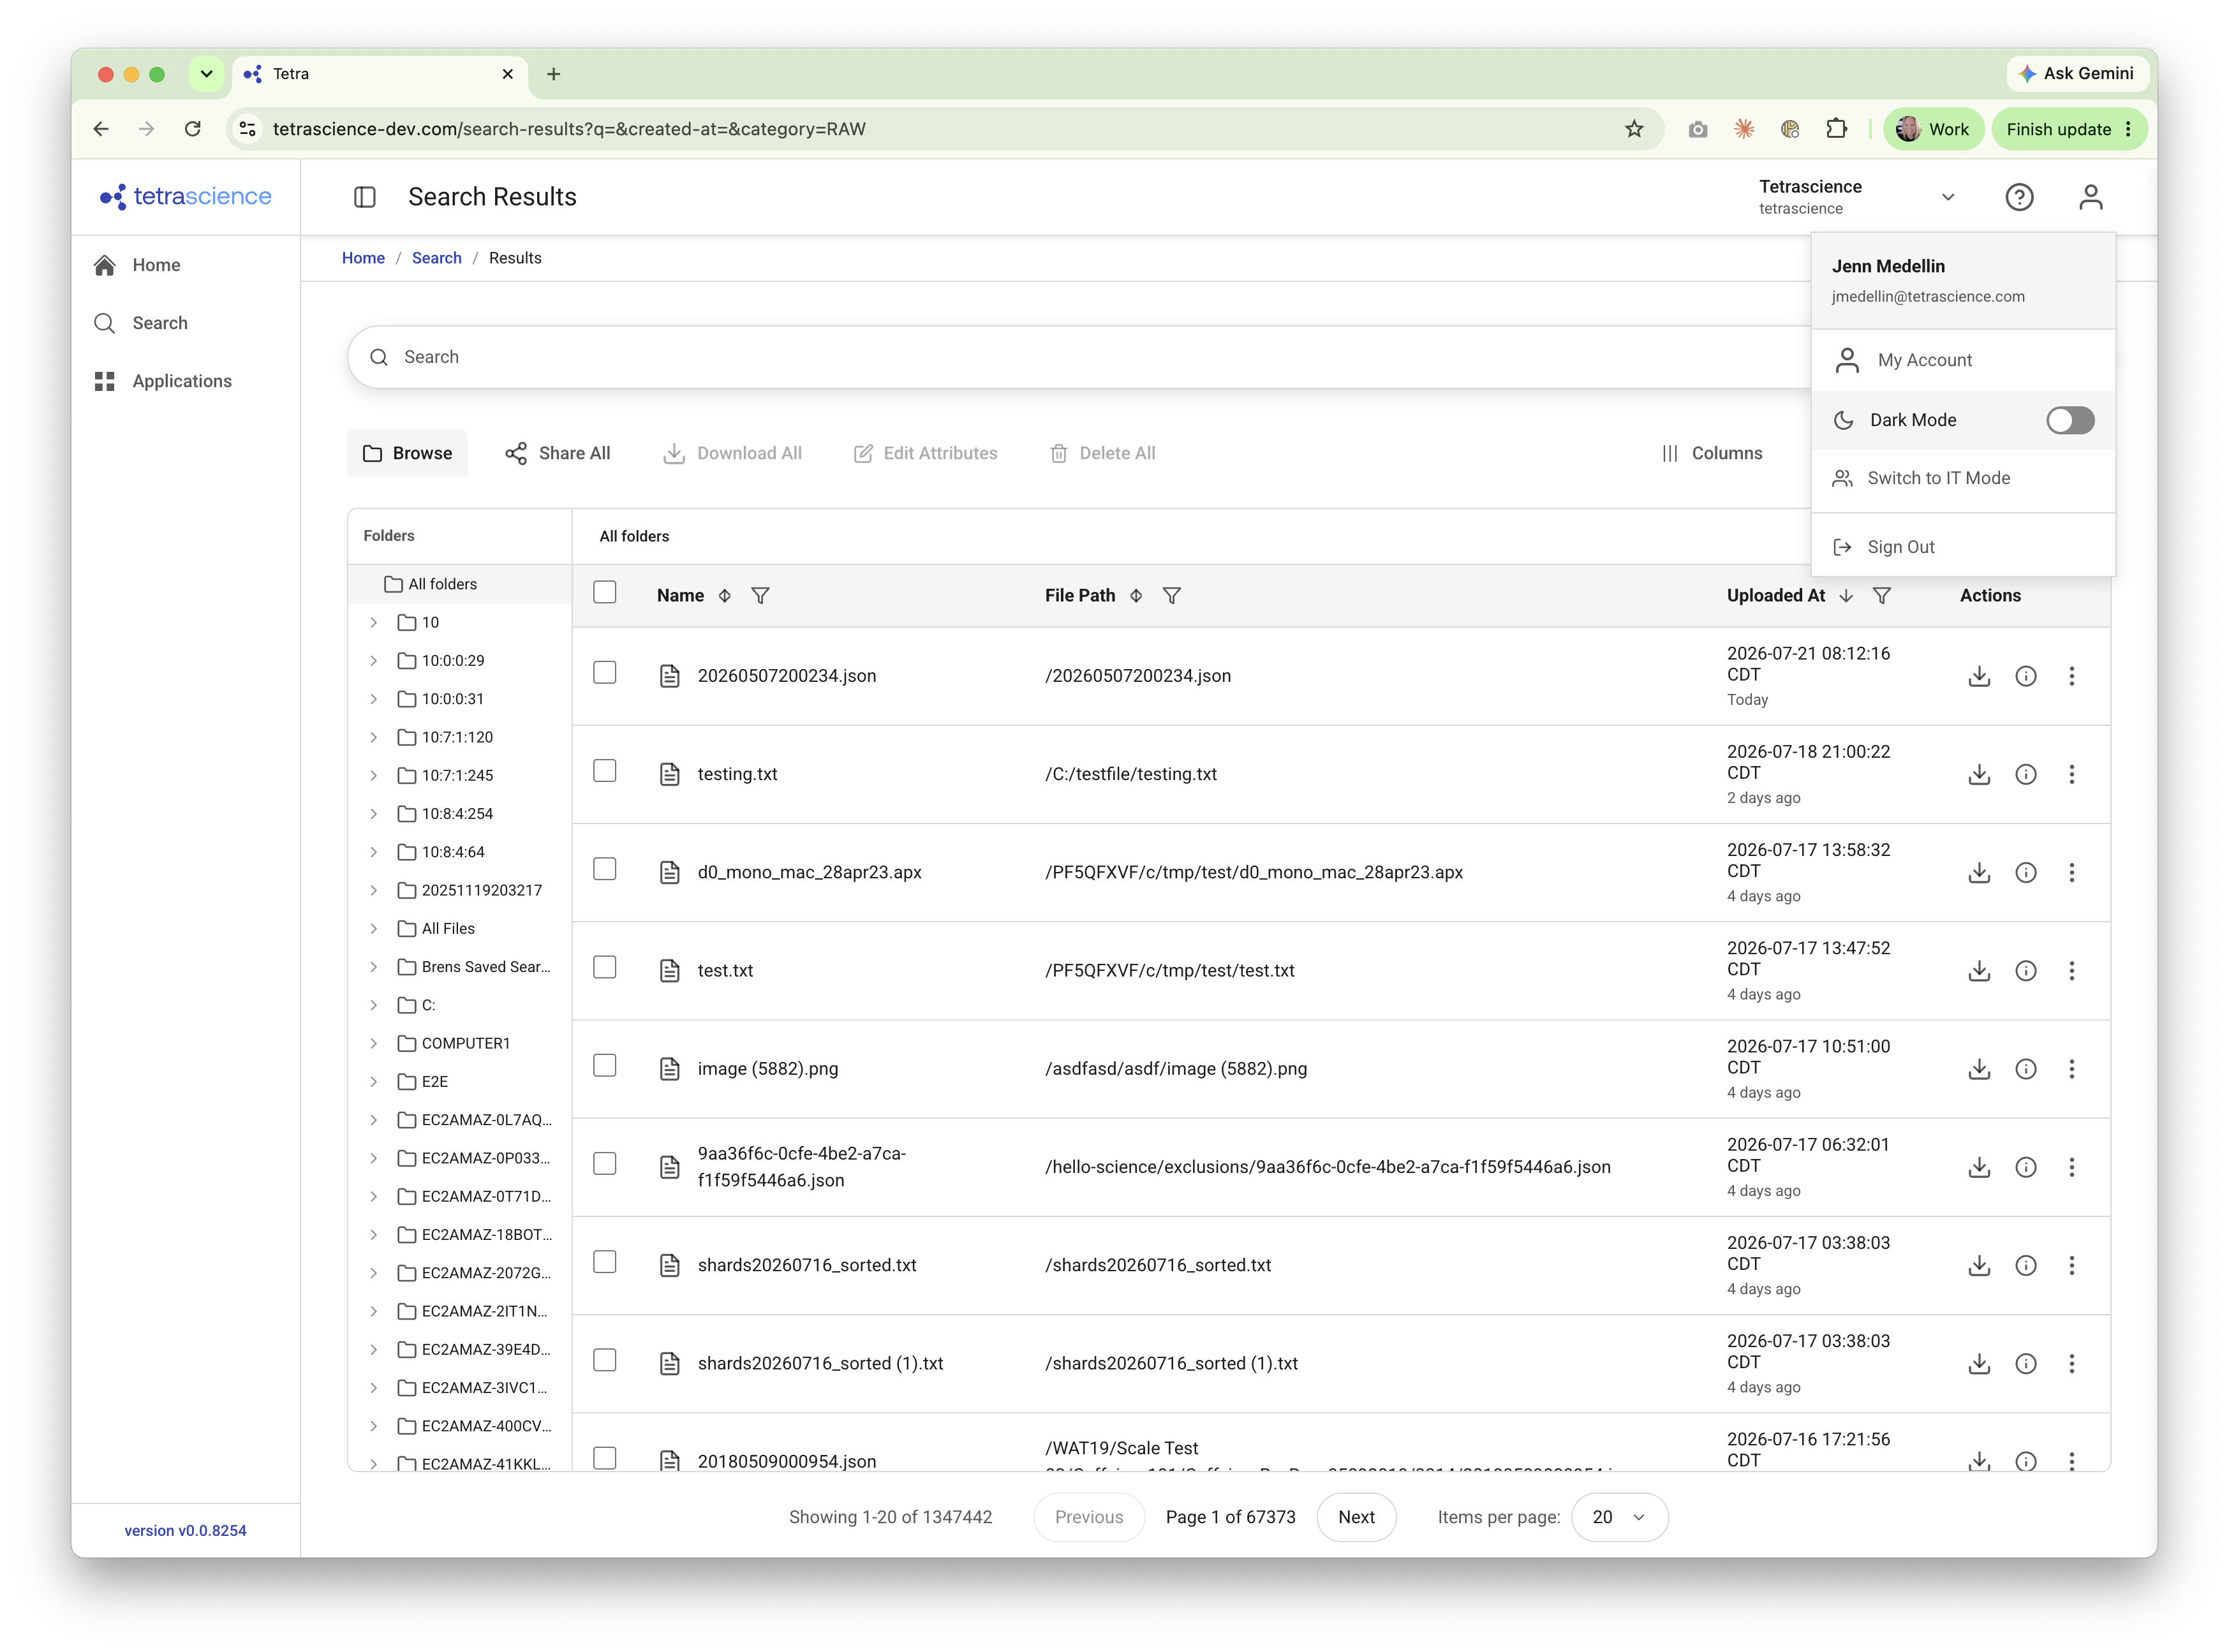
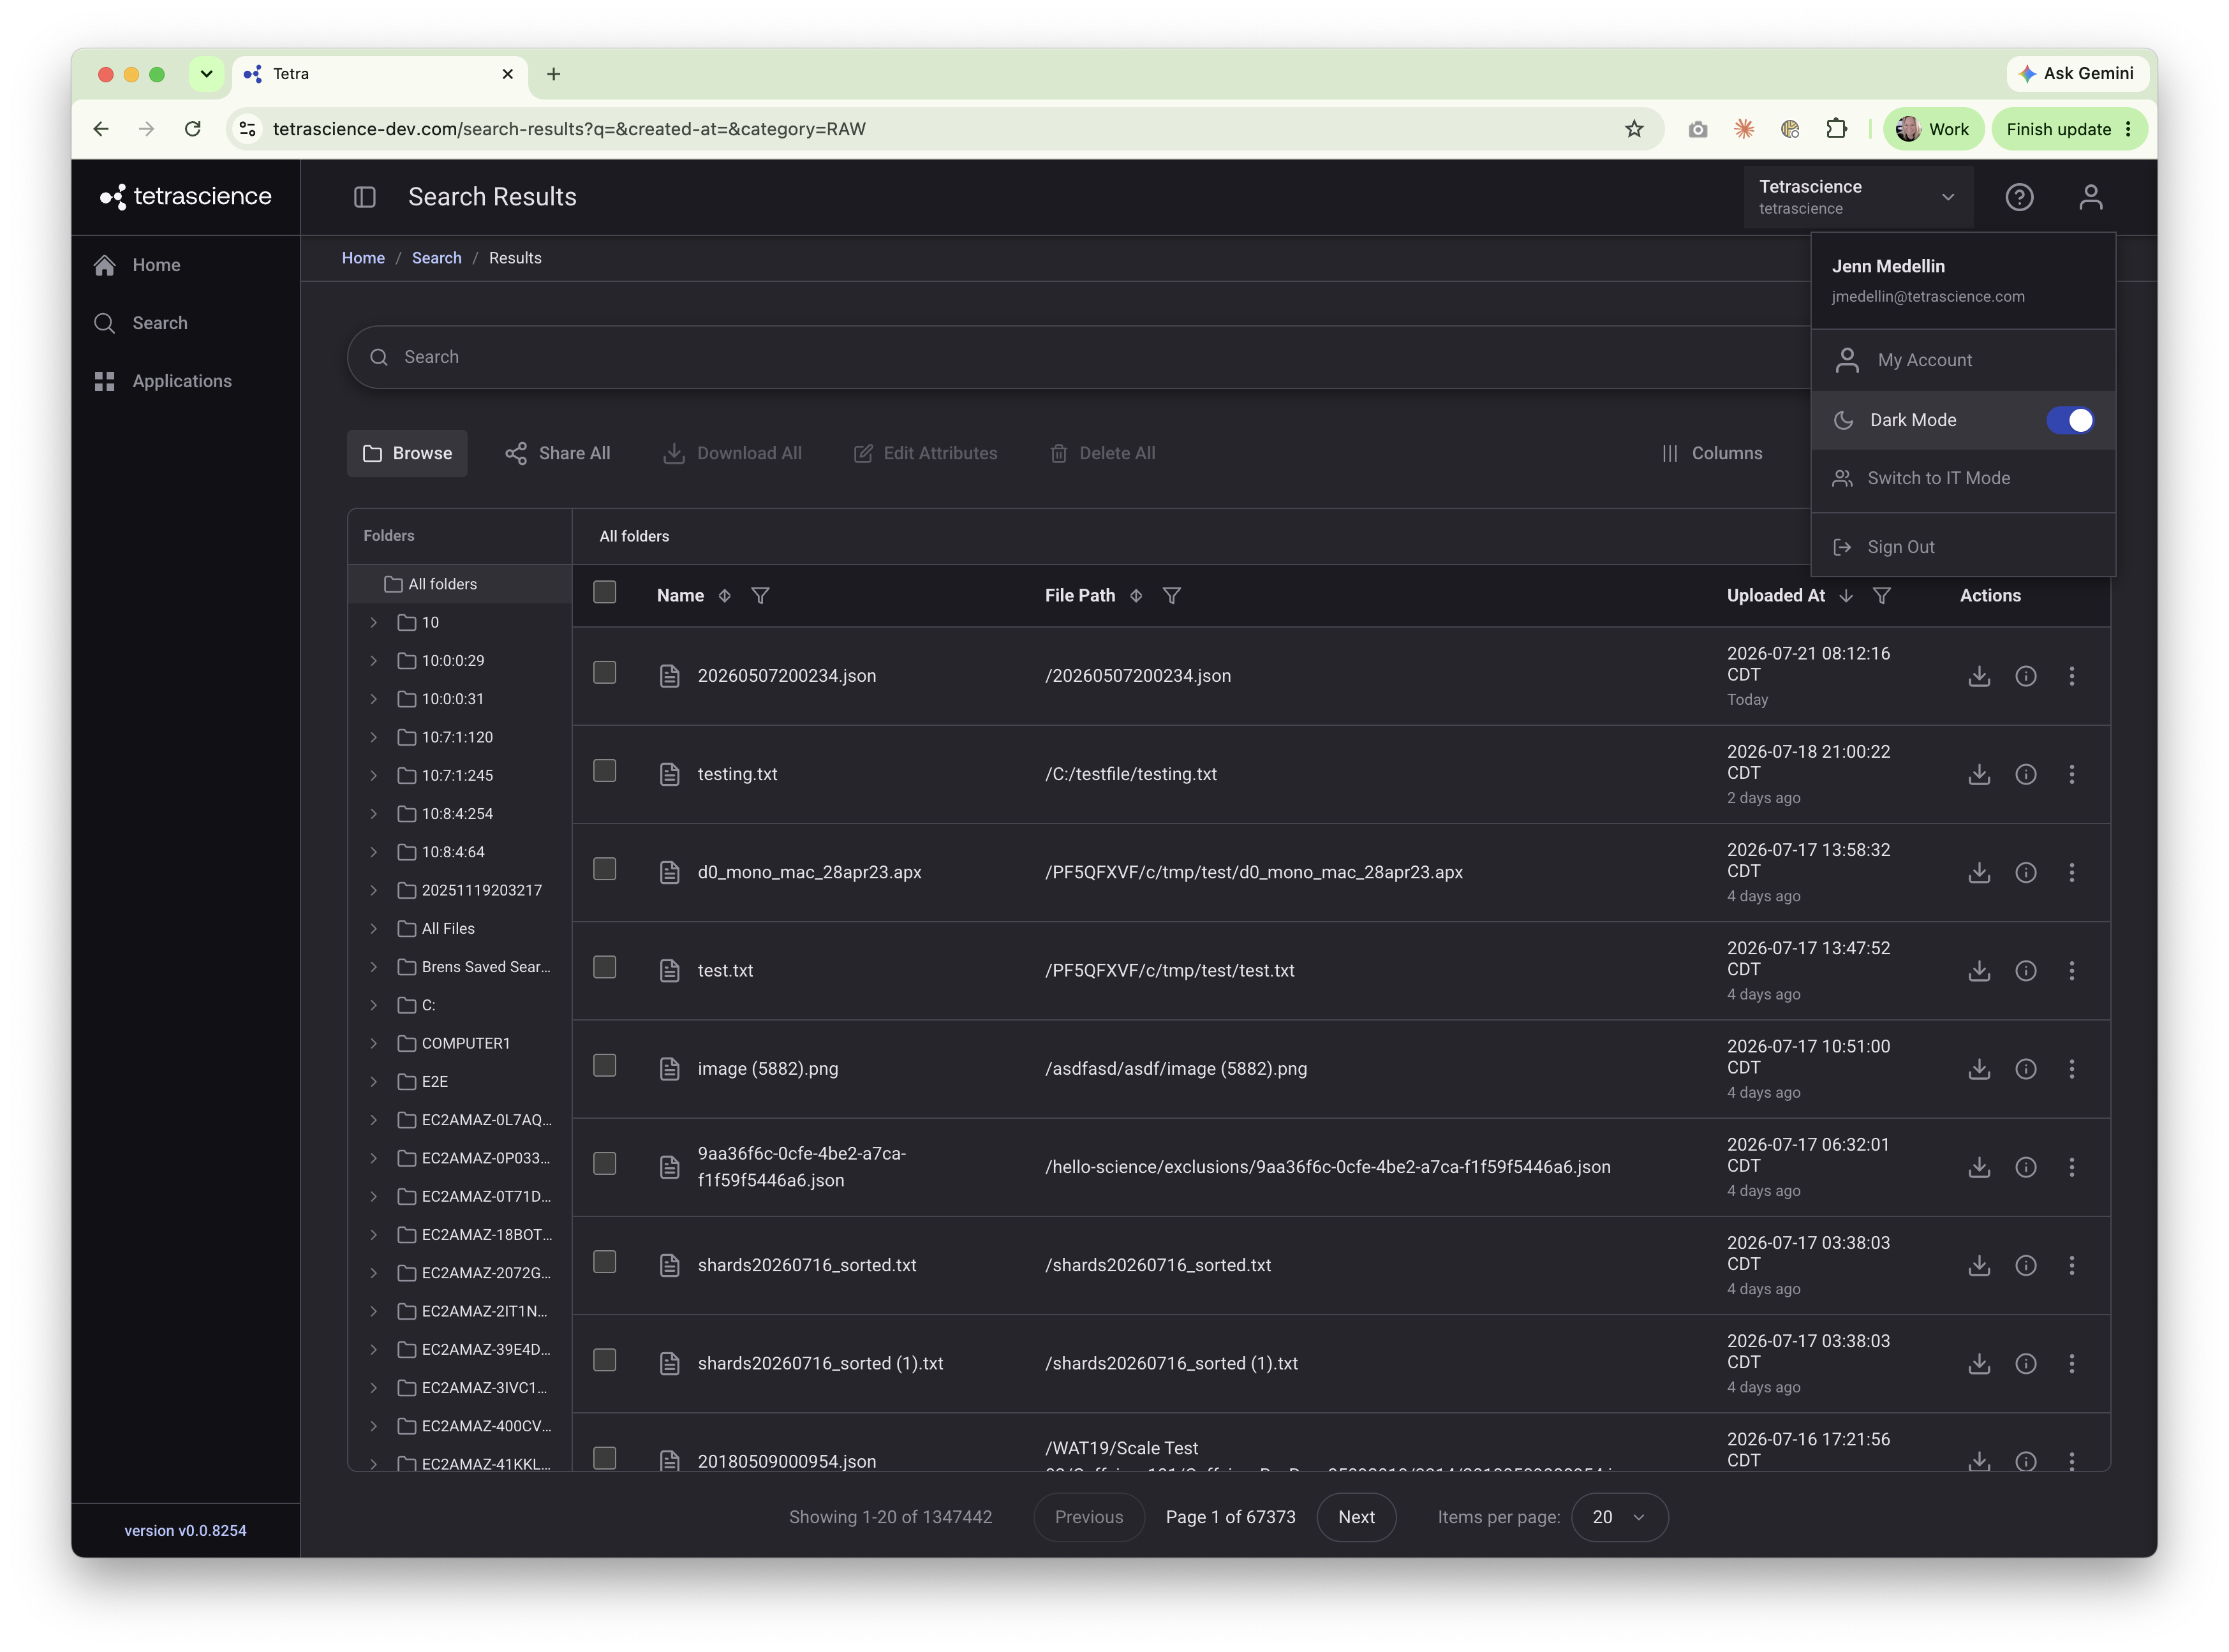
The Scientist Experience supports both light and dark display modes. By default, it inherits the light or dark setting from your operating system, and you can override it at any time.
To change the display mode, select the upper right My Account icon and choose your preferred mode.
Find Data
Run a Search
To search for specific data, do the following:
- In the left navigation menu, choose Search. The Search page appears.
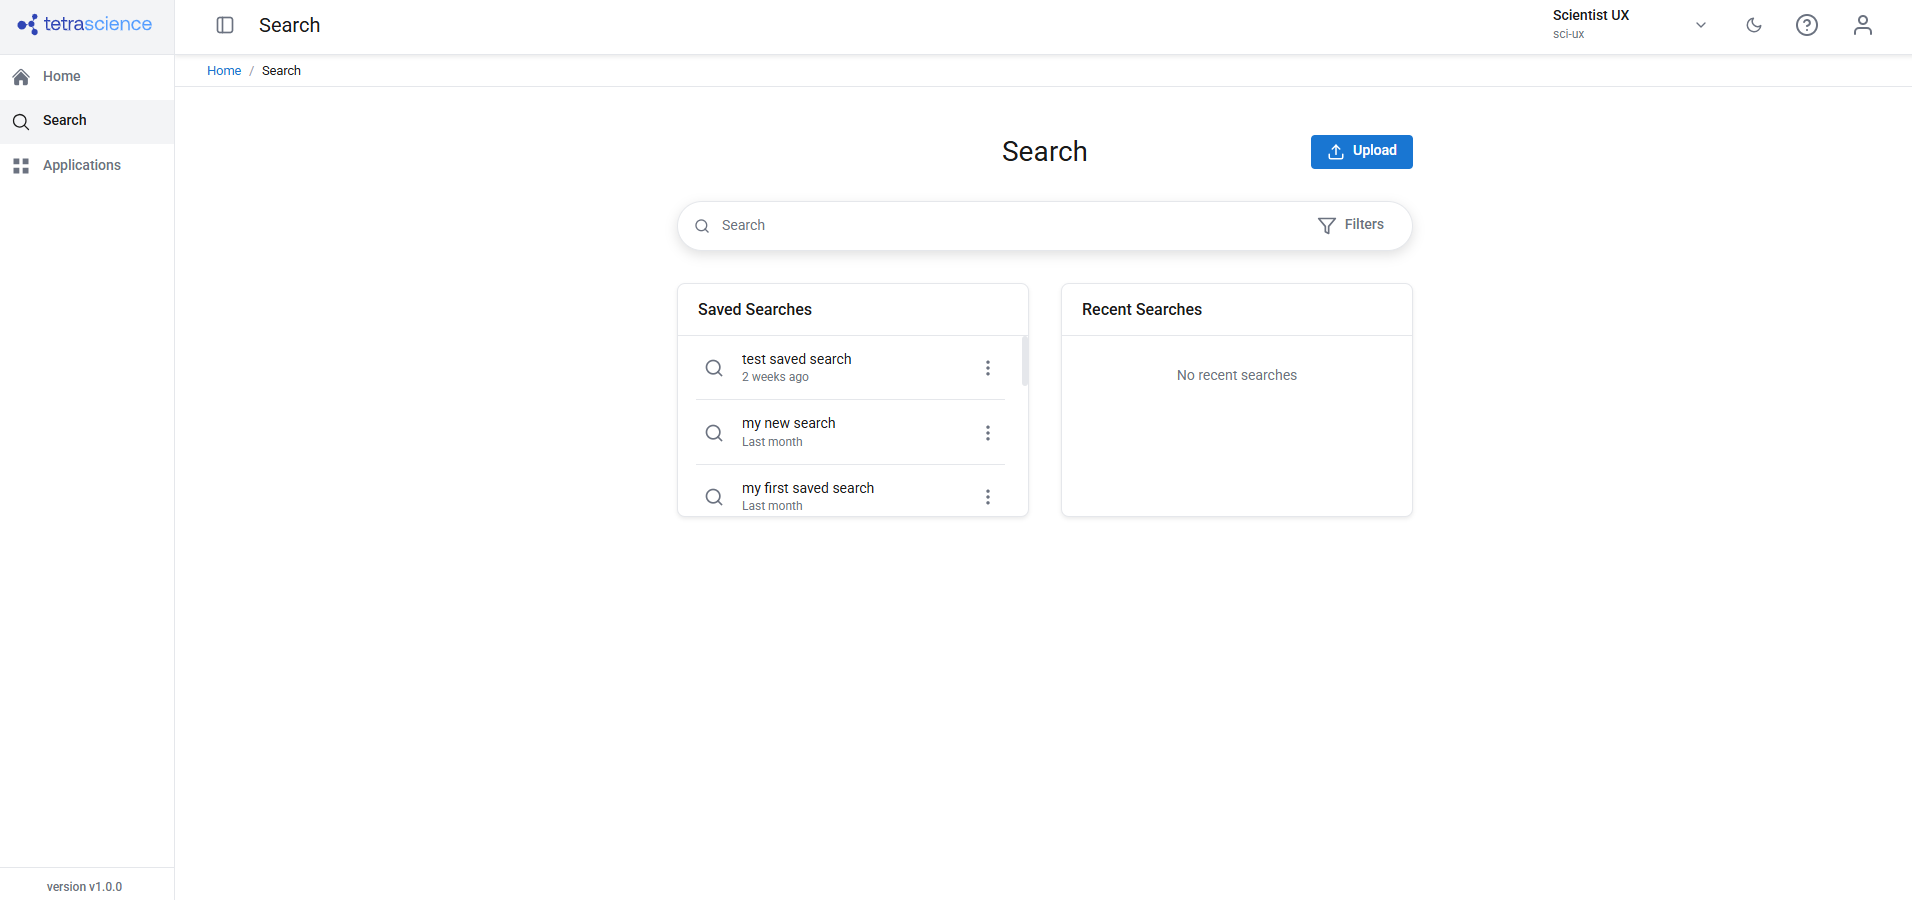
- Enter your search terms in the search bar.
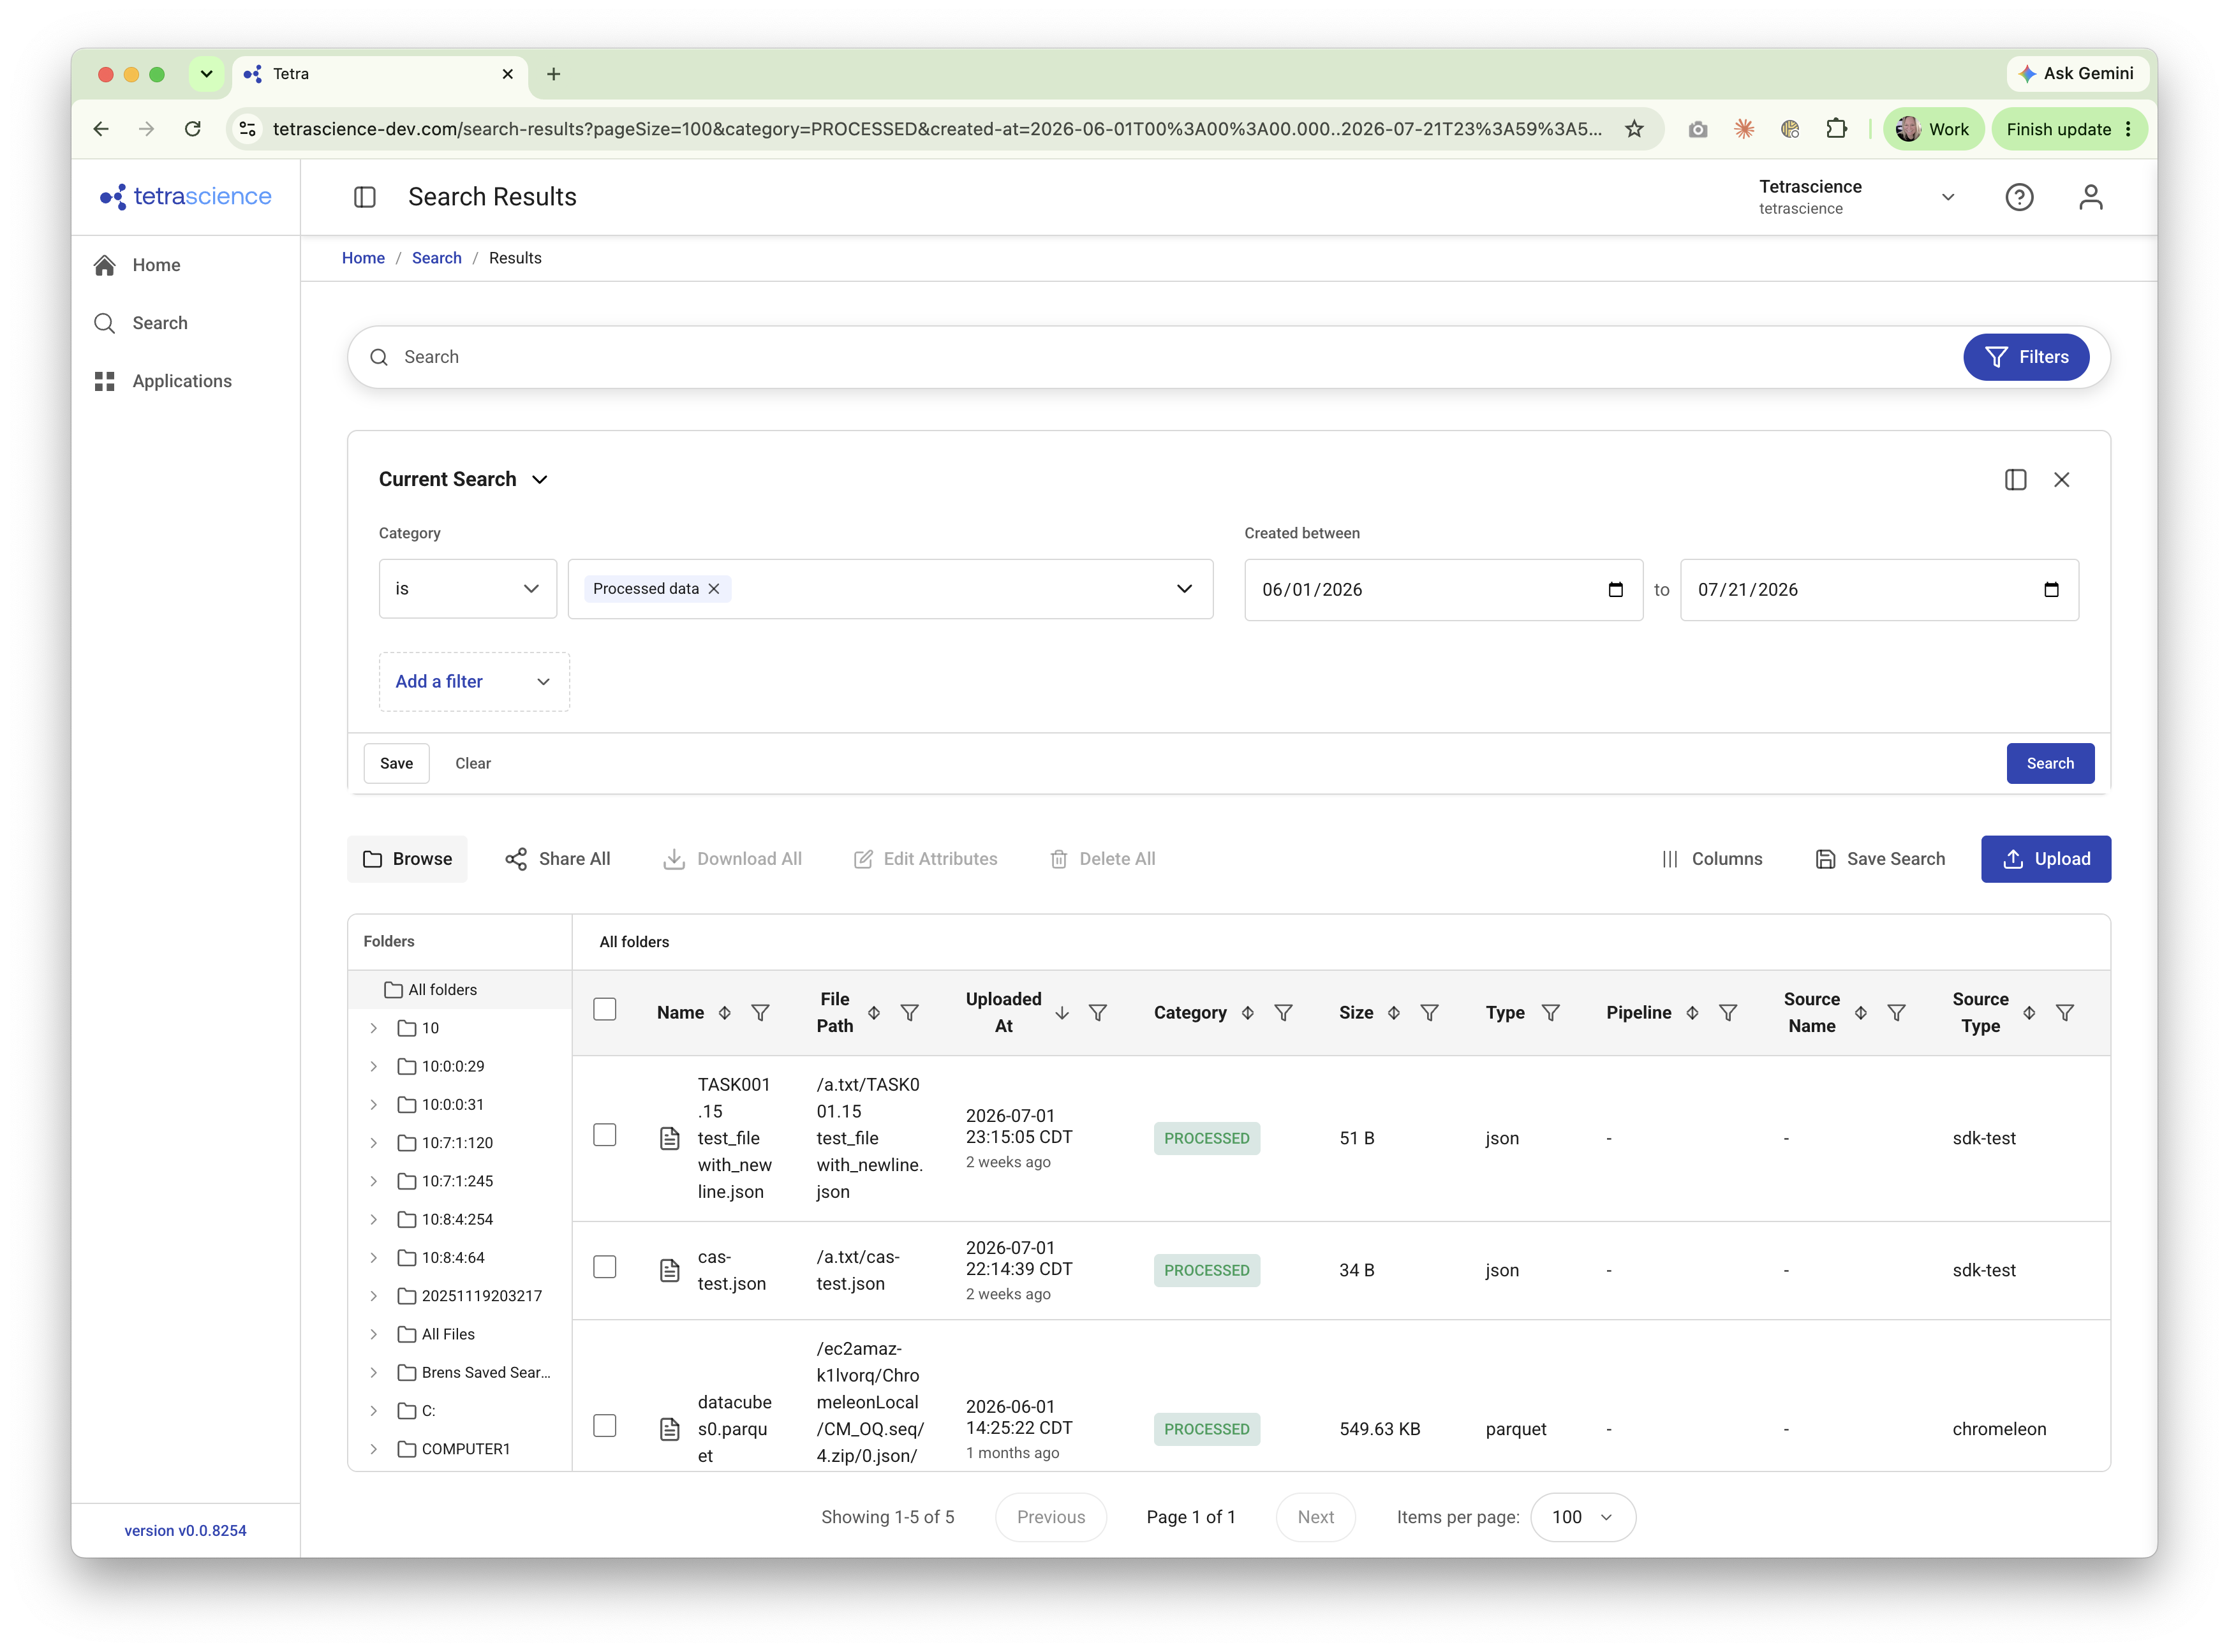
- (Optional) Apply one or more Filters to narrow your results.
- Press Enter. The search results appear.
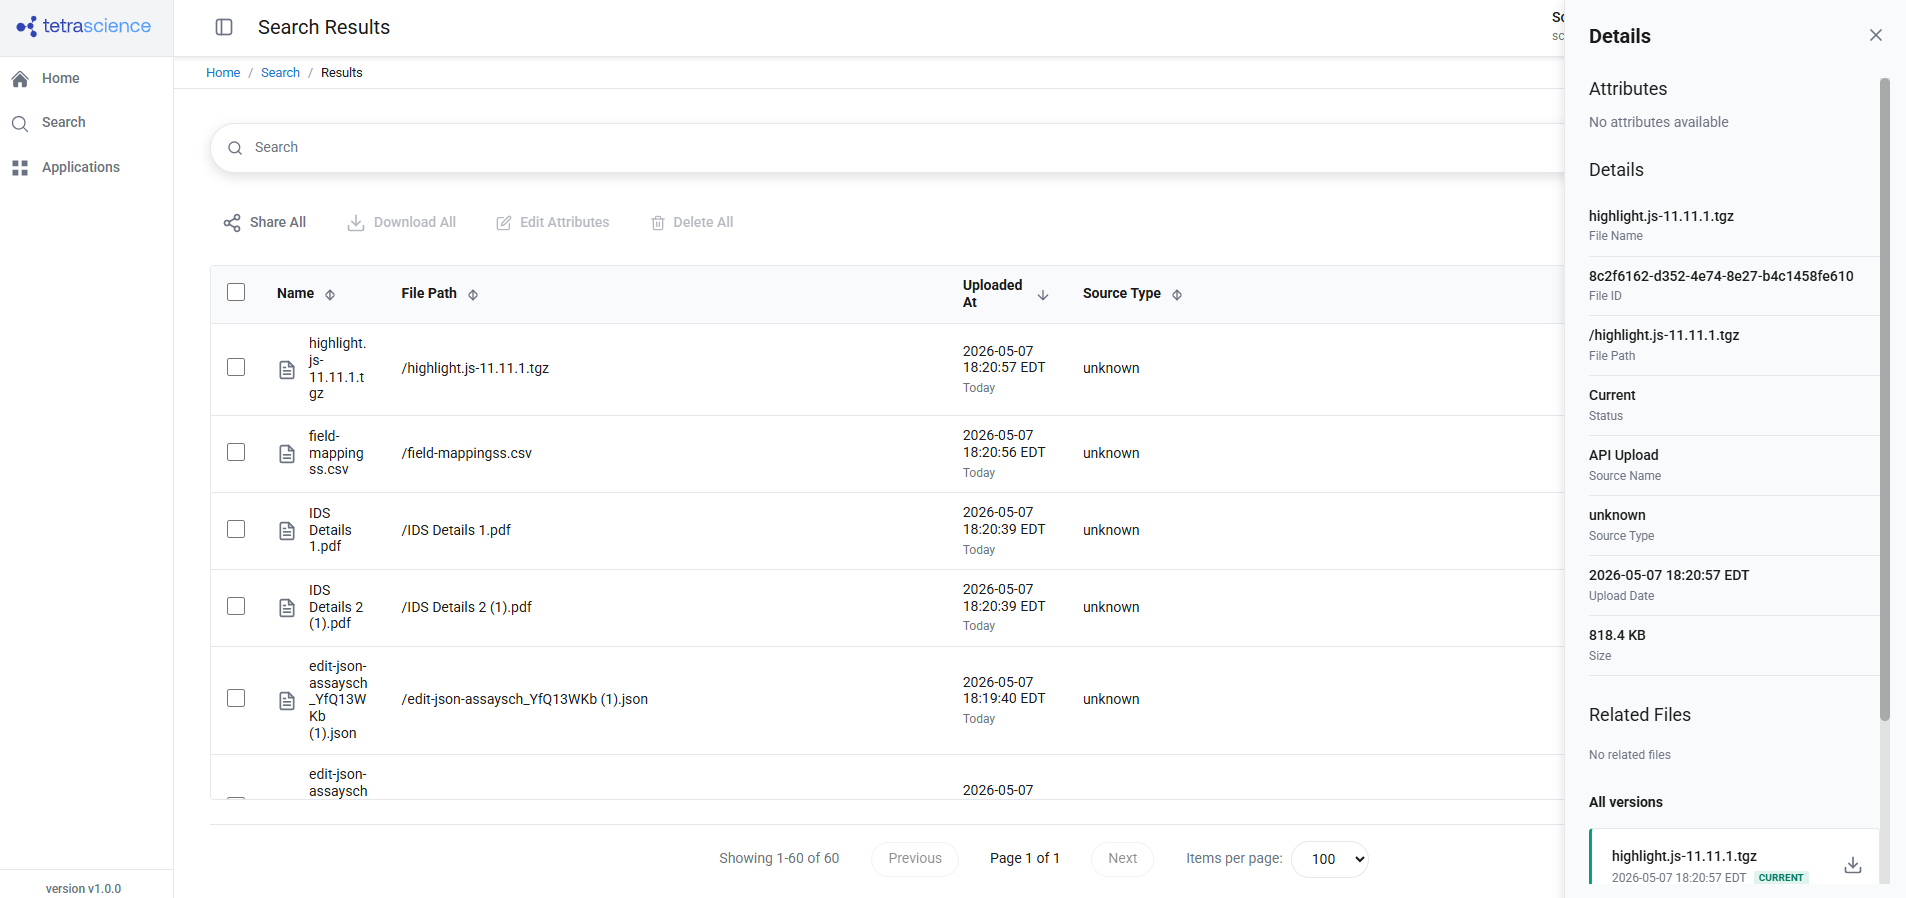
Create and Apply Filters
To create filters to narrow your search results, do the following:
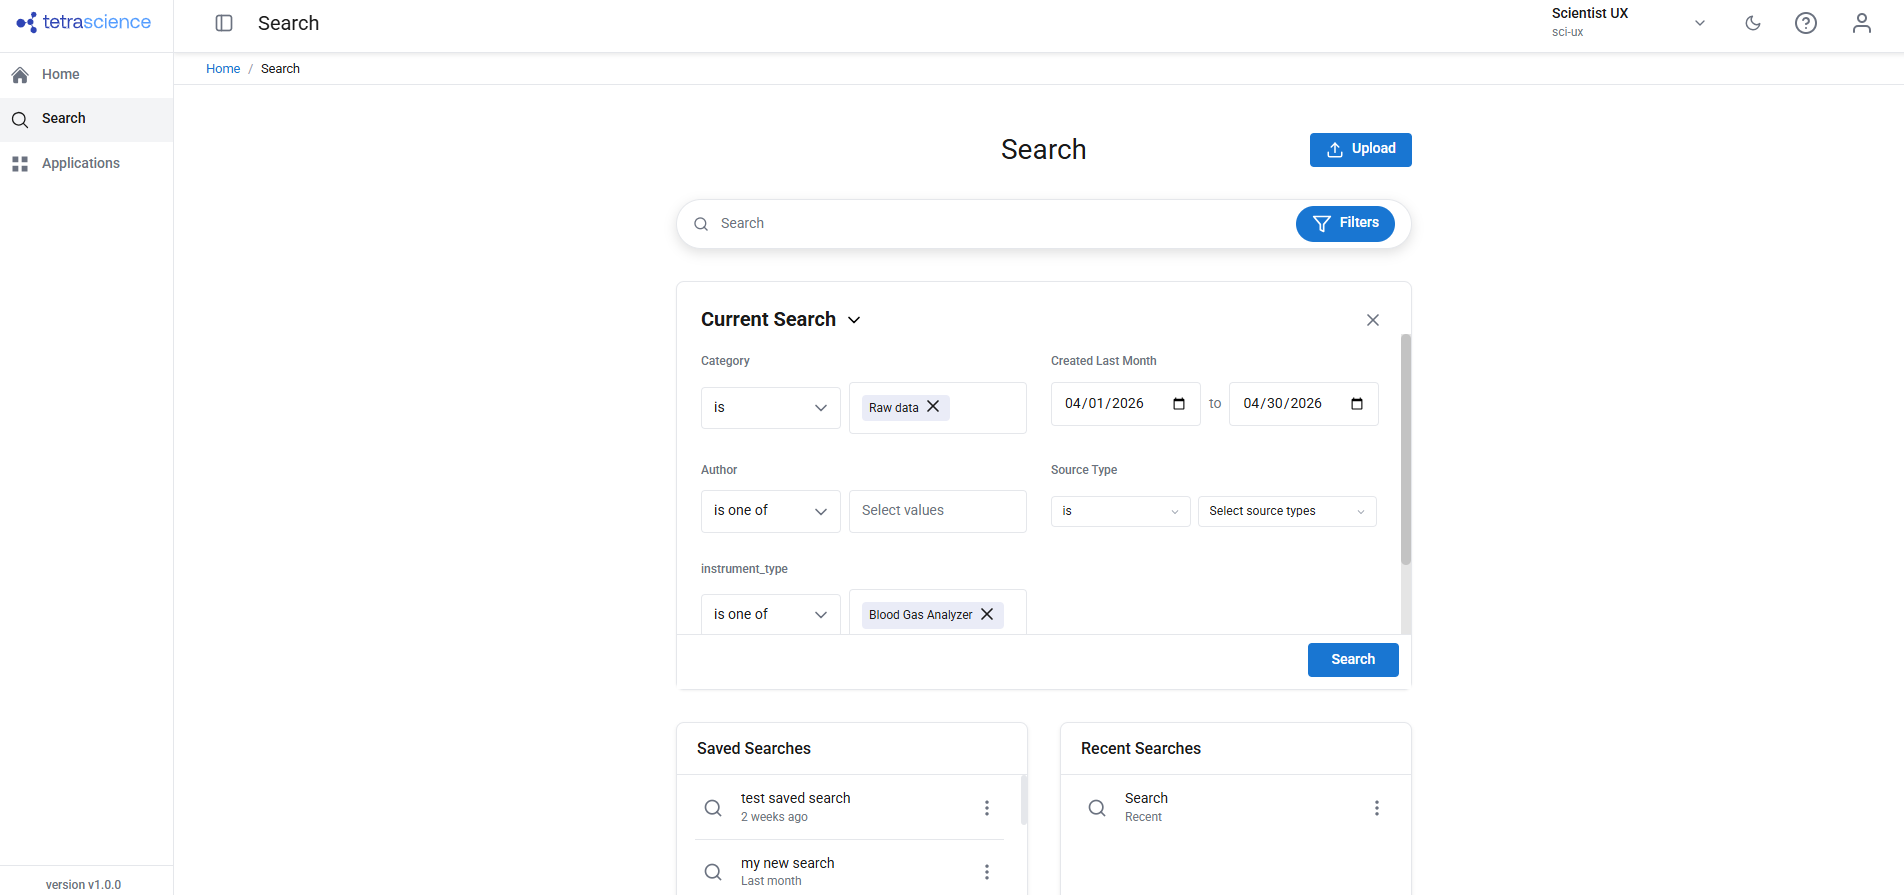
- On the Search page, select Filters.
- Choose the filter category and specify the filter criteria. For more information about each filter option, see Filter Options for Search
- Select Search. The search results update to reflect your filter. You can combine multiple filters to refine your results further.
Refine Results Within a Column
From the search results page, you can filter results within a specific column or attribute to narrow your results further without starting a new search.
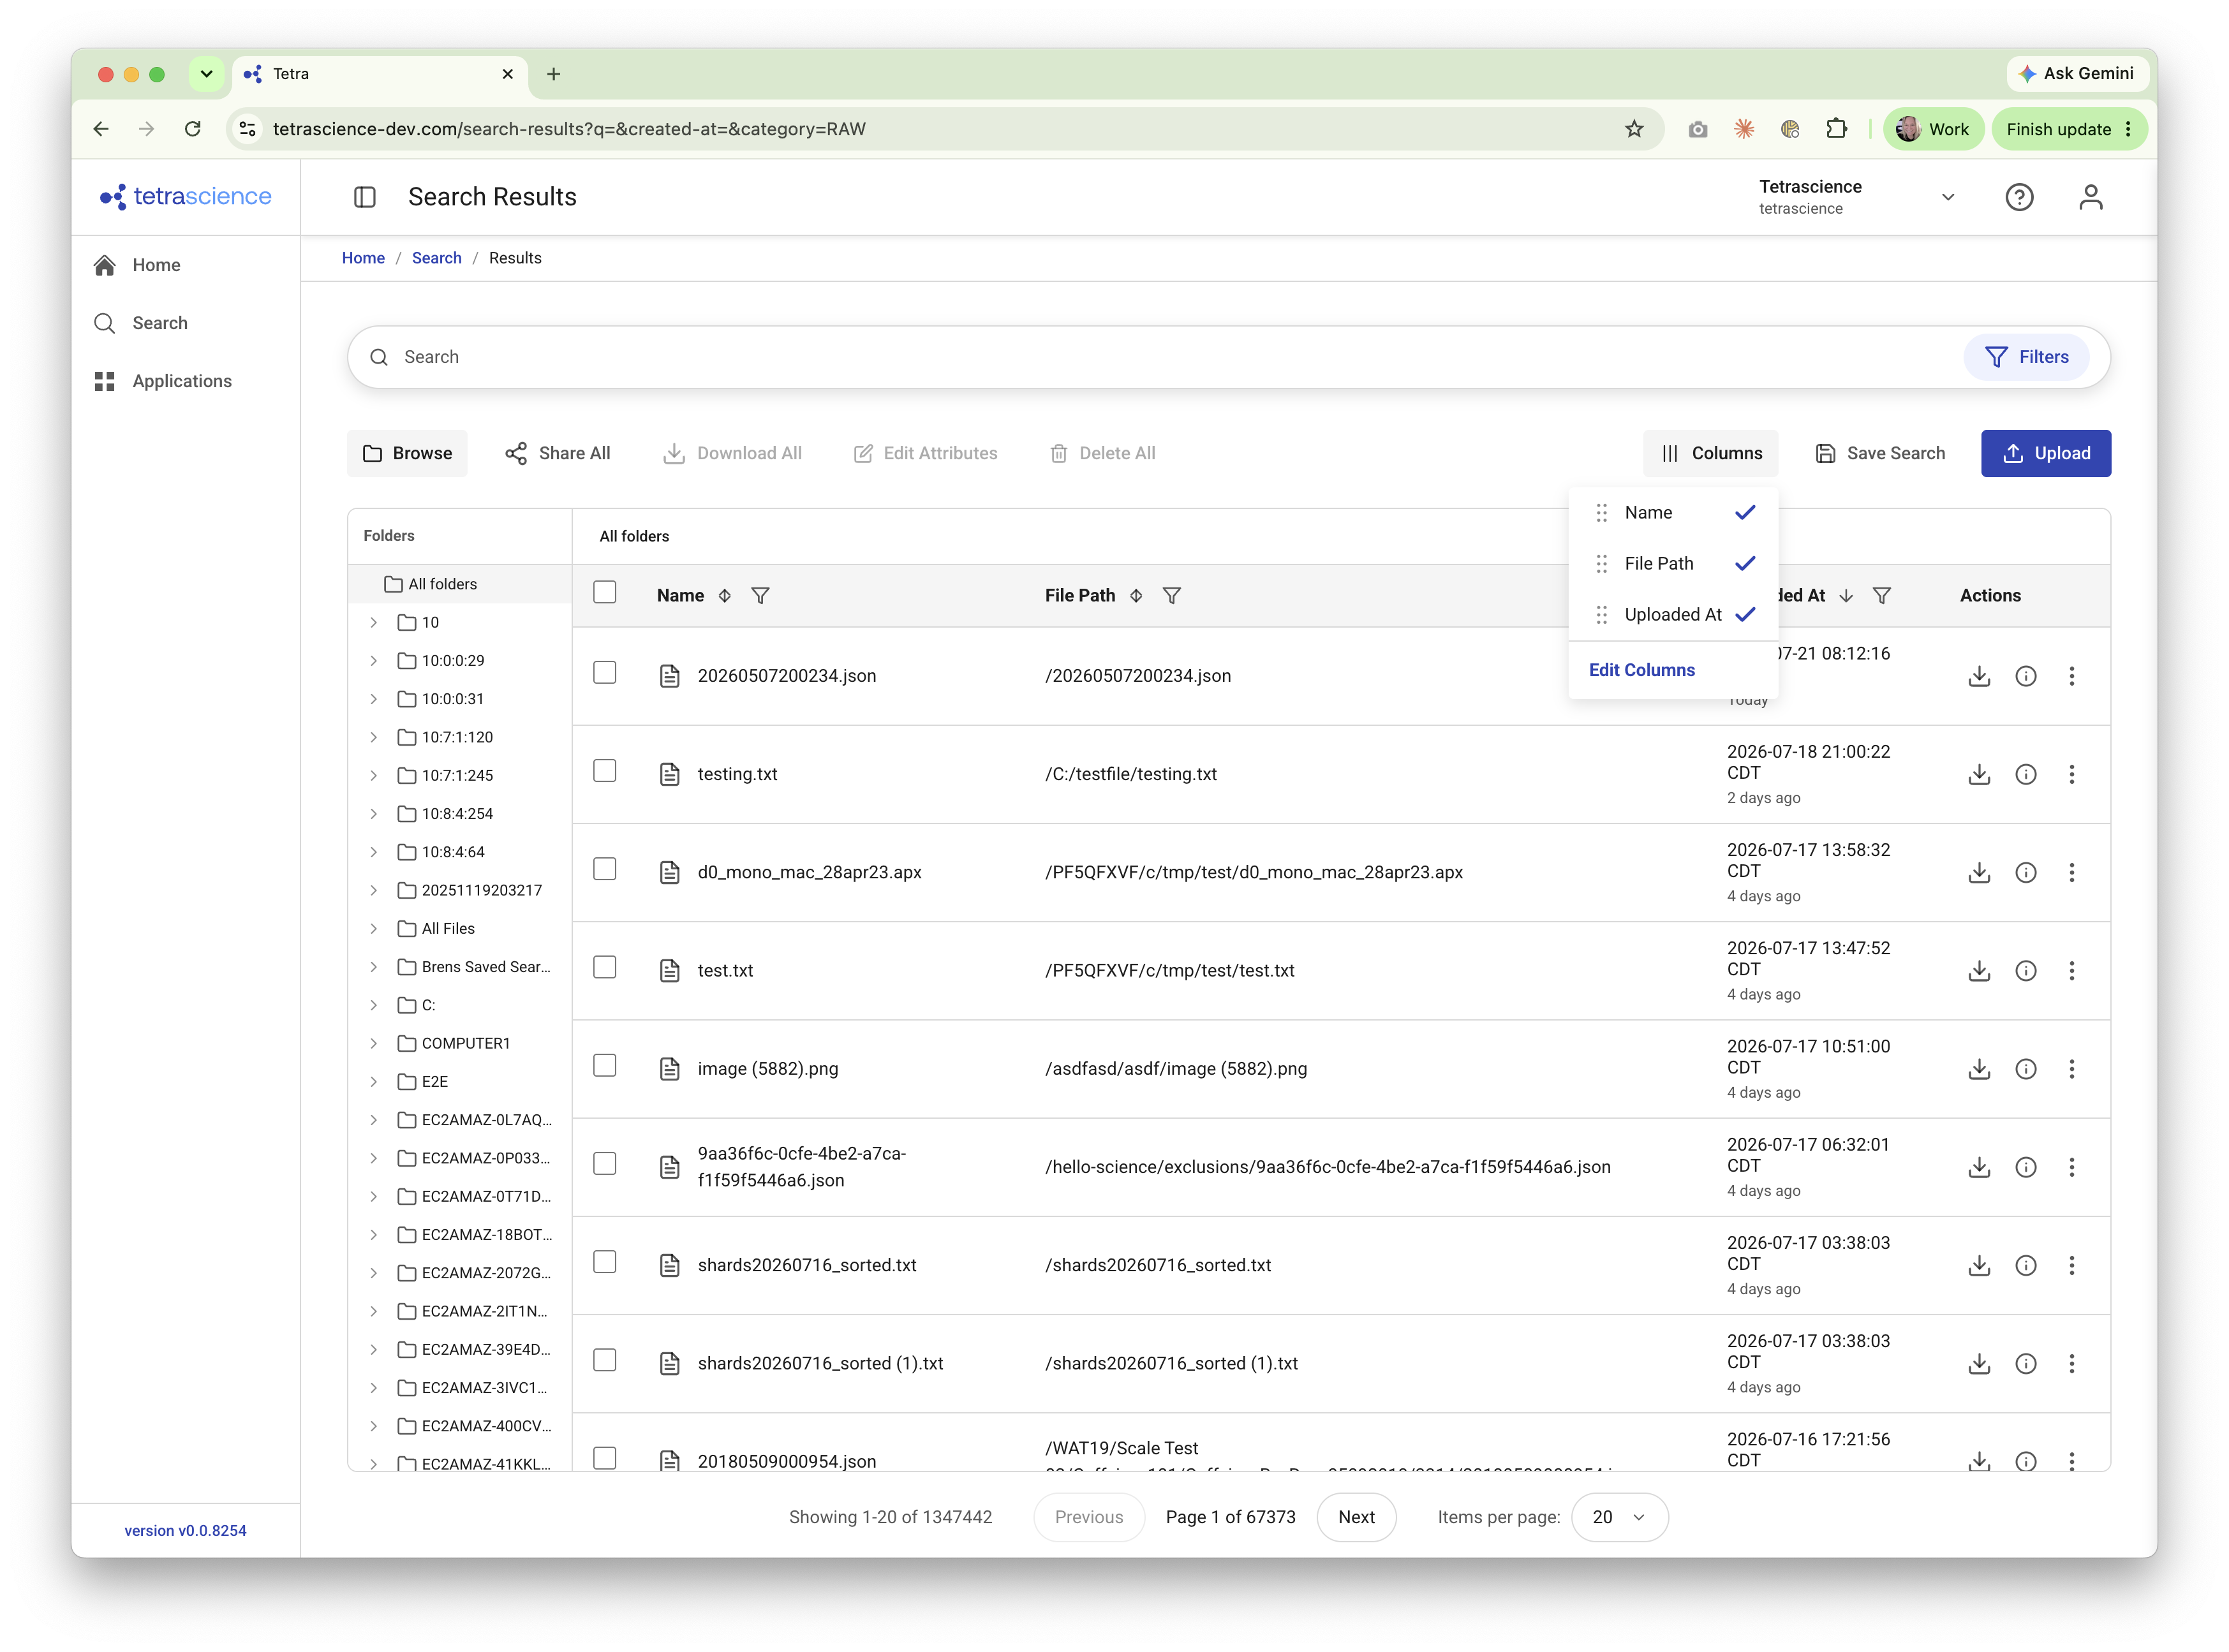
- On the search results page, select the filter icon next to the name of the column that you want to filter by. The Filters panel appears, with that column already added as a filter.
- Specify the filter criteria for the column, and then select Search. The current results narrow to show only matching files.
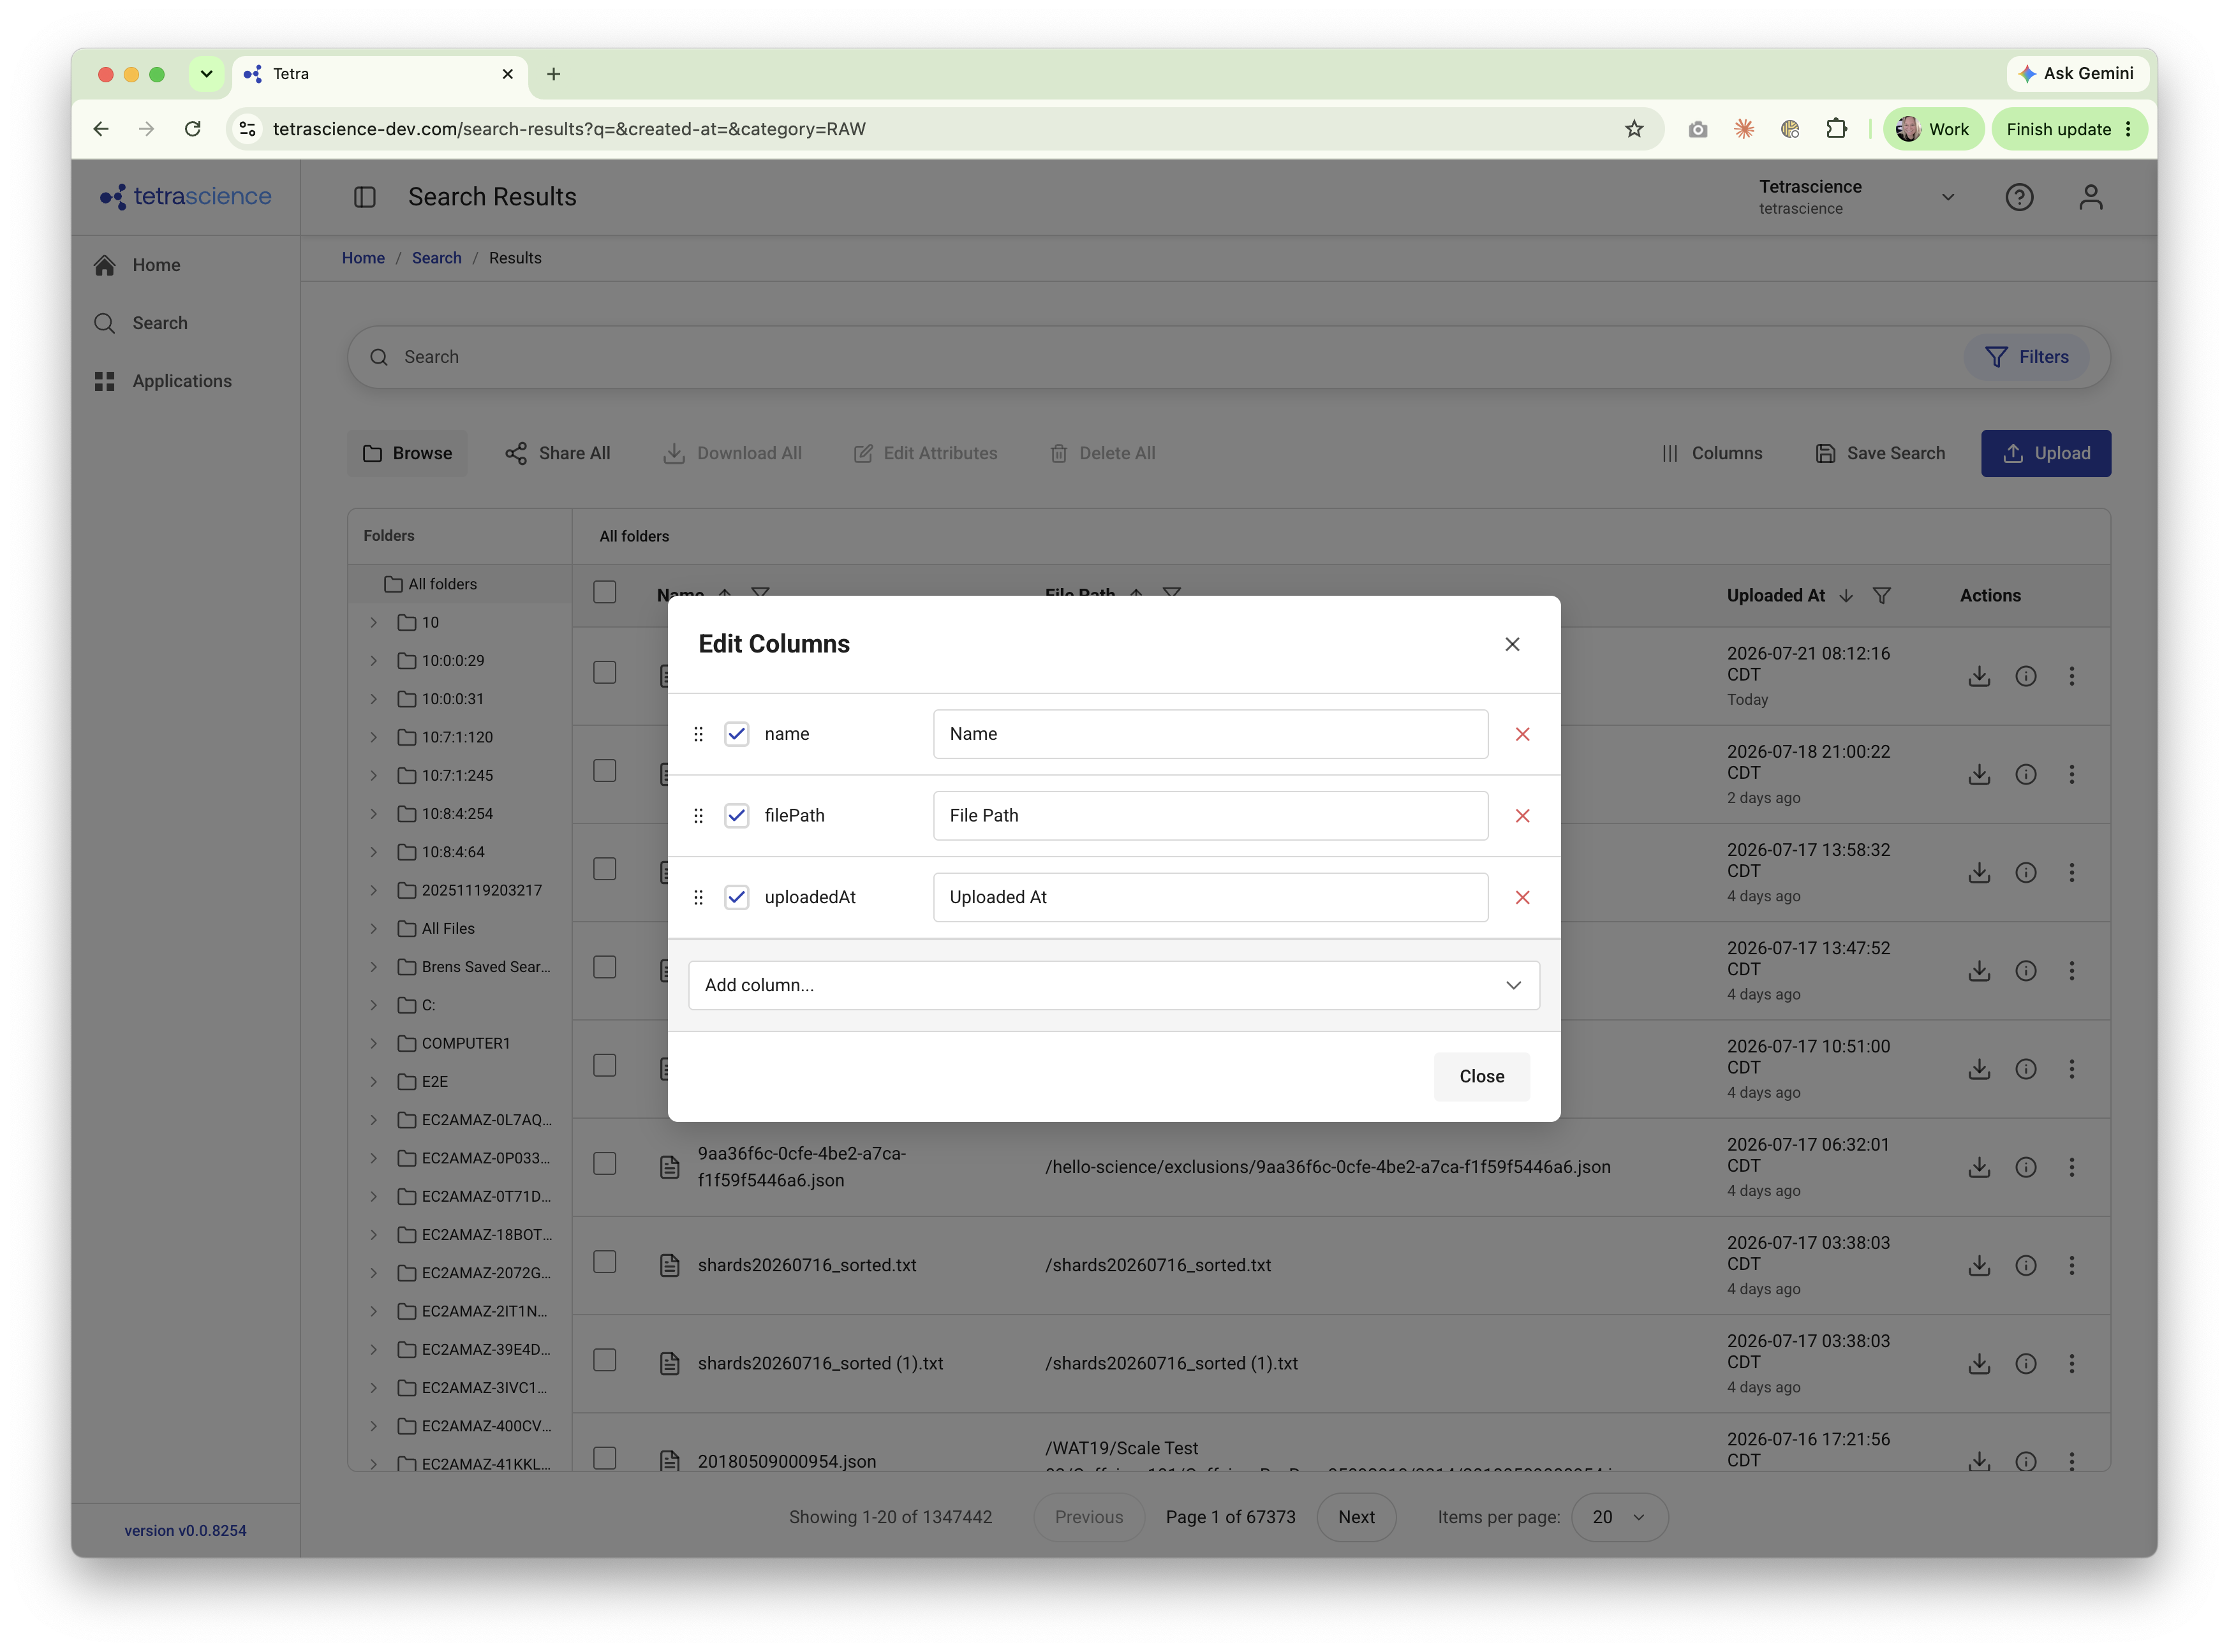
Most columns support filtering. If the attribute that you want to filter by isn't shown as a column, add it first: select Columns, choose Edit Columns, and then add the column. Added columns that support filtering also show a filter icon.
Browse Files in a Folder Structure
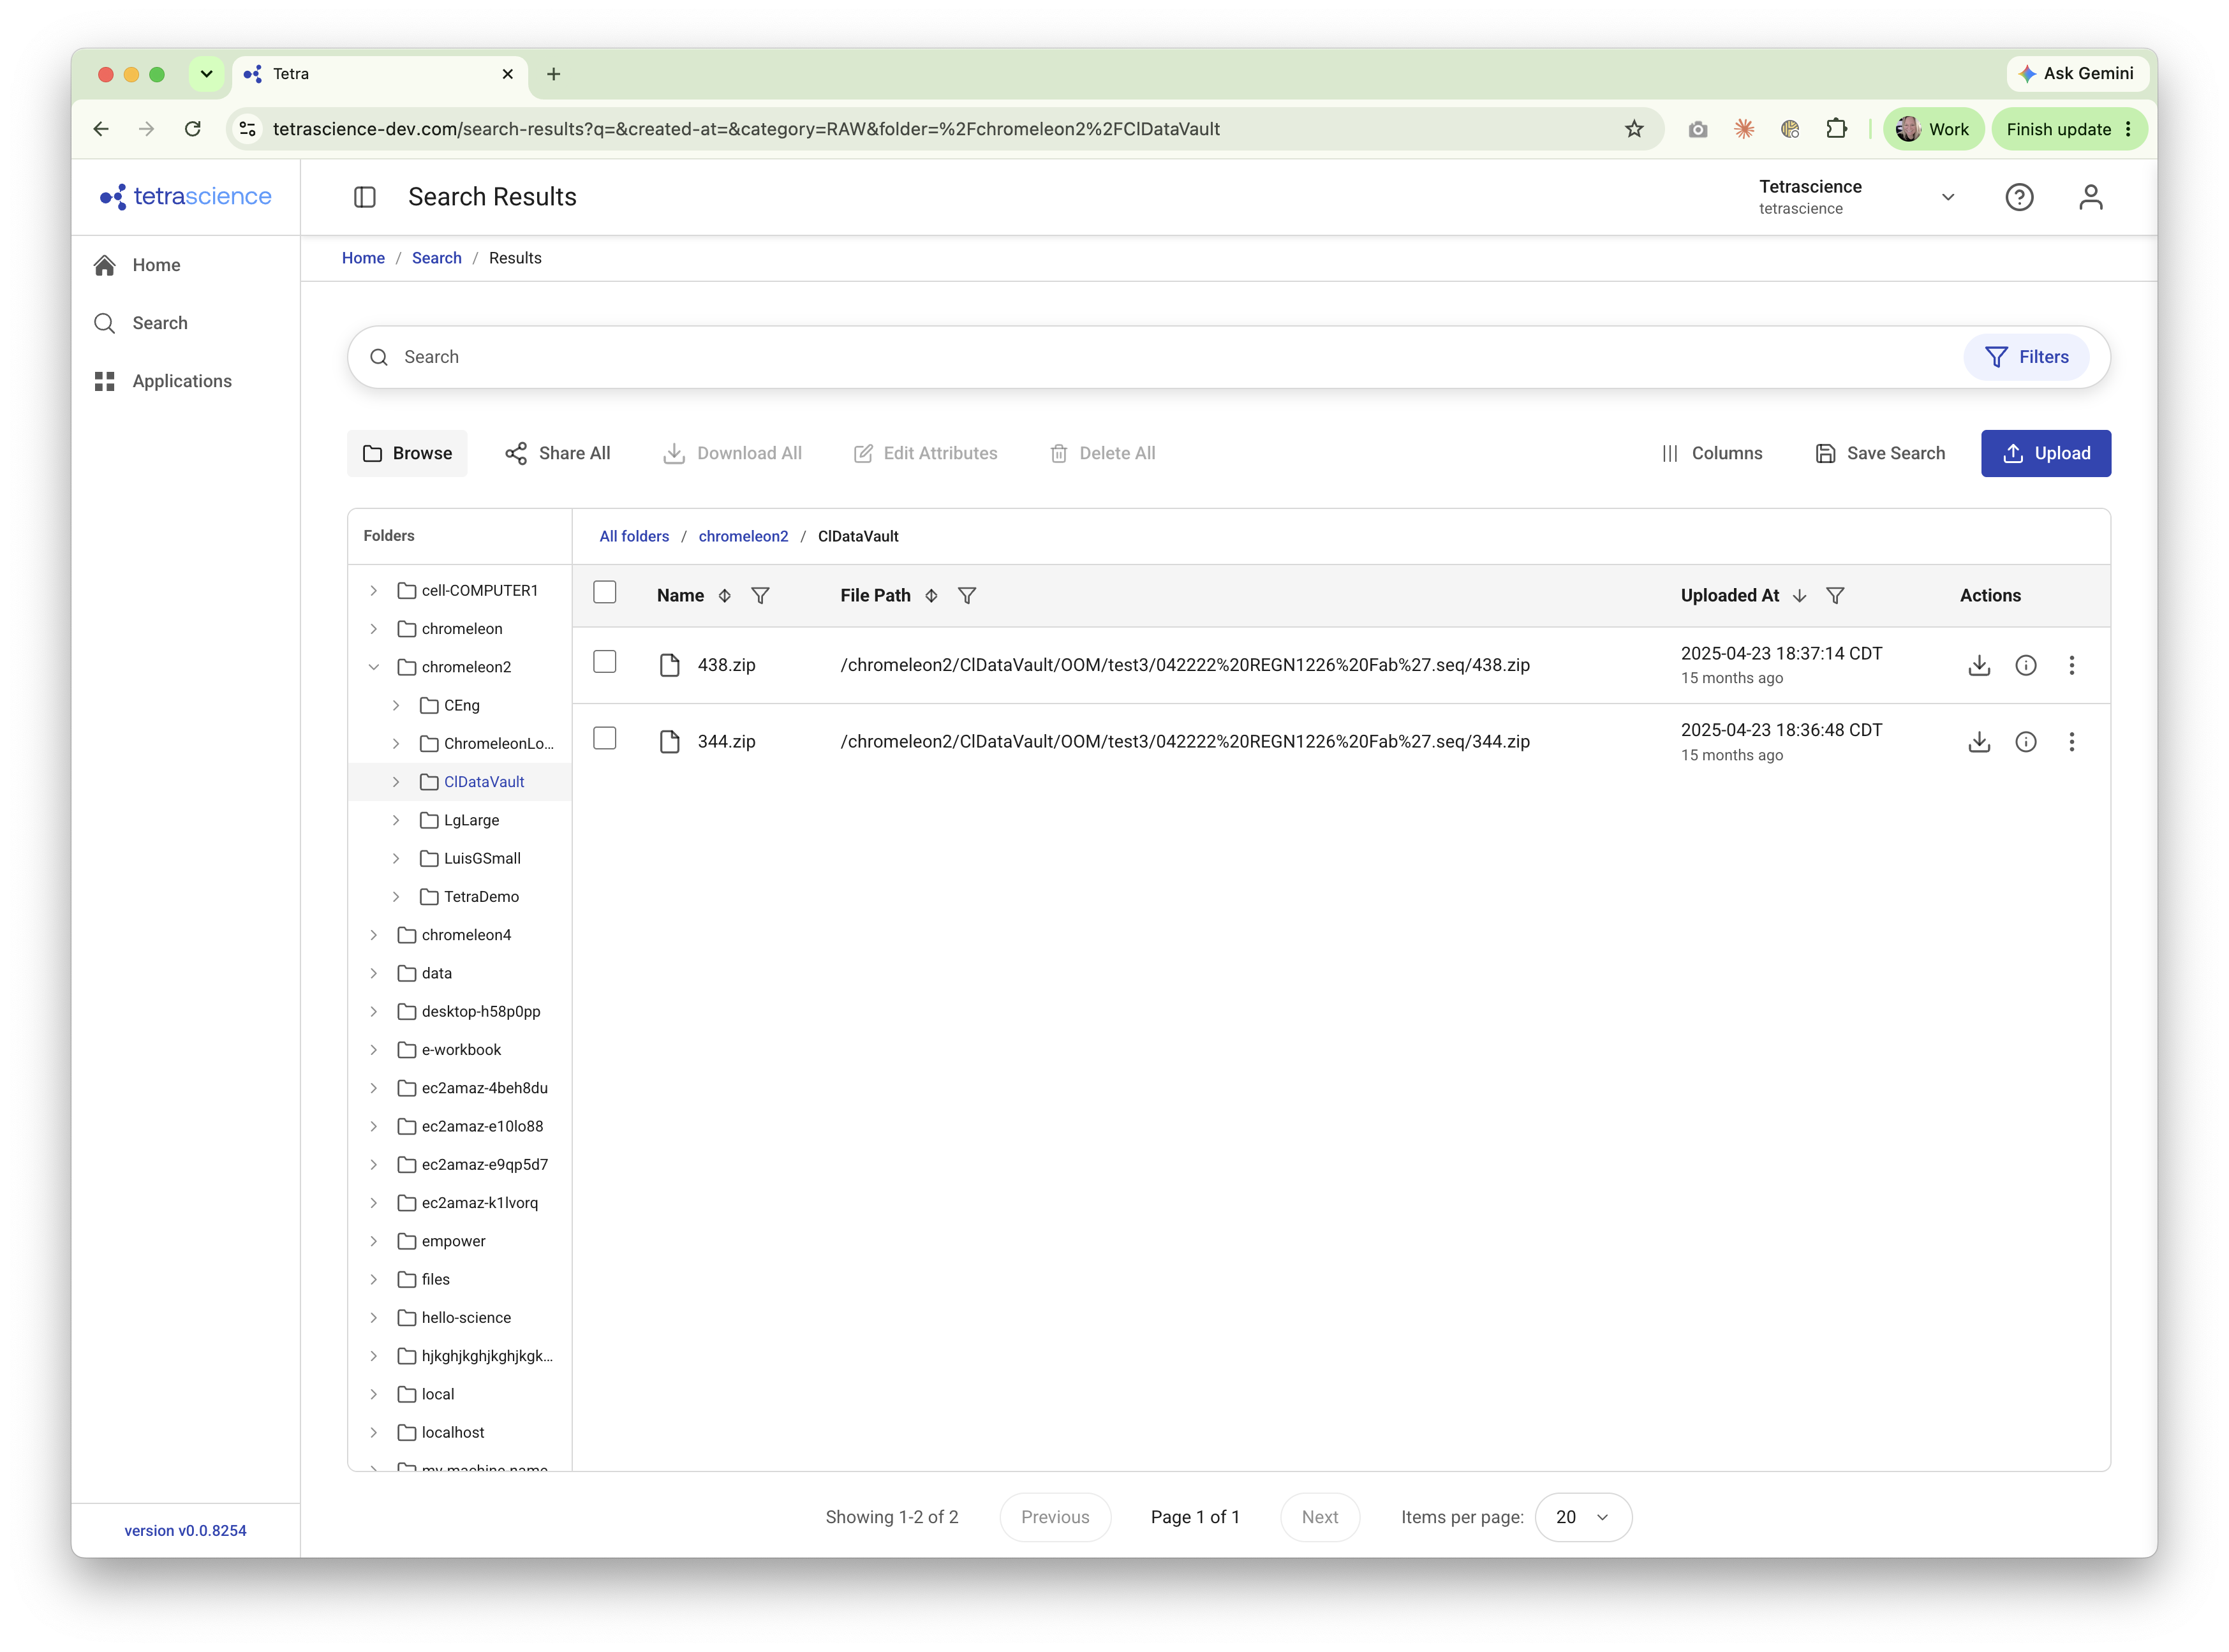
You can view your data within a folder structure, making it easier to locate files based on how they're organized rather than by search terms alone.
- On the search results page, find the Folders panel to the left of the results. The panel appears by default. To hide or show it, select Browse.
- In the Folders panel, select a folder. The results update to show the files in that folder, and a breadcrumb path starting with All folders appears above the results. To move back up the hierarchy, select a folder in the breadcrumb path.
- Select a file to open its Details page.
Save and Rerun a Search
You can save frequently used searches so that you can rerun them later without re-entering your search terms and filters.
To save a search, do the following:
- Run a search with the terms and filters that you want to save.
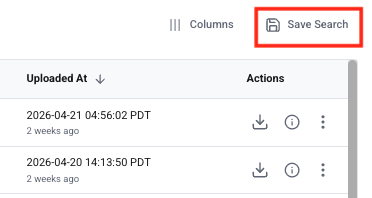
- Select Save Search.
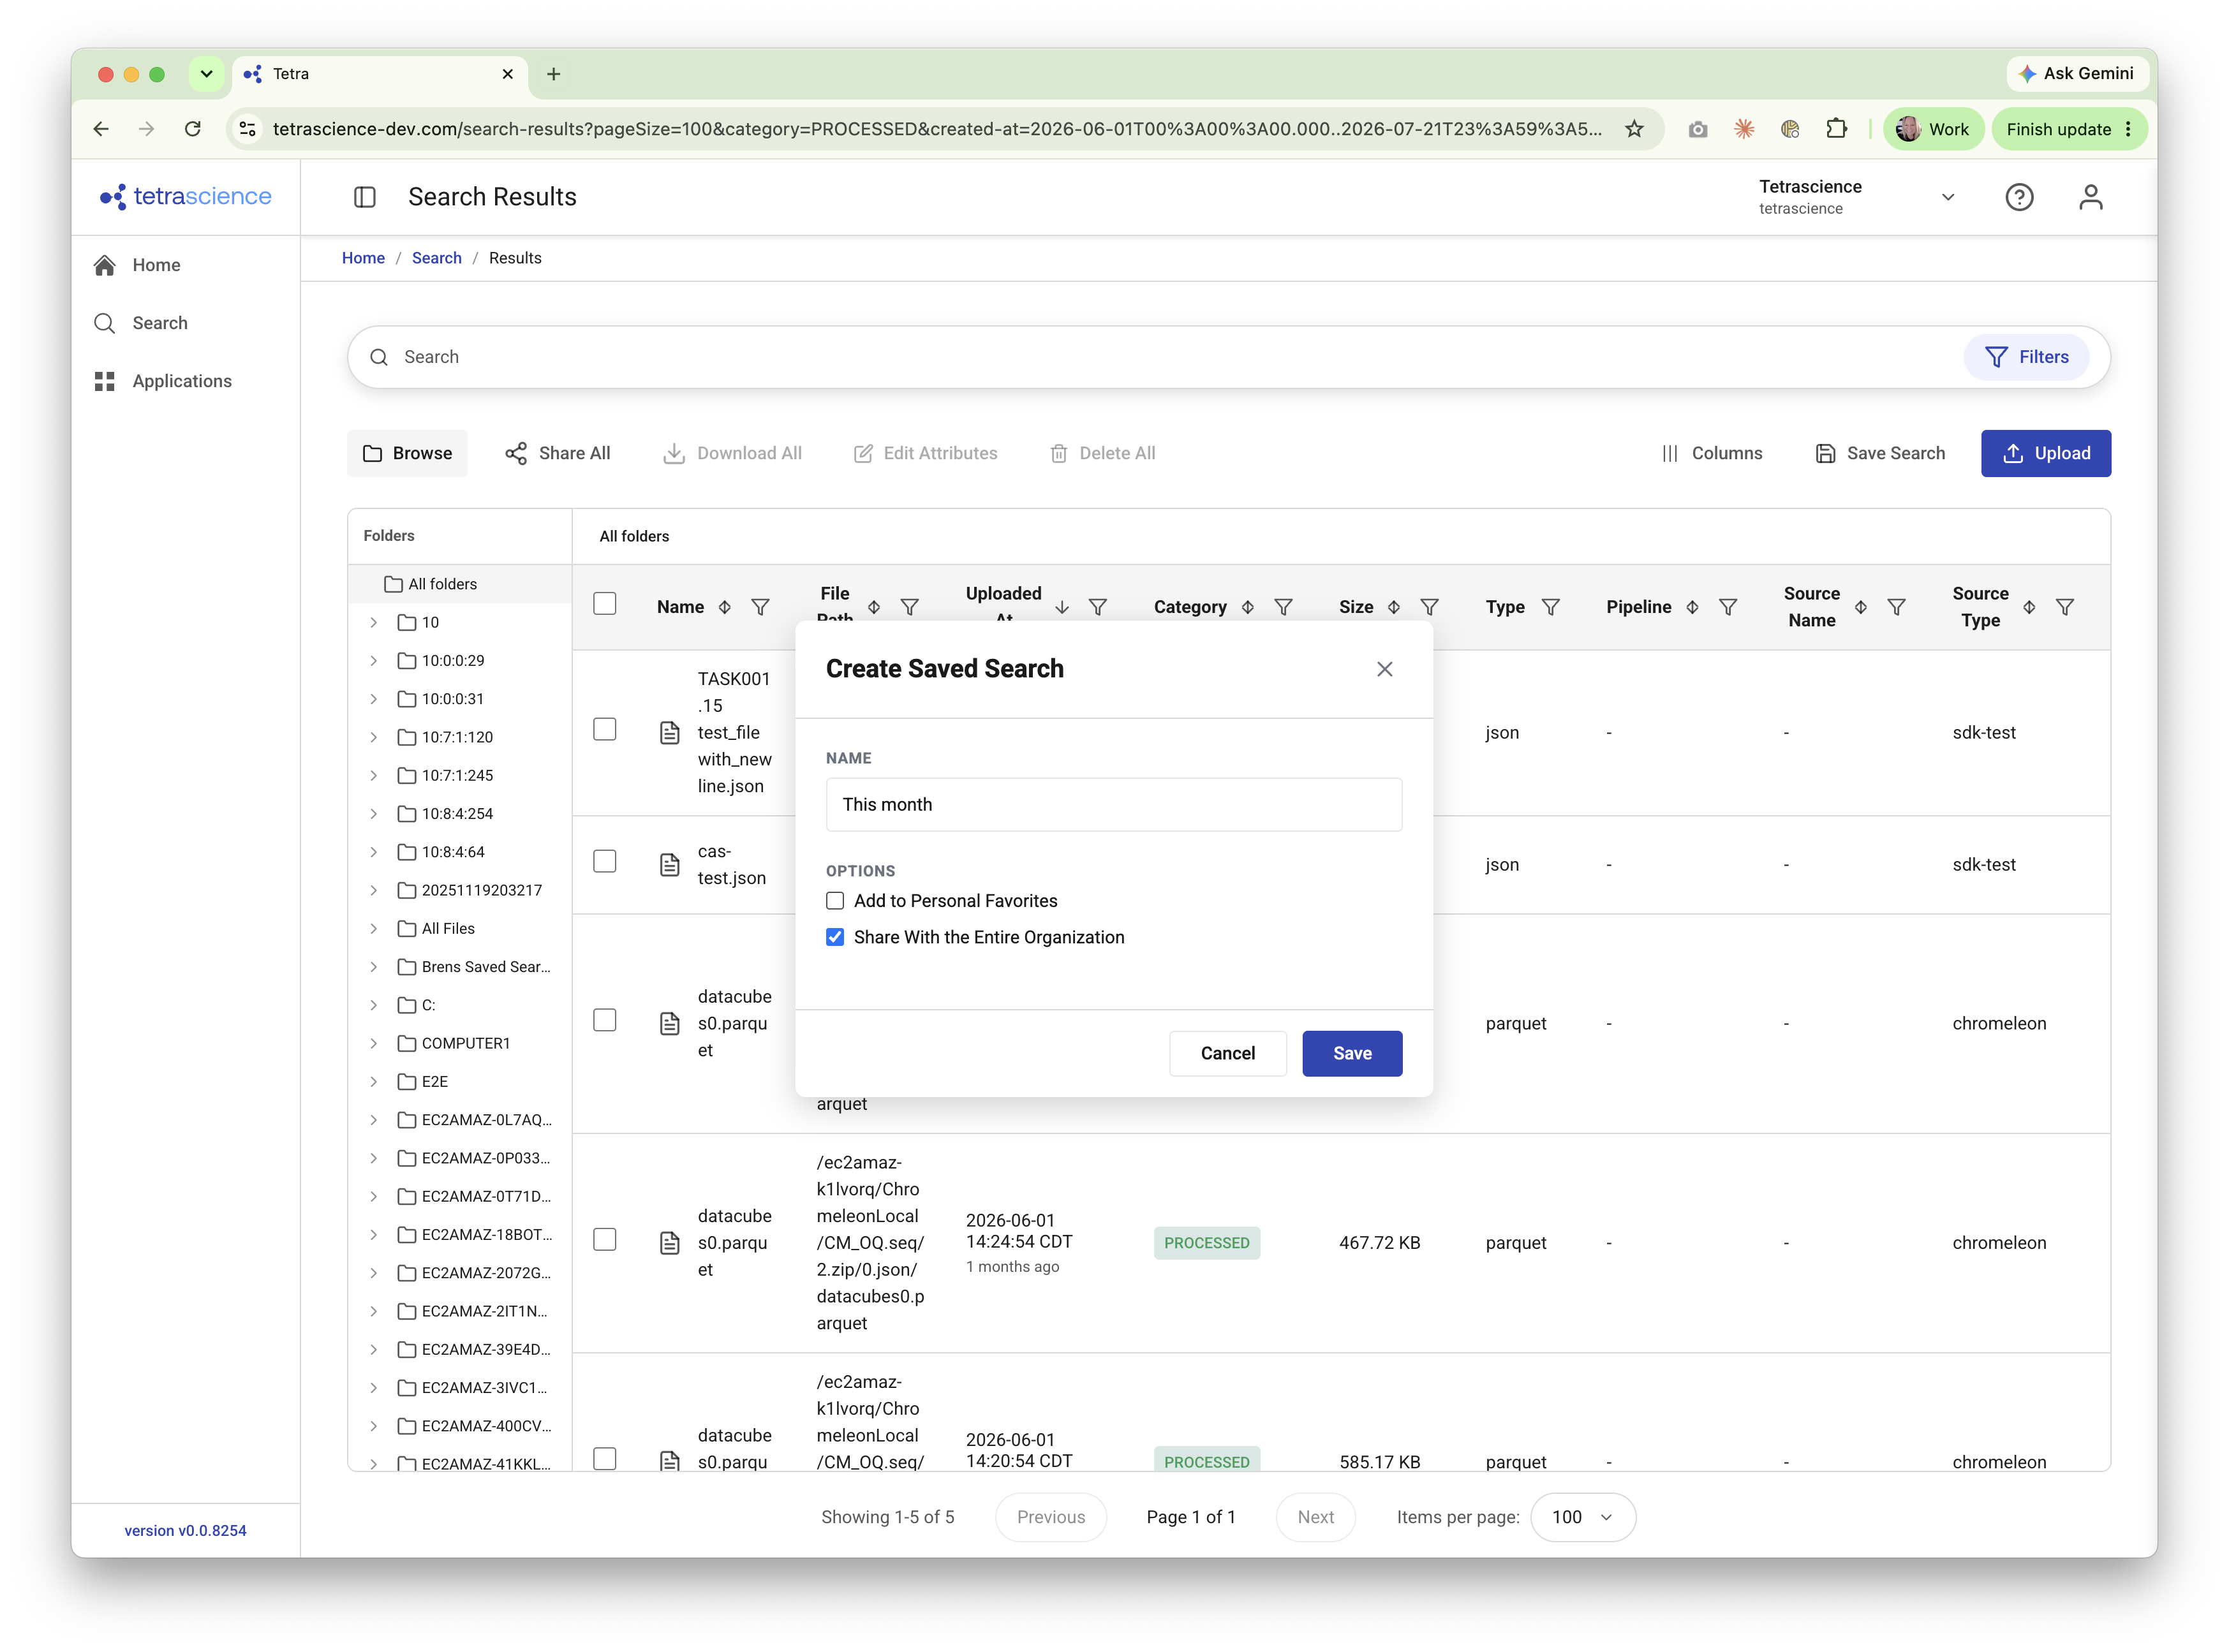
The Create Saved Search dialog appears.
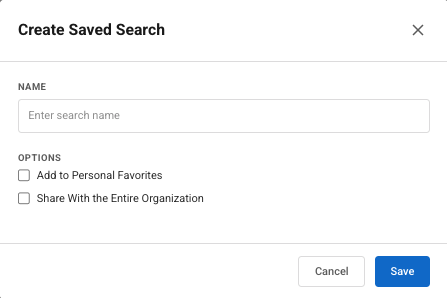
- Enter a name for the saved search.
- Select Save. The search is saved and available for future use.
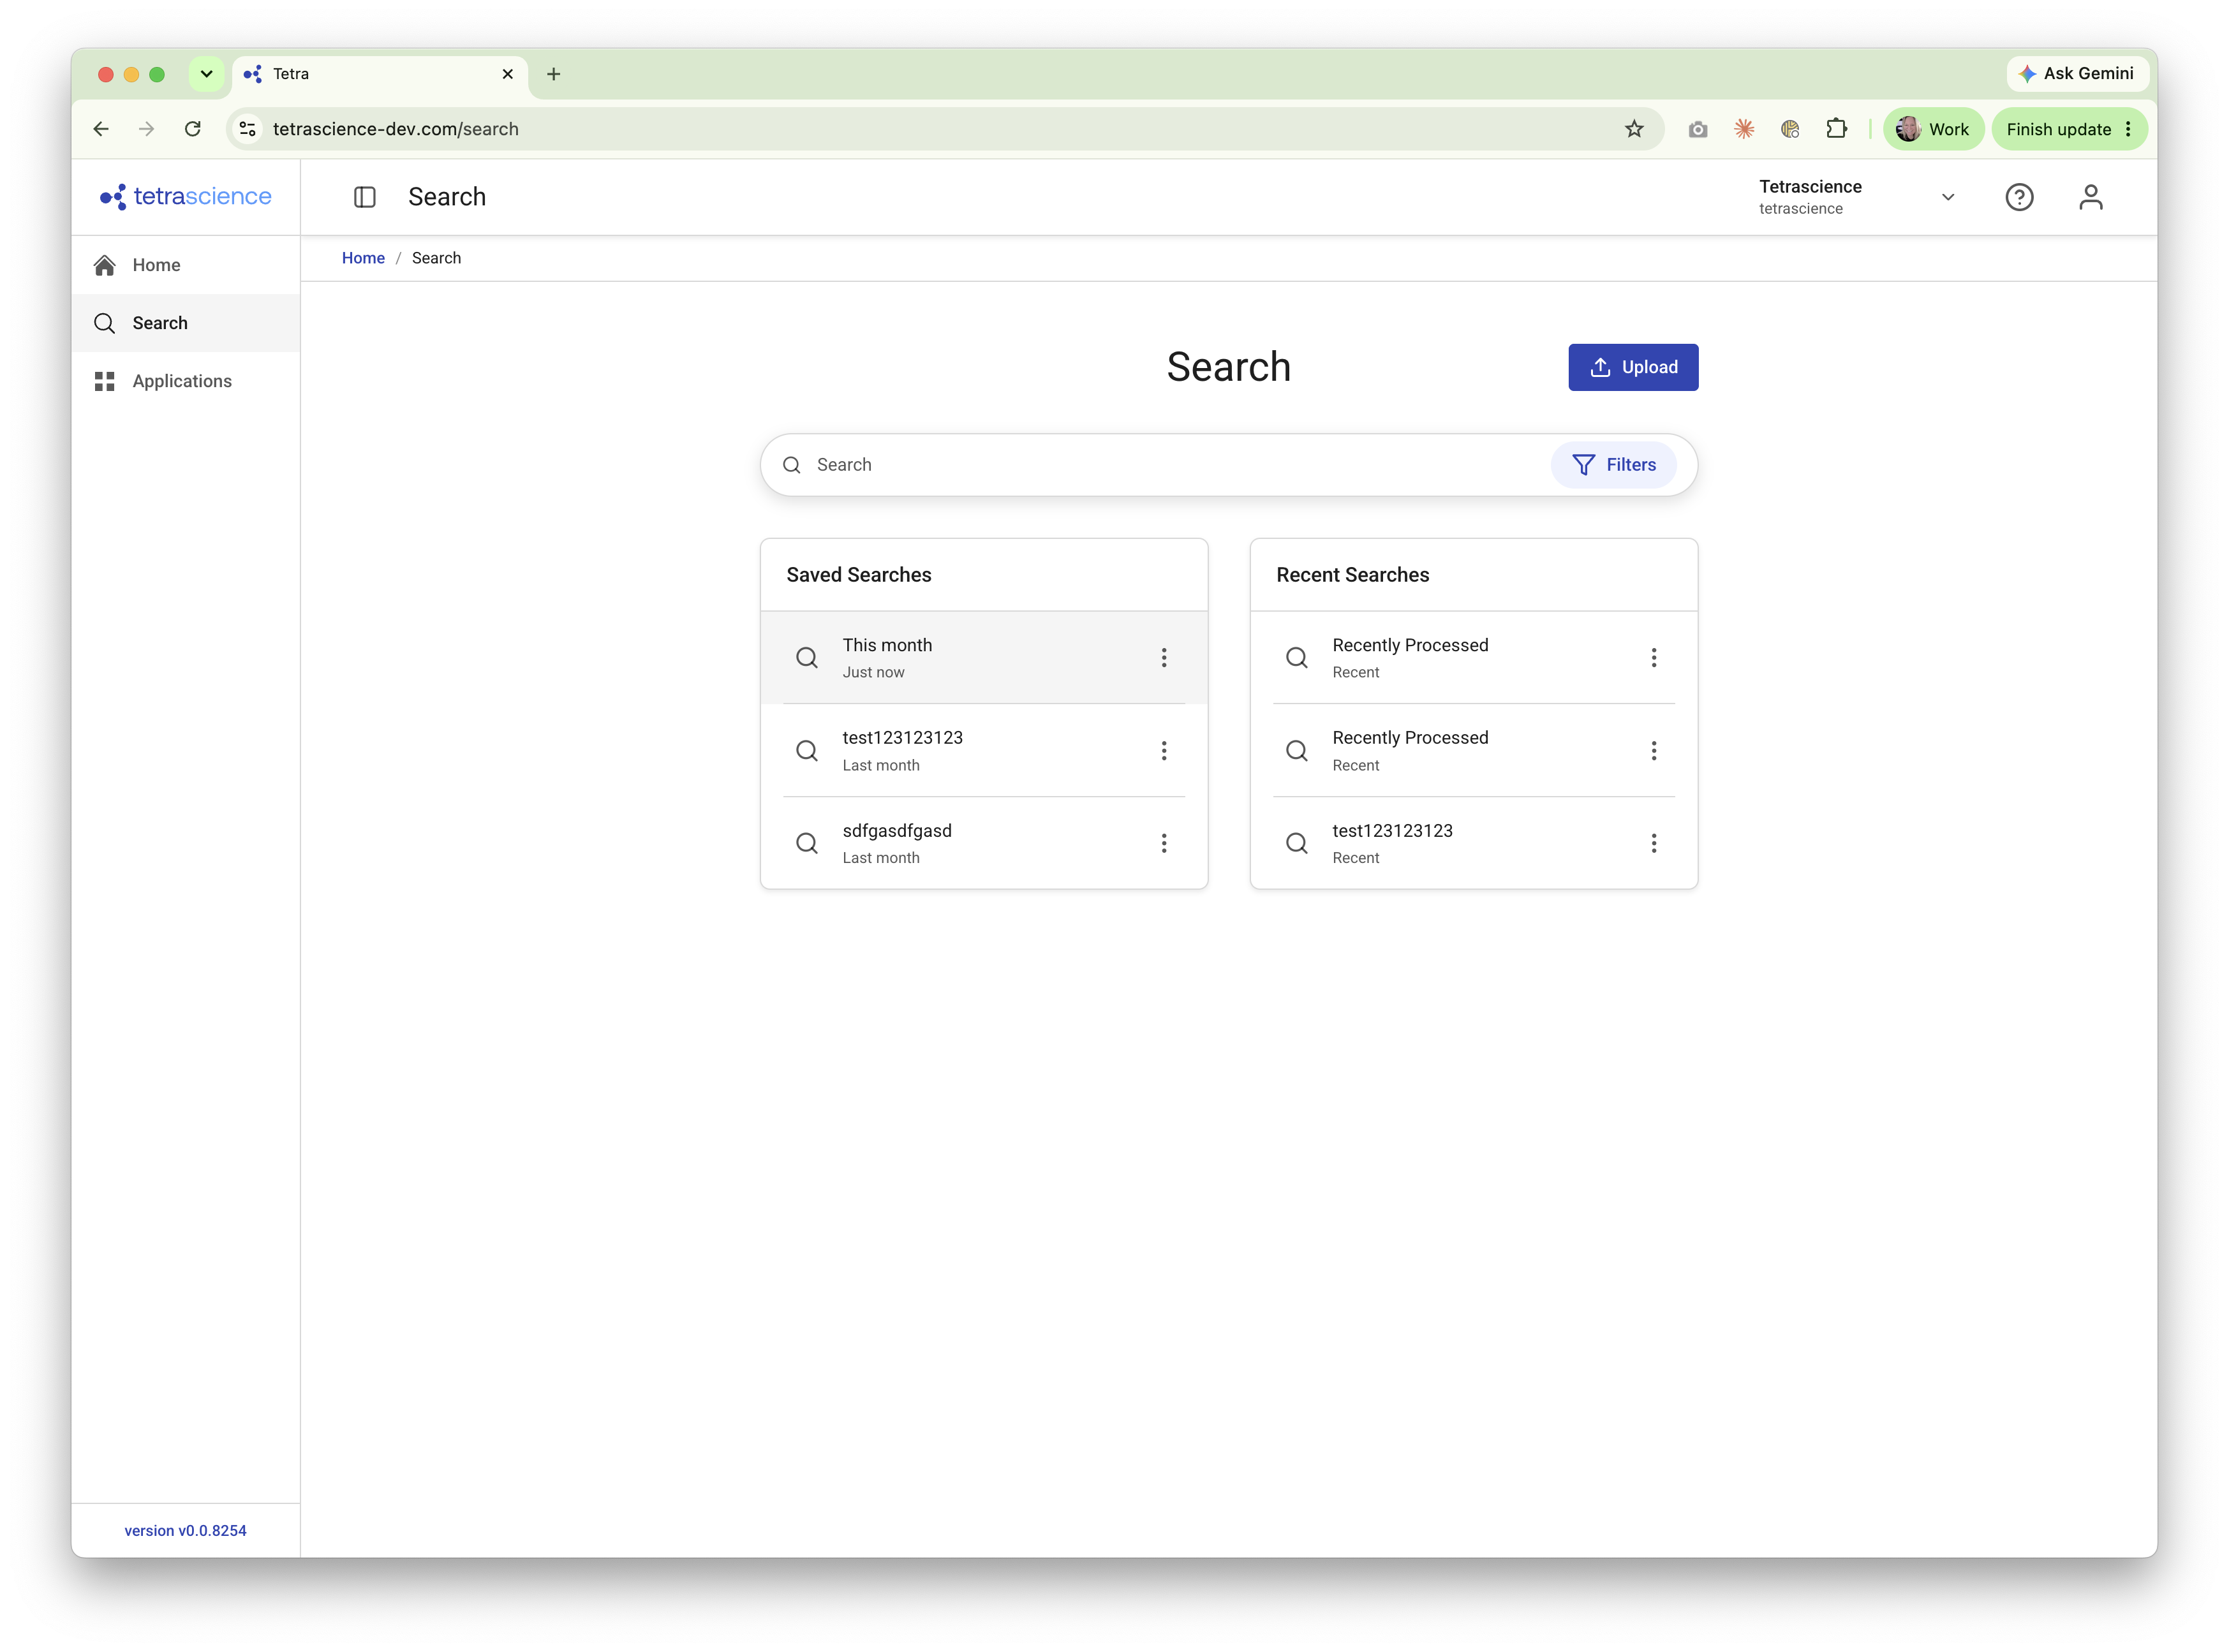
After saving a search, you can rerun it by selecting it from the Saved Searches tile on either the Home or Search page.
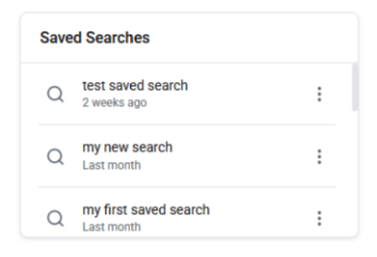
You can also:
- Edit a saved filter: After changing a saved filter's criteria, save your updates back to the same saved filter.
- Reuse recent searches: The Recent Searches tile keeps your recent searches available for quick reuse.
View File Details
To preview a file, select the file from the search Results list. The file's Details page appears, showing the file content and related information.
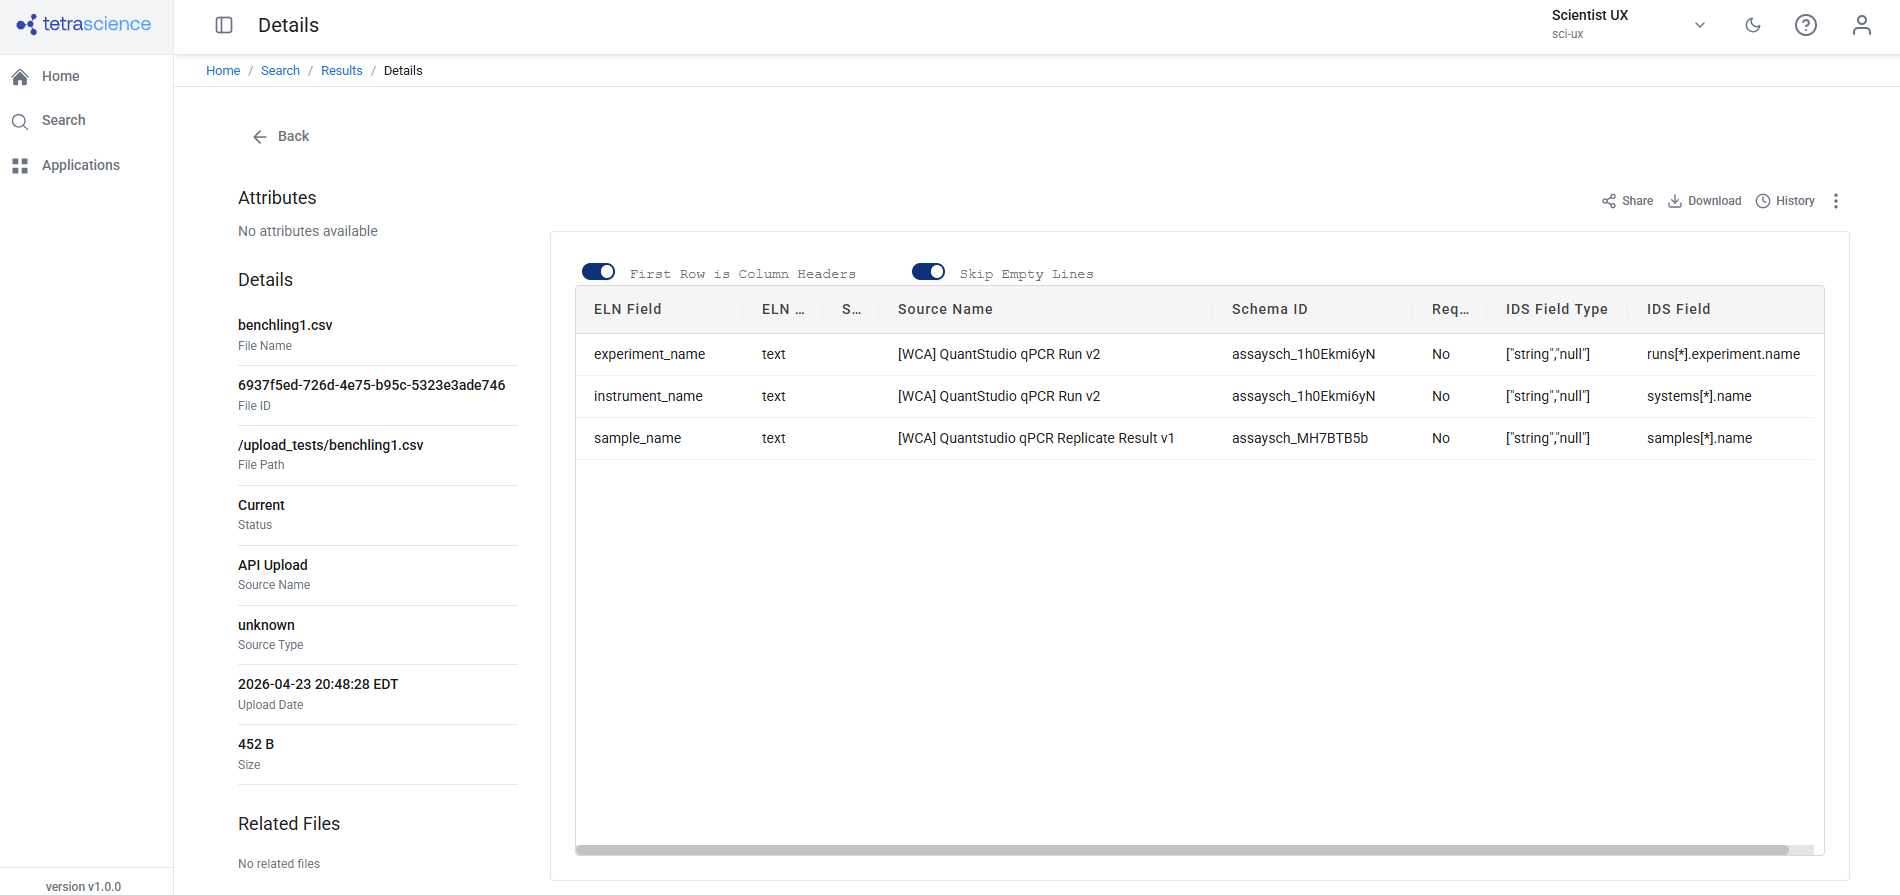
For each file in the search results, you can view the following information:
- Attributes — Attributes associated with the file
- Details — File details such as file name, file ID, file path, version, source name, source type, upload date, and size
- Related Files — Pointer(s) to related files
View File History
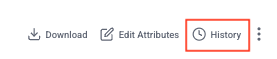
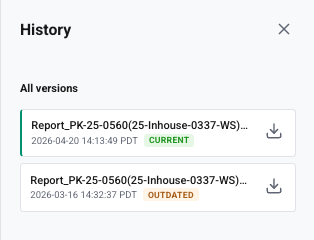
To view the history of a specific file, select History on the file's Details page.
The file history appears. To download a specific file version, select the version's download icon.
Share Files and Search Results
When you apply filters on the Search page, the browser's address bar updates automatically with a clean URL that reflects your current search criteria. You can copy, share, or bookmark this URL, and anyone who opens it sees the same filtered results.
You can also retrieve these sharable search results URLs by choosing the Share All option on the search Results page, or by selecting the Share menu option on a specific file.
For more information, see Share and Bookmark Search Results.
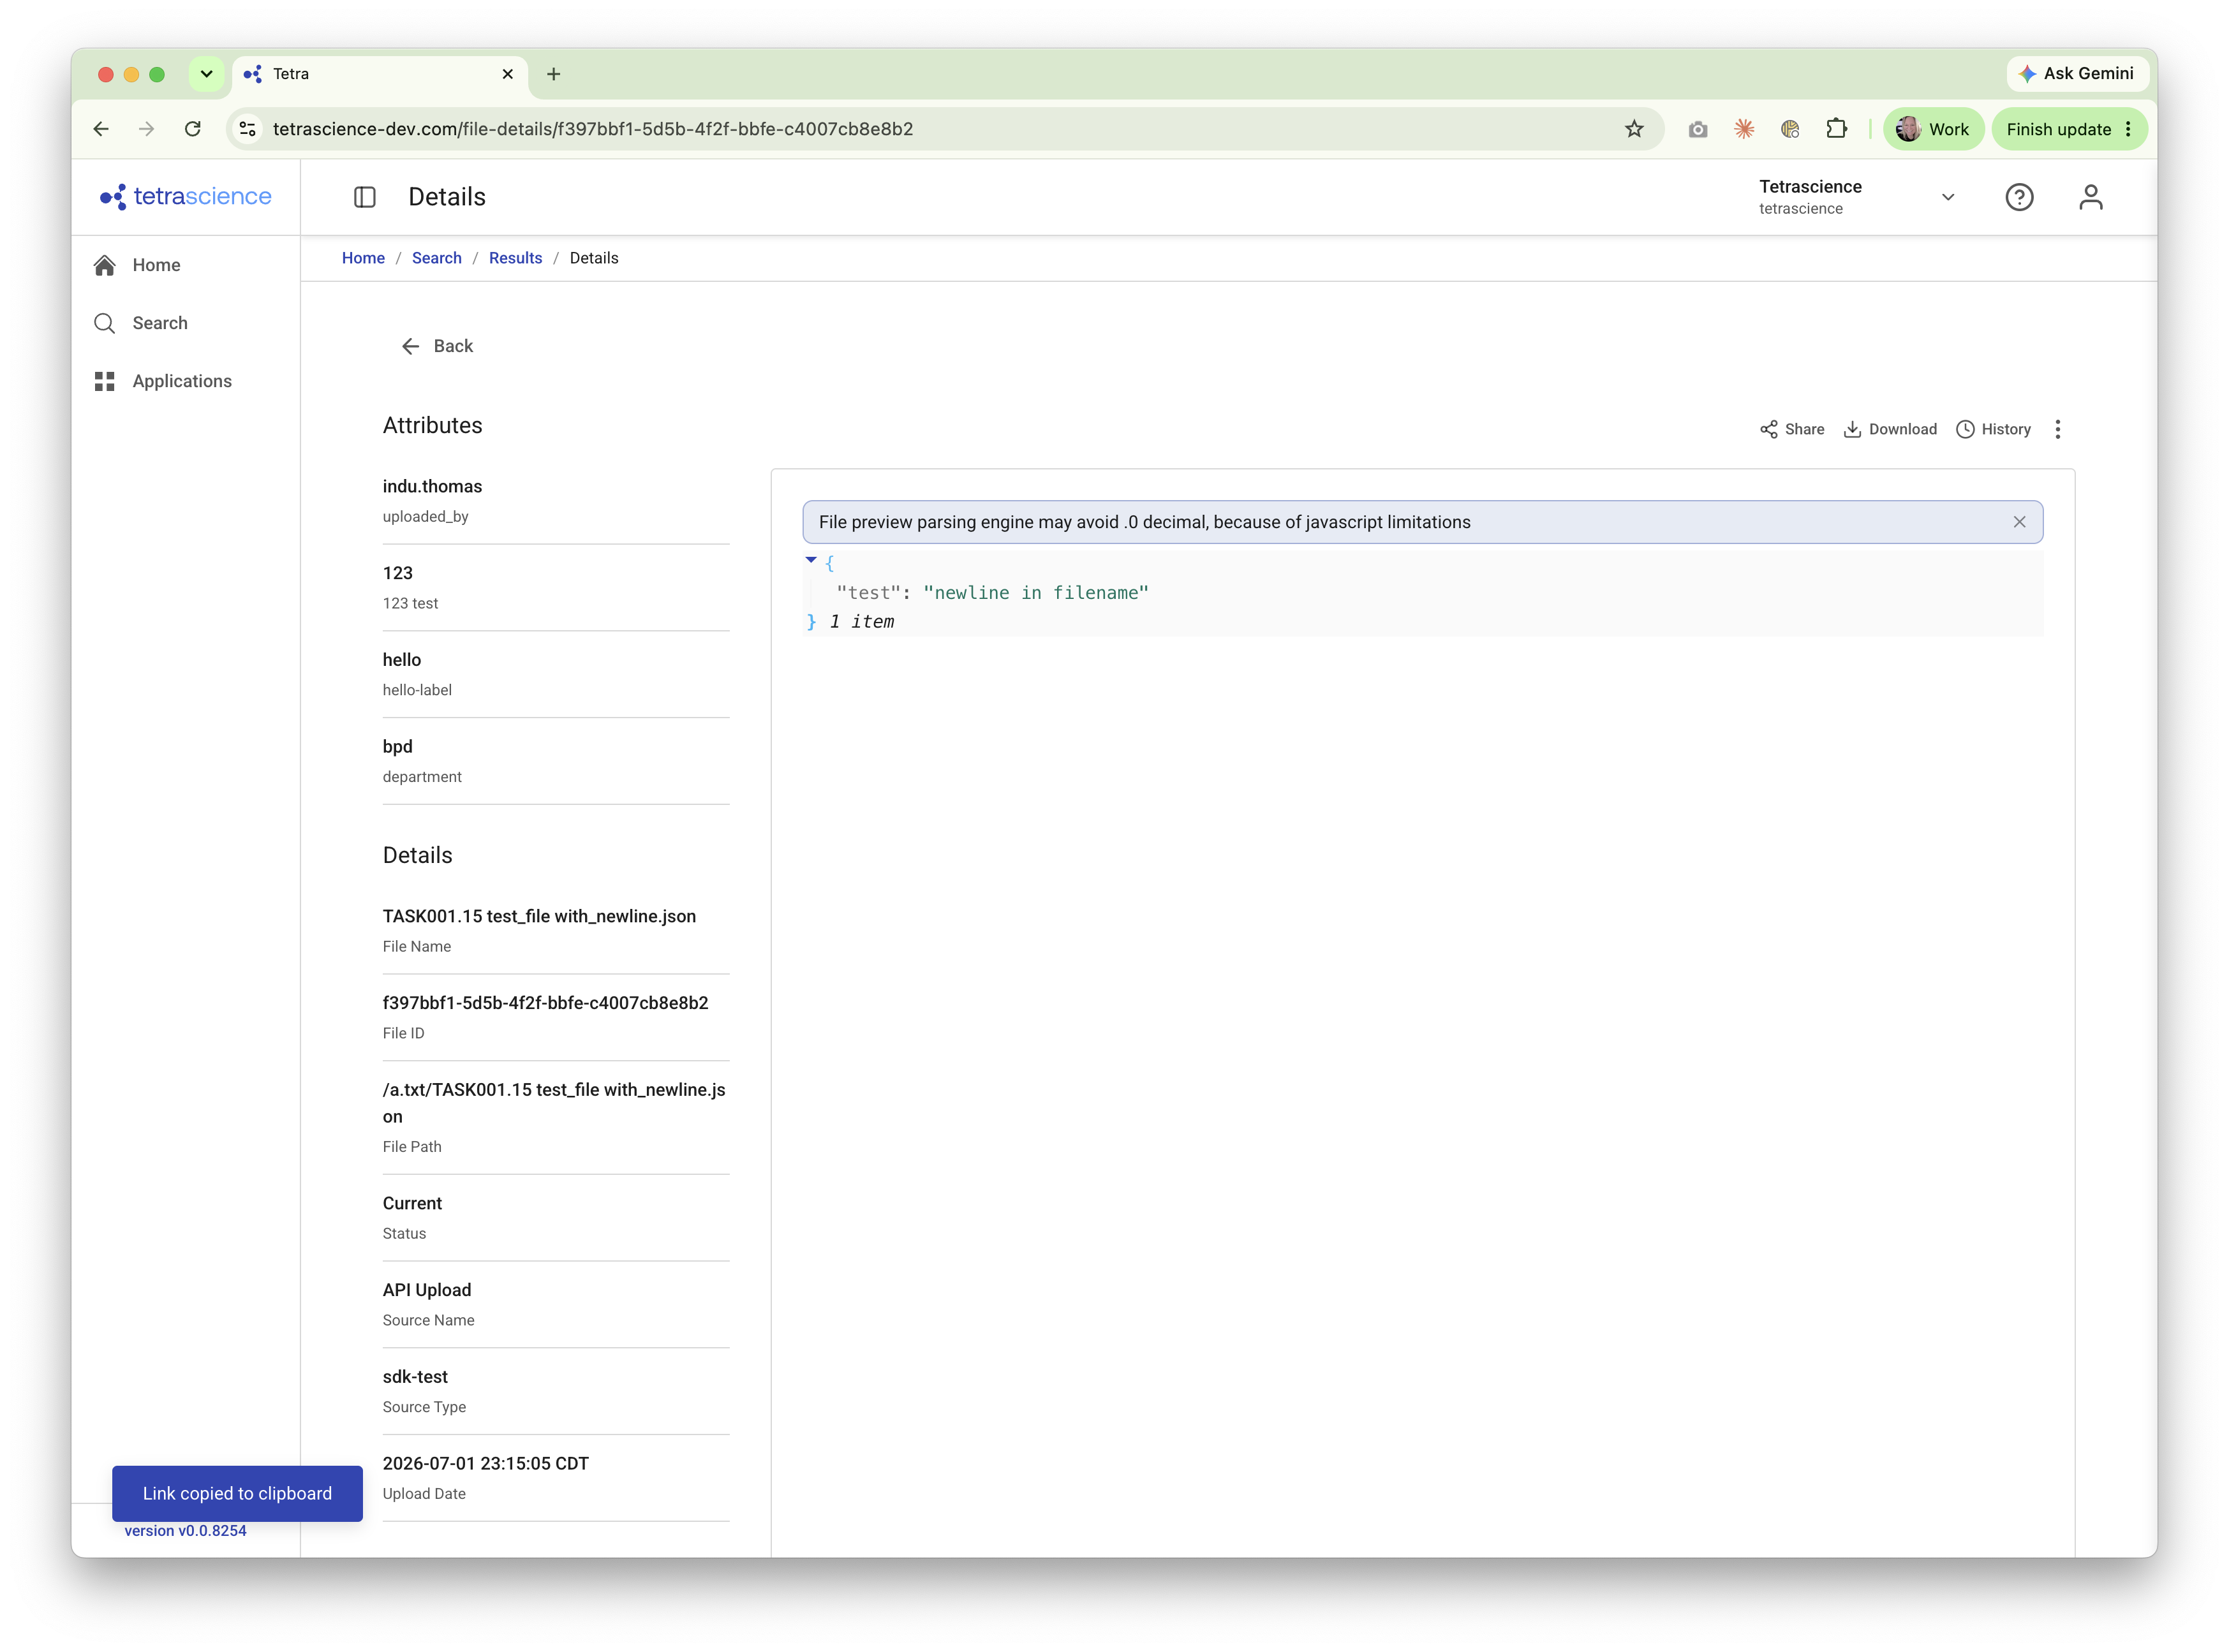
Share a File Details Page
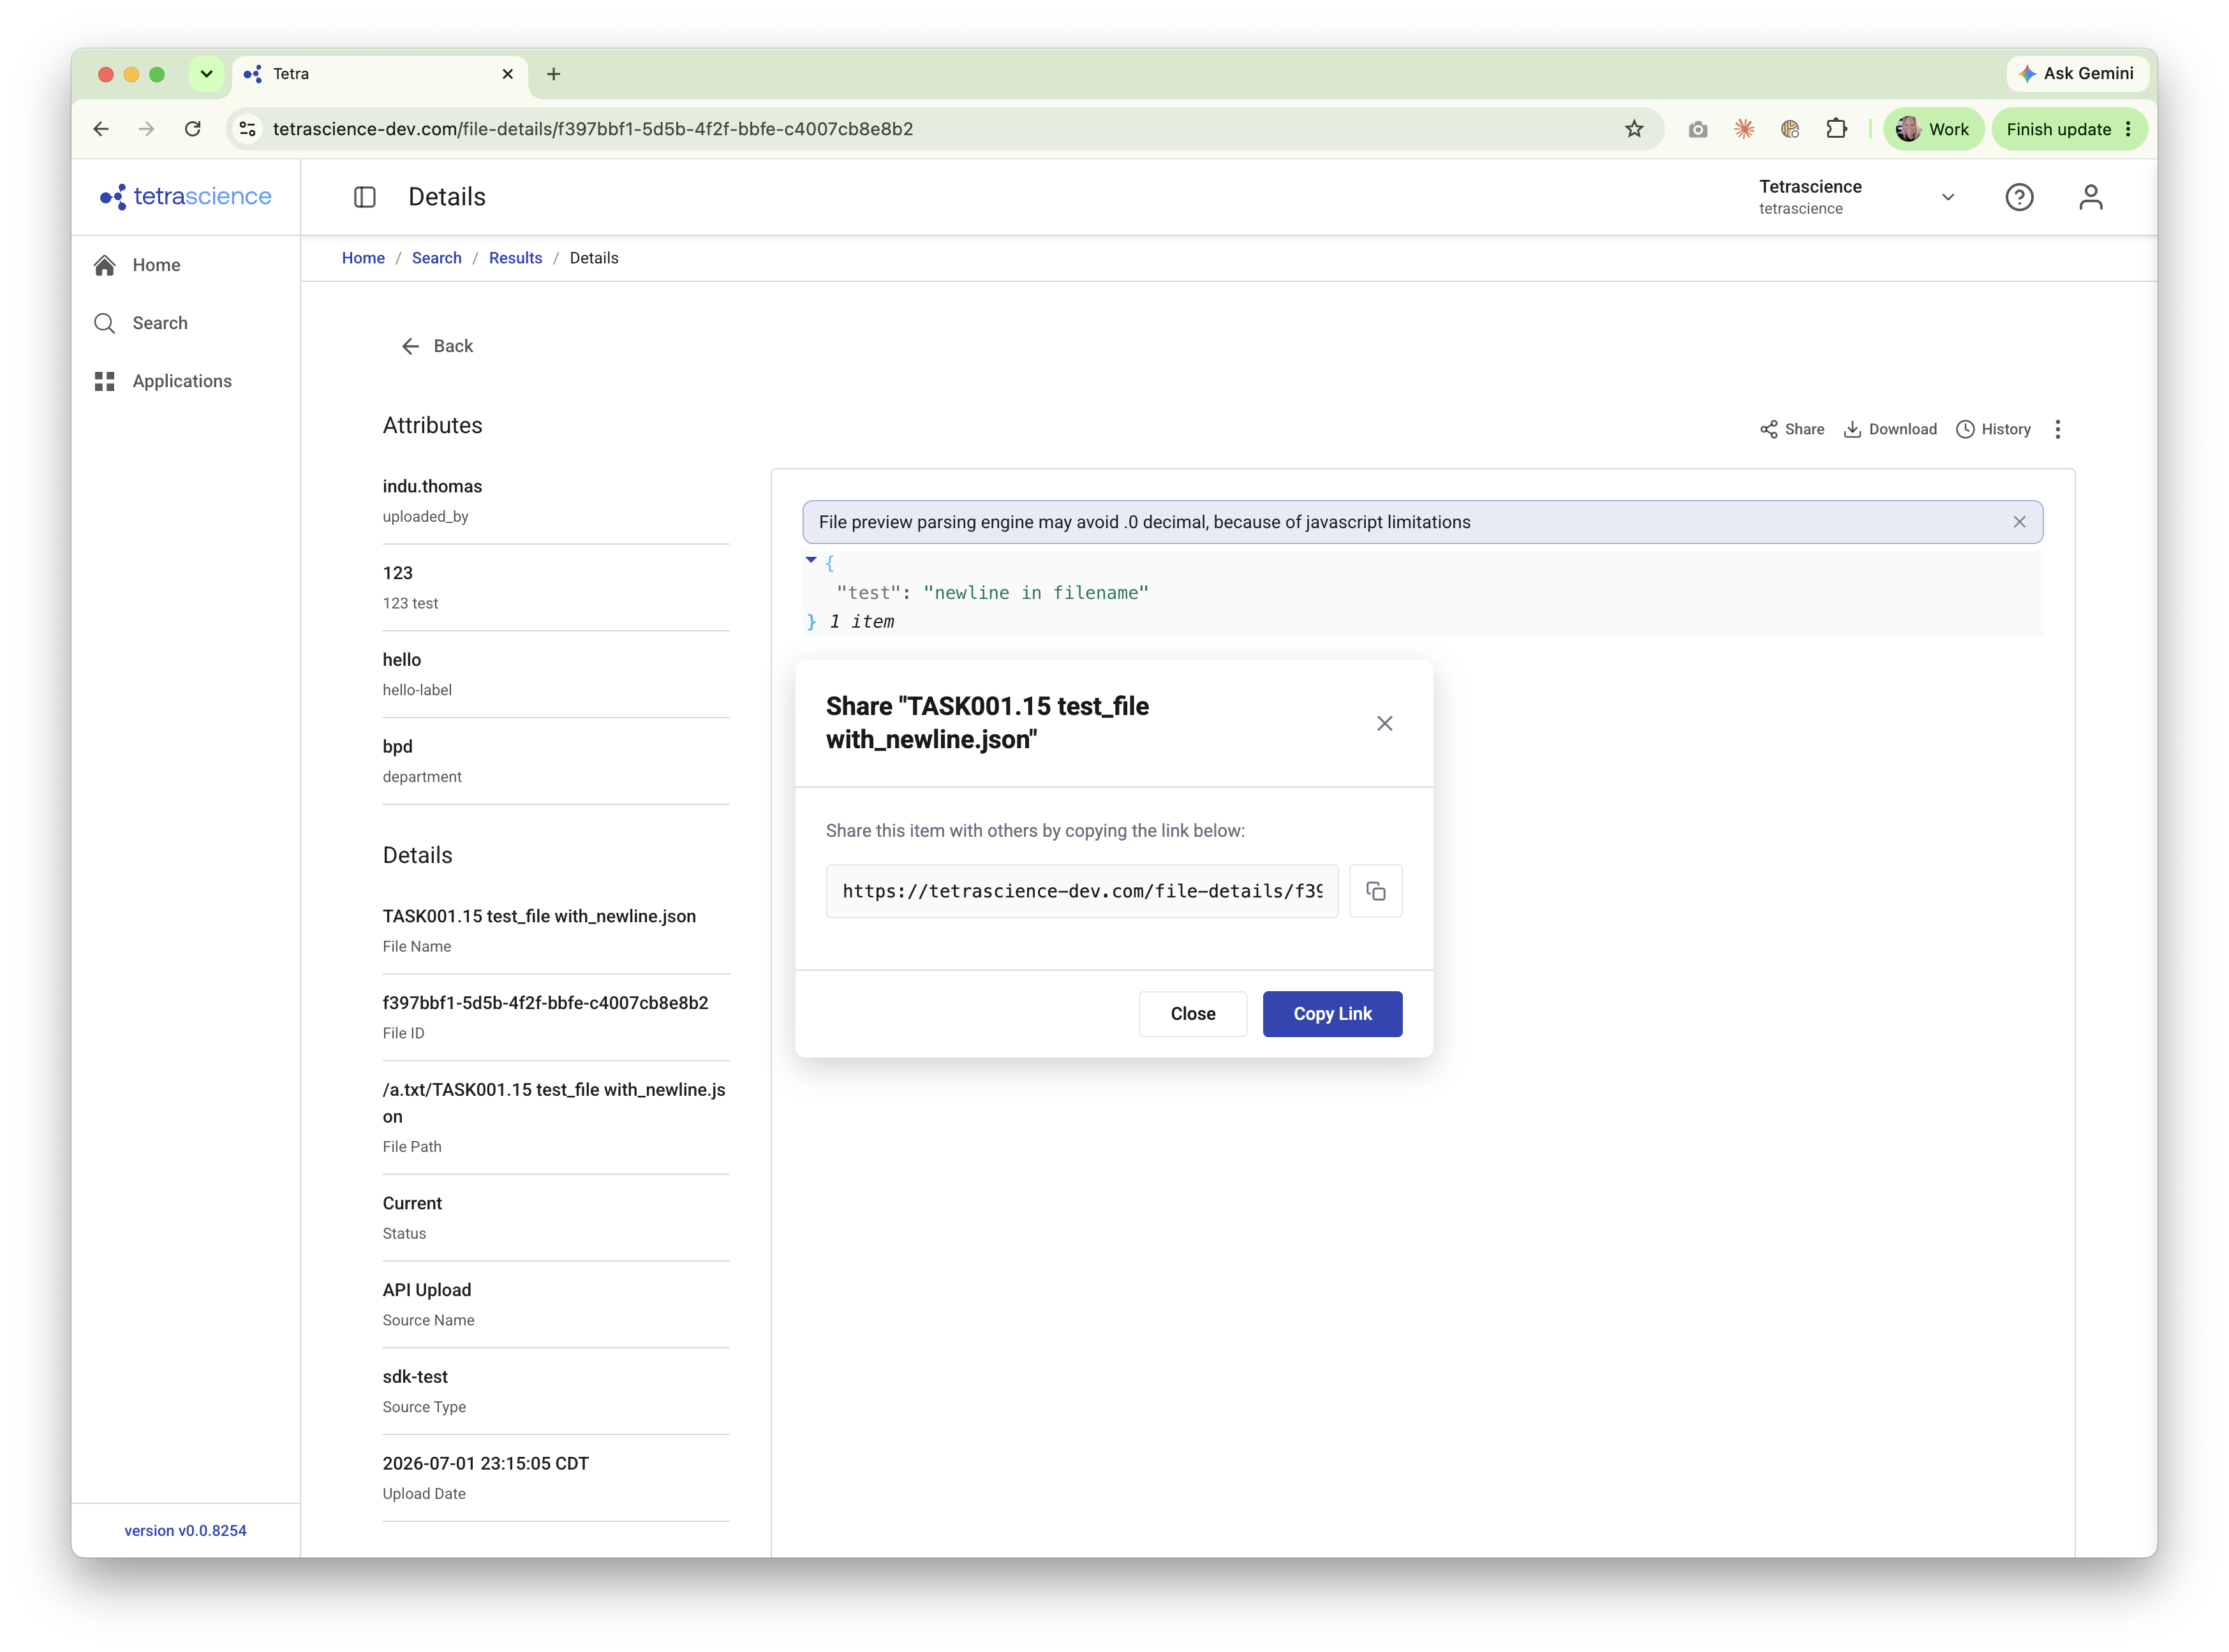
You can also share a static link to an individual file's Details page — for example, to reference a specific file from a LIMS or ELN.
- Open the file's Details page.
- Select Share. The Share dialog appears.
- Select Copy Link to copy the static link to that page.
Manage Data
Upload Files
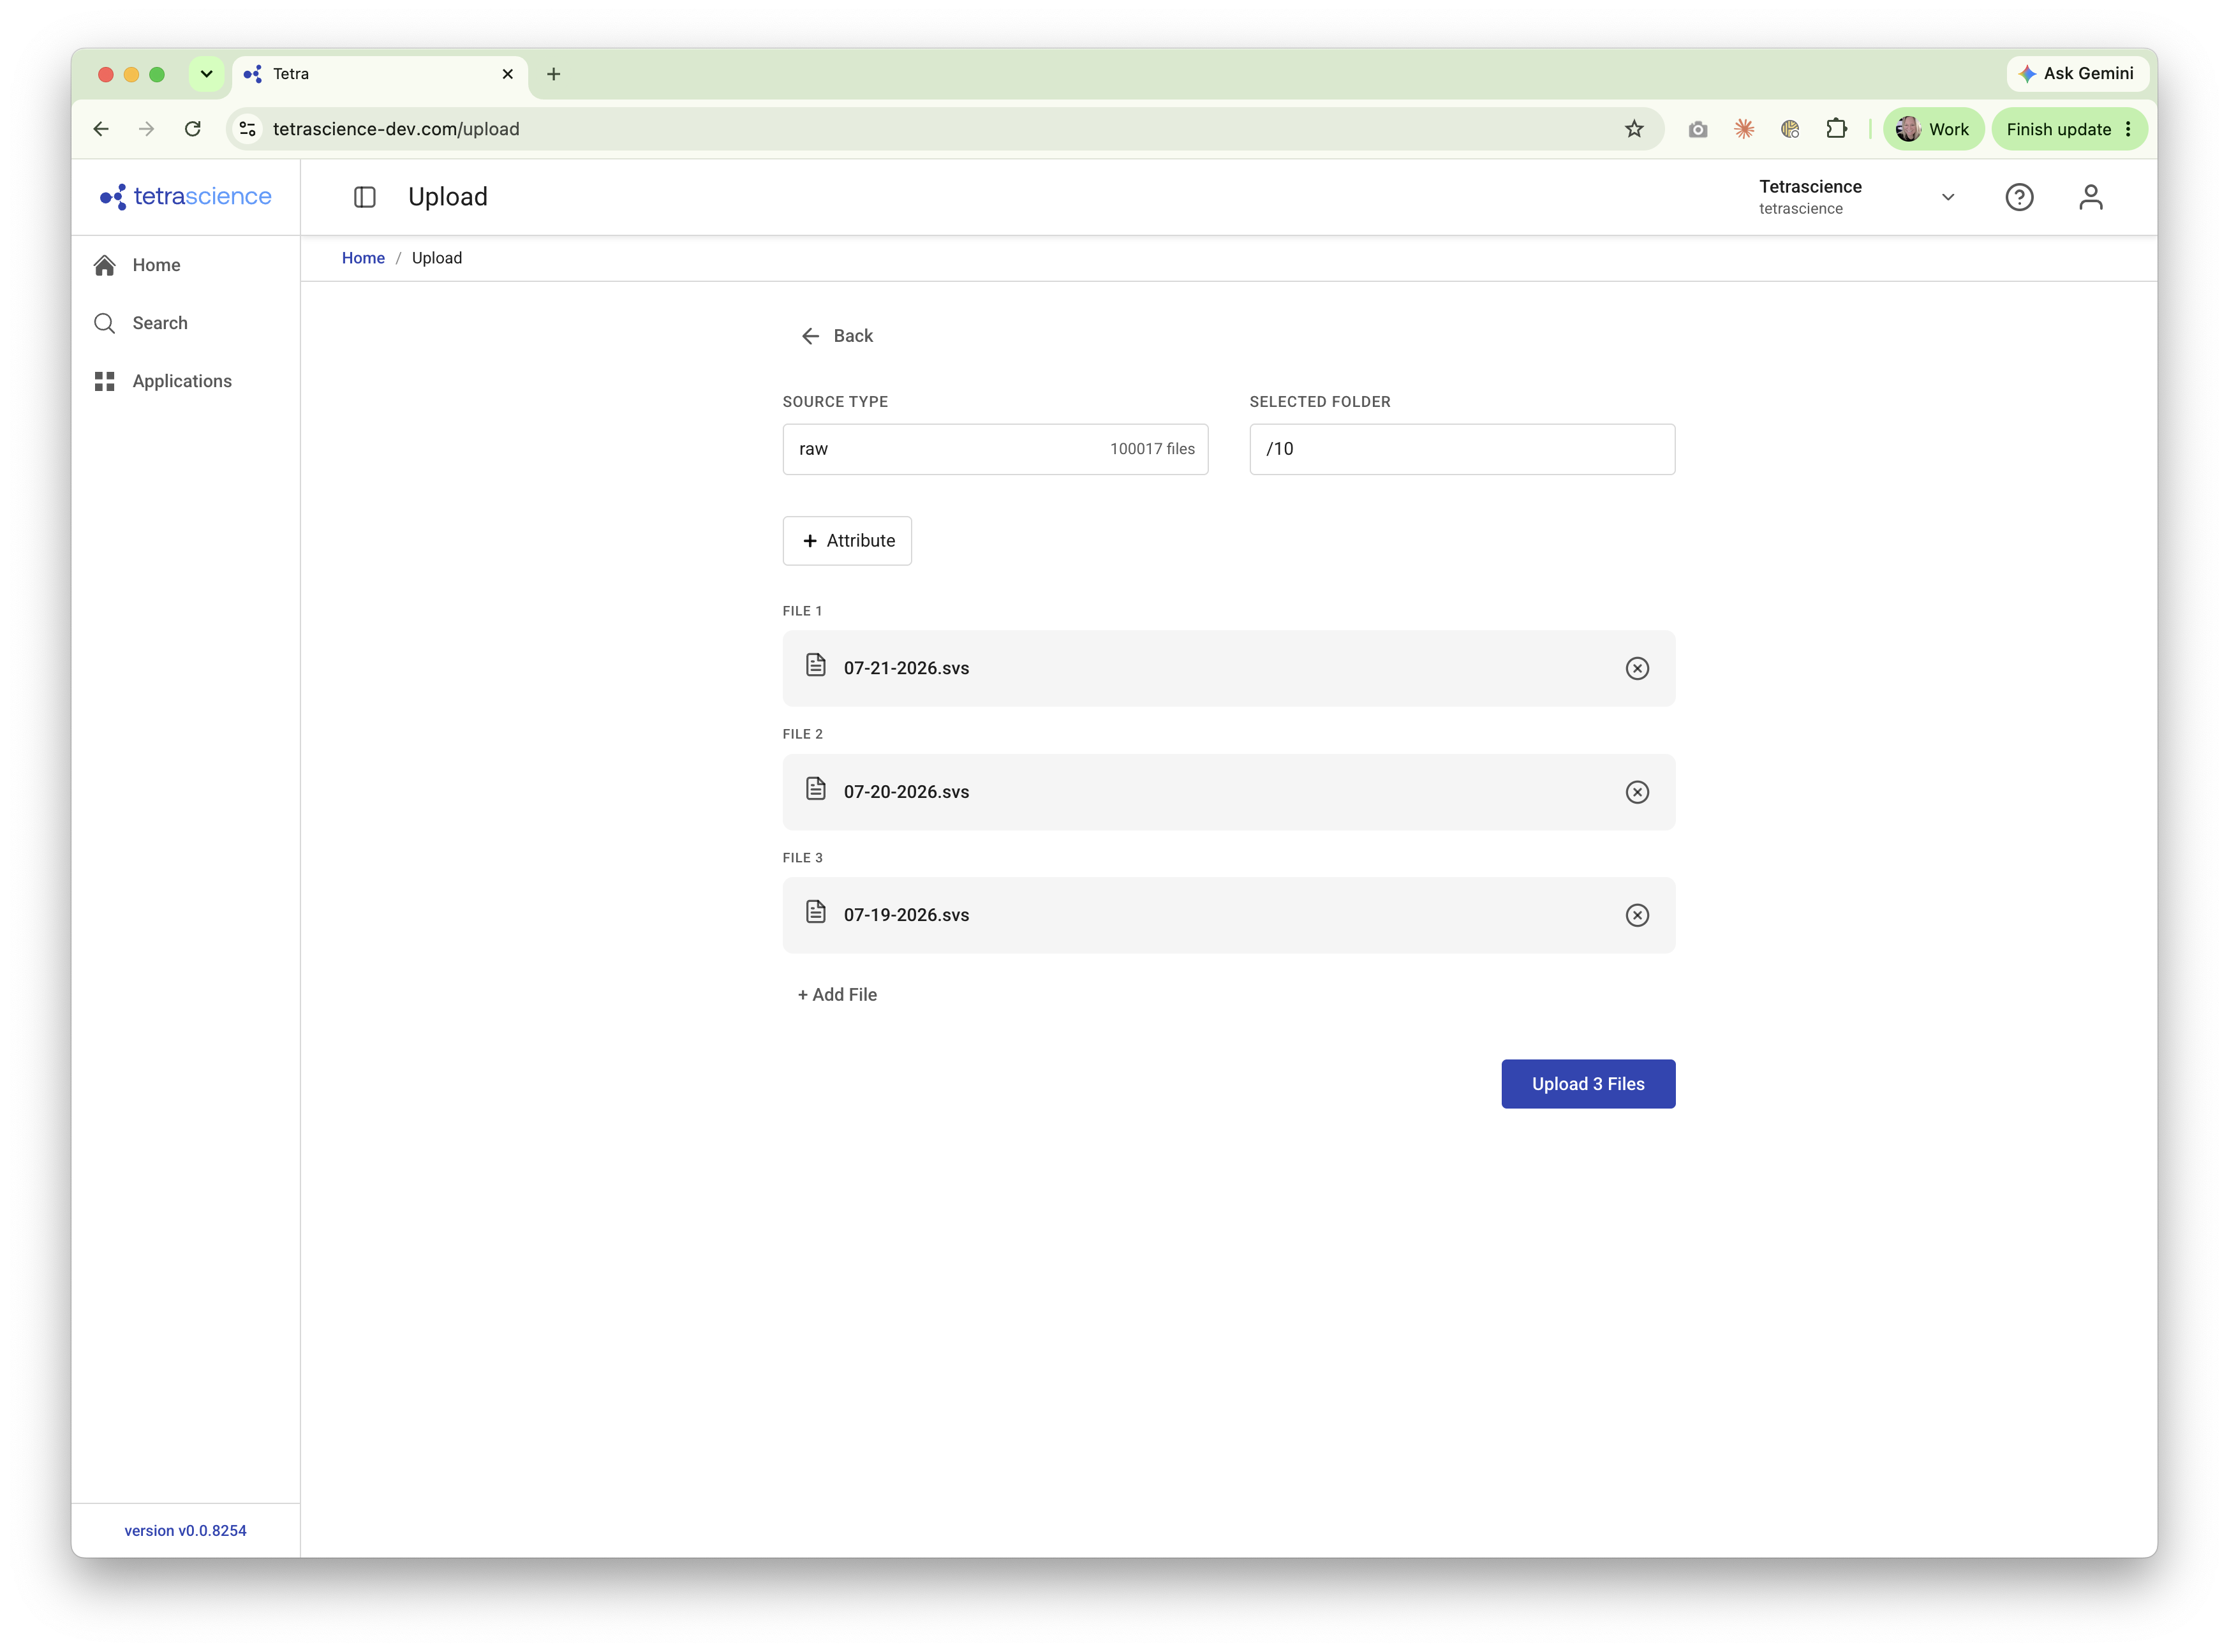
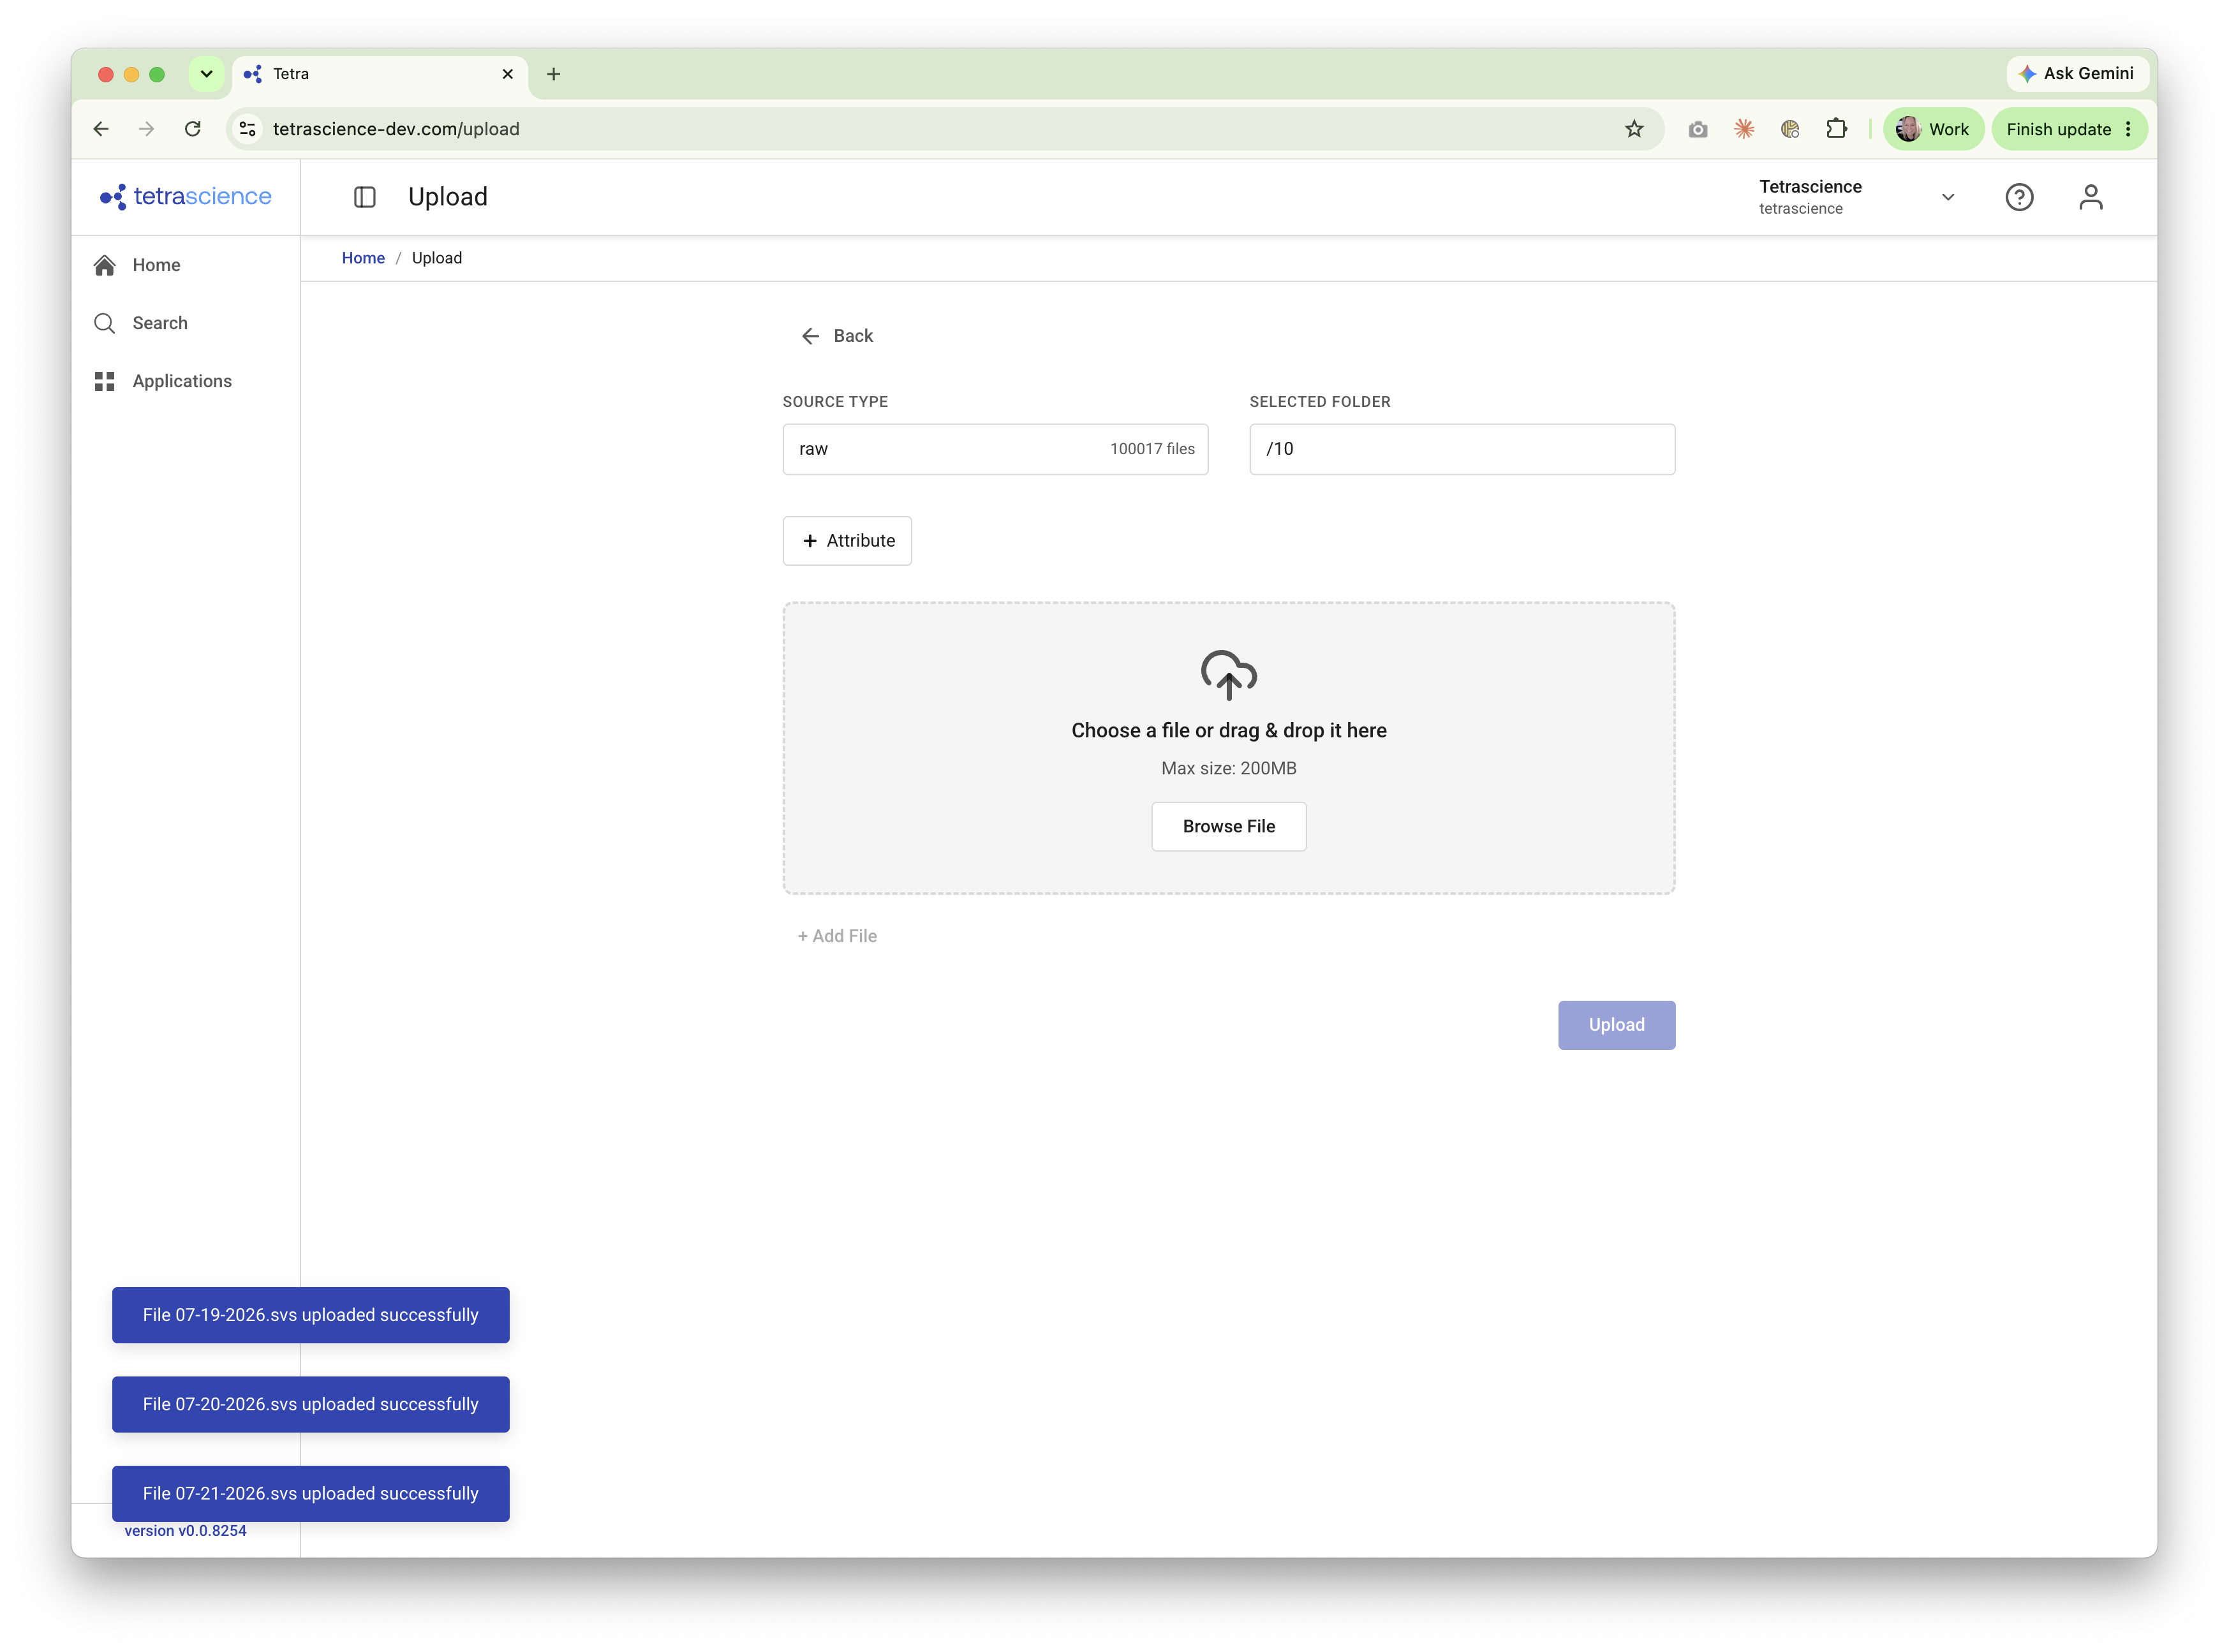
You can upload one or more files directly from the Scientist Experience.
- Select Upload.
- Choose files or drag and drop them into the dialog. You can add multiple files at once.
- Select the Source Type and destination Folder for the files.
- Choose Upload. The files are uploaded and become available through search.
Edit Attributes
To edit attributes for multiple files at once, do the following:
- In the search results, select the checkboxes next to the files that you want to update. To select all files in the search results, select the top check box.
- Choose Edit Attributes.
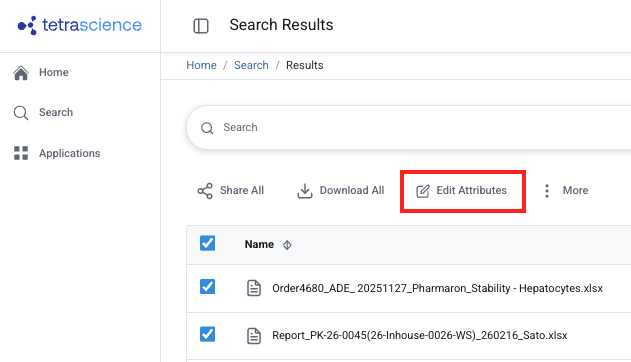
The Edit Attributes dialog appears.
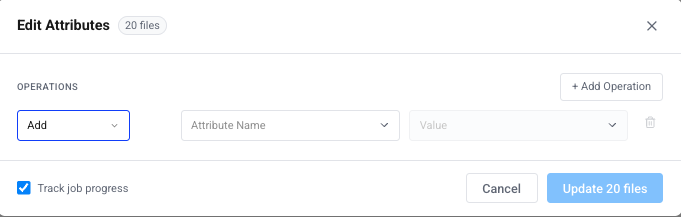
- Add or remove attributes as needed.
- (Optional) Check the Track job progress box to track the bulk label edit job. To monitor the job's progress in IT mode, see Monitor a Bulk Label Edit Job's Status.
- Select Update [#] files. The attributes are updated for all selected files.
Upload a New Version of a File
You can upload a new version of an existing file from either the search results or the file's Details page.
From the search results:
- In the search results, find the file that you want to update.
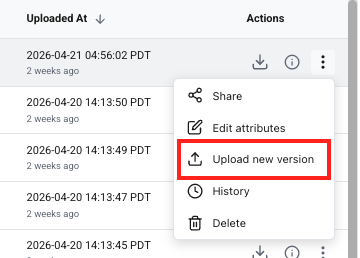
- Select the file's three-dot menu icon. Then, select Upload new version.
From the file Details page:
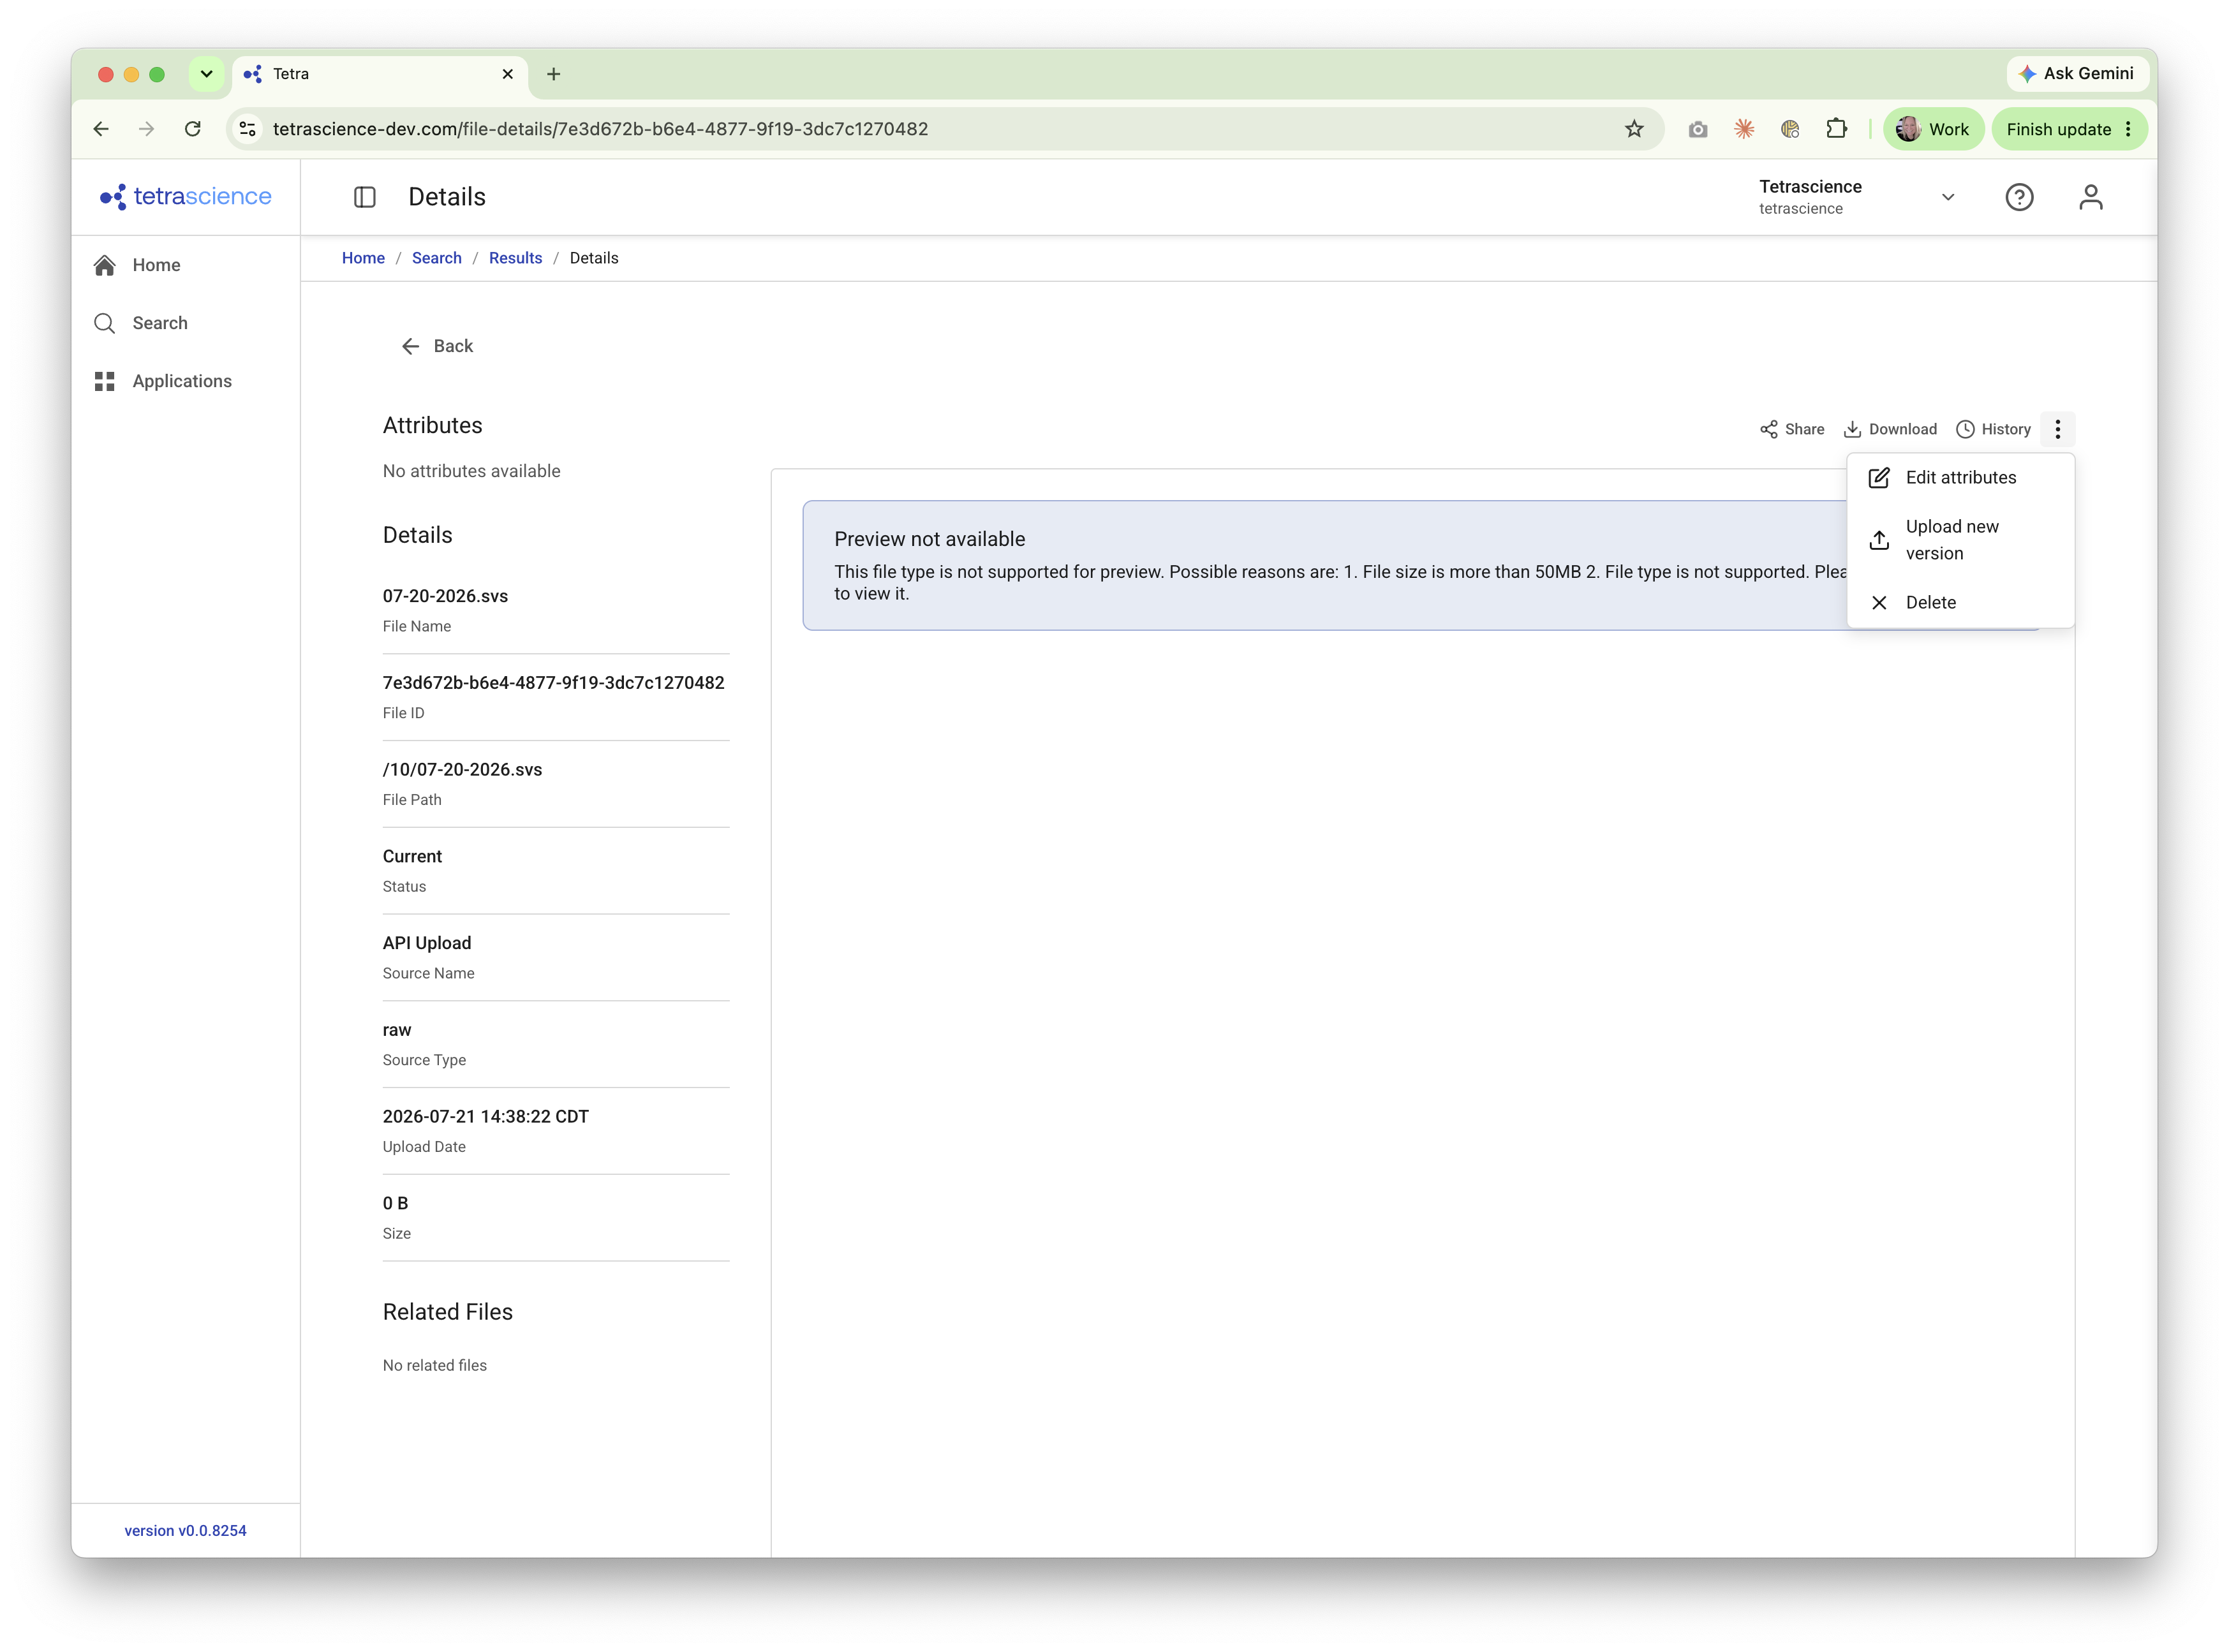
- Open the file's Details page.
- Select the three-dot menu icon. Then, select Upload new version.
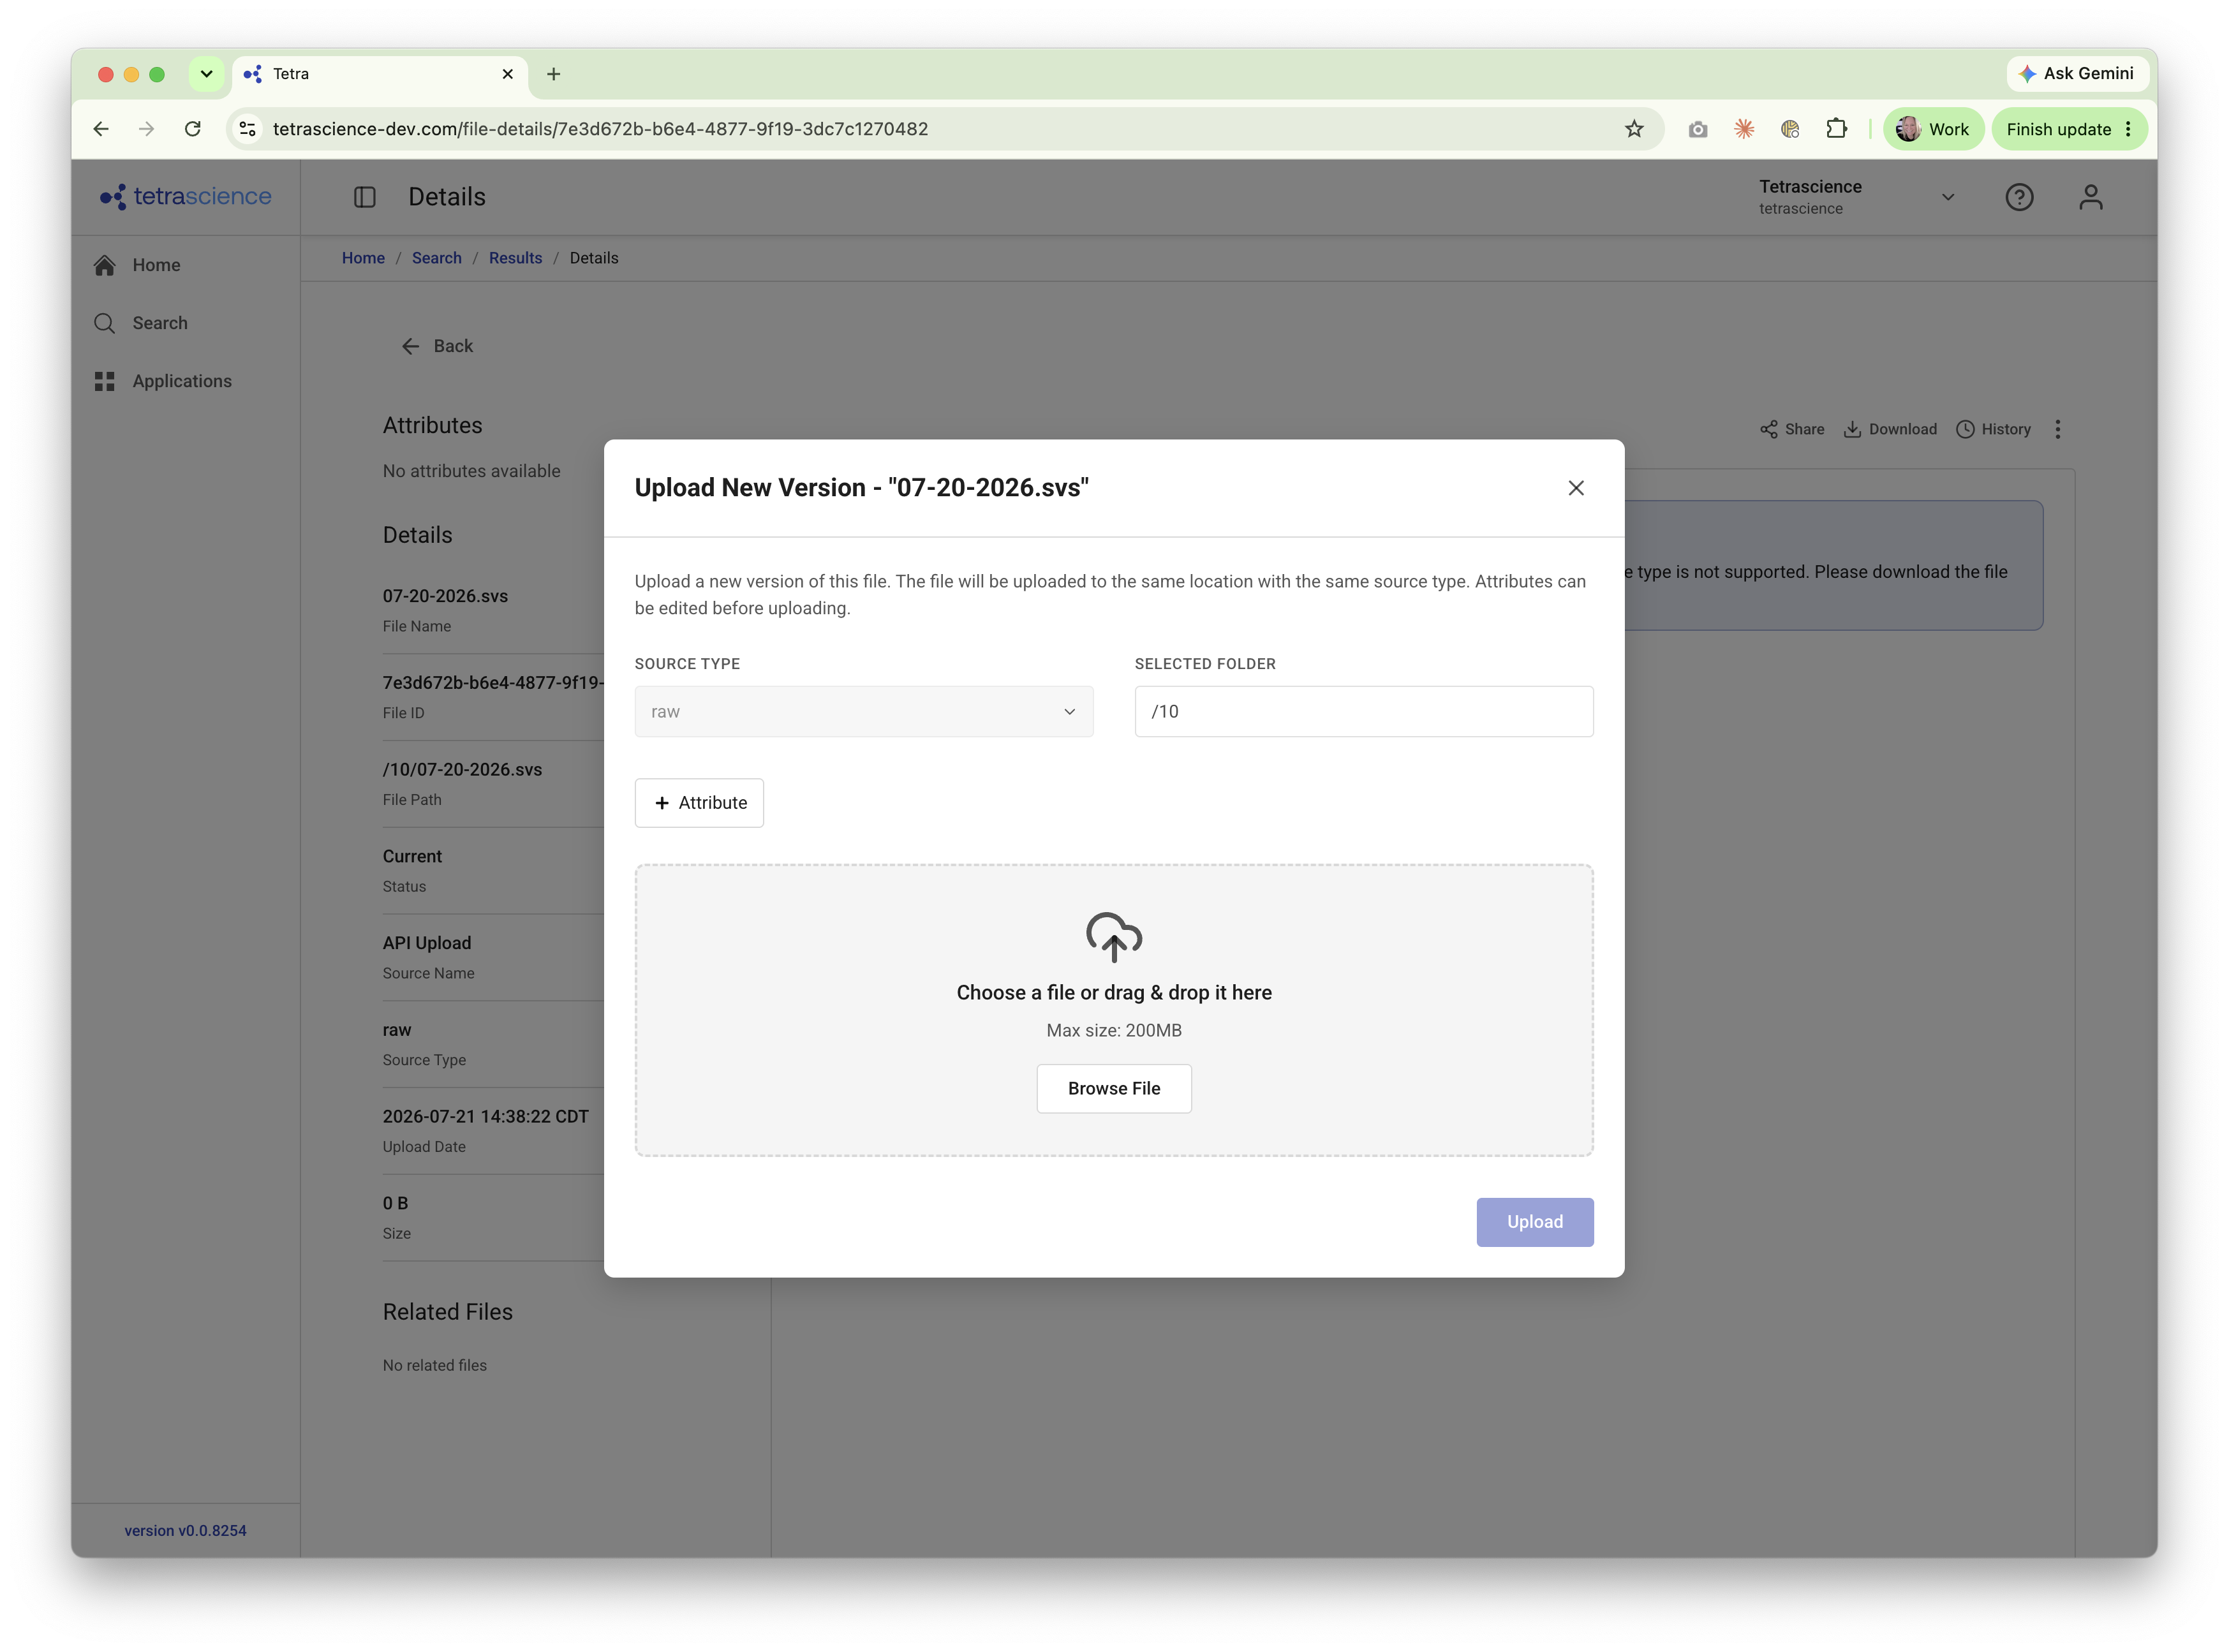
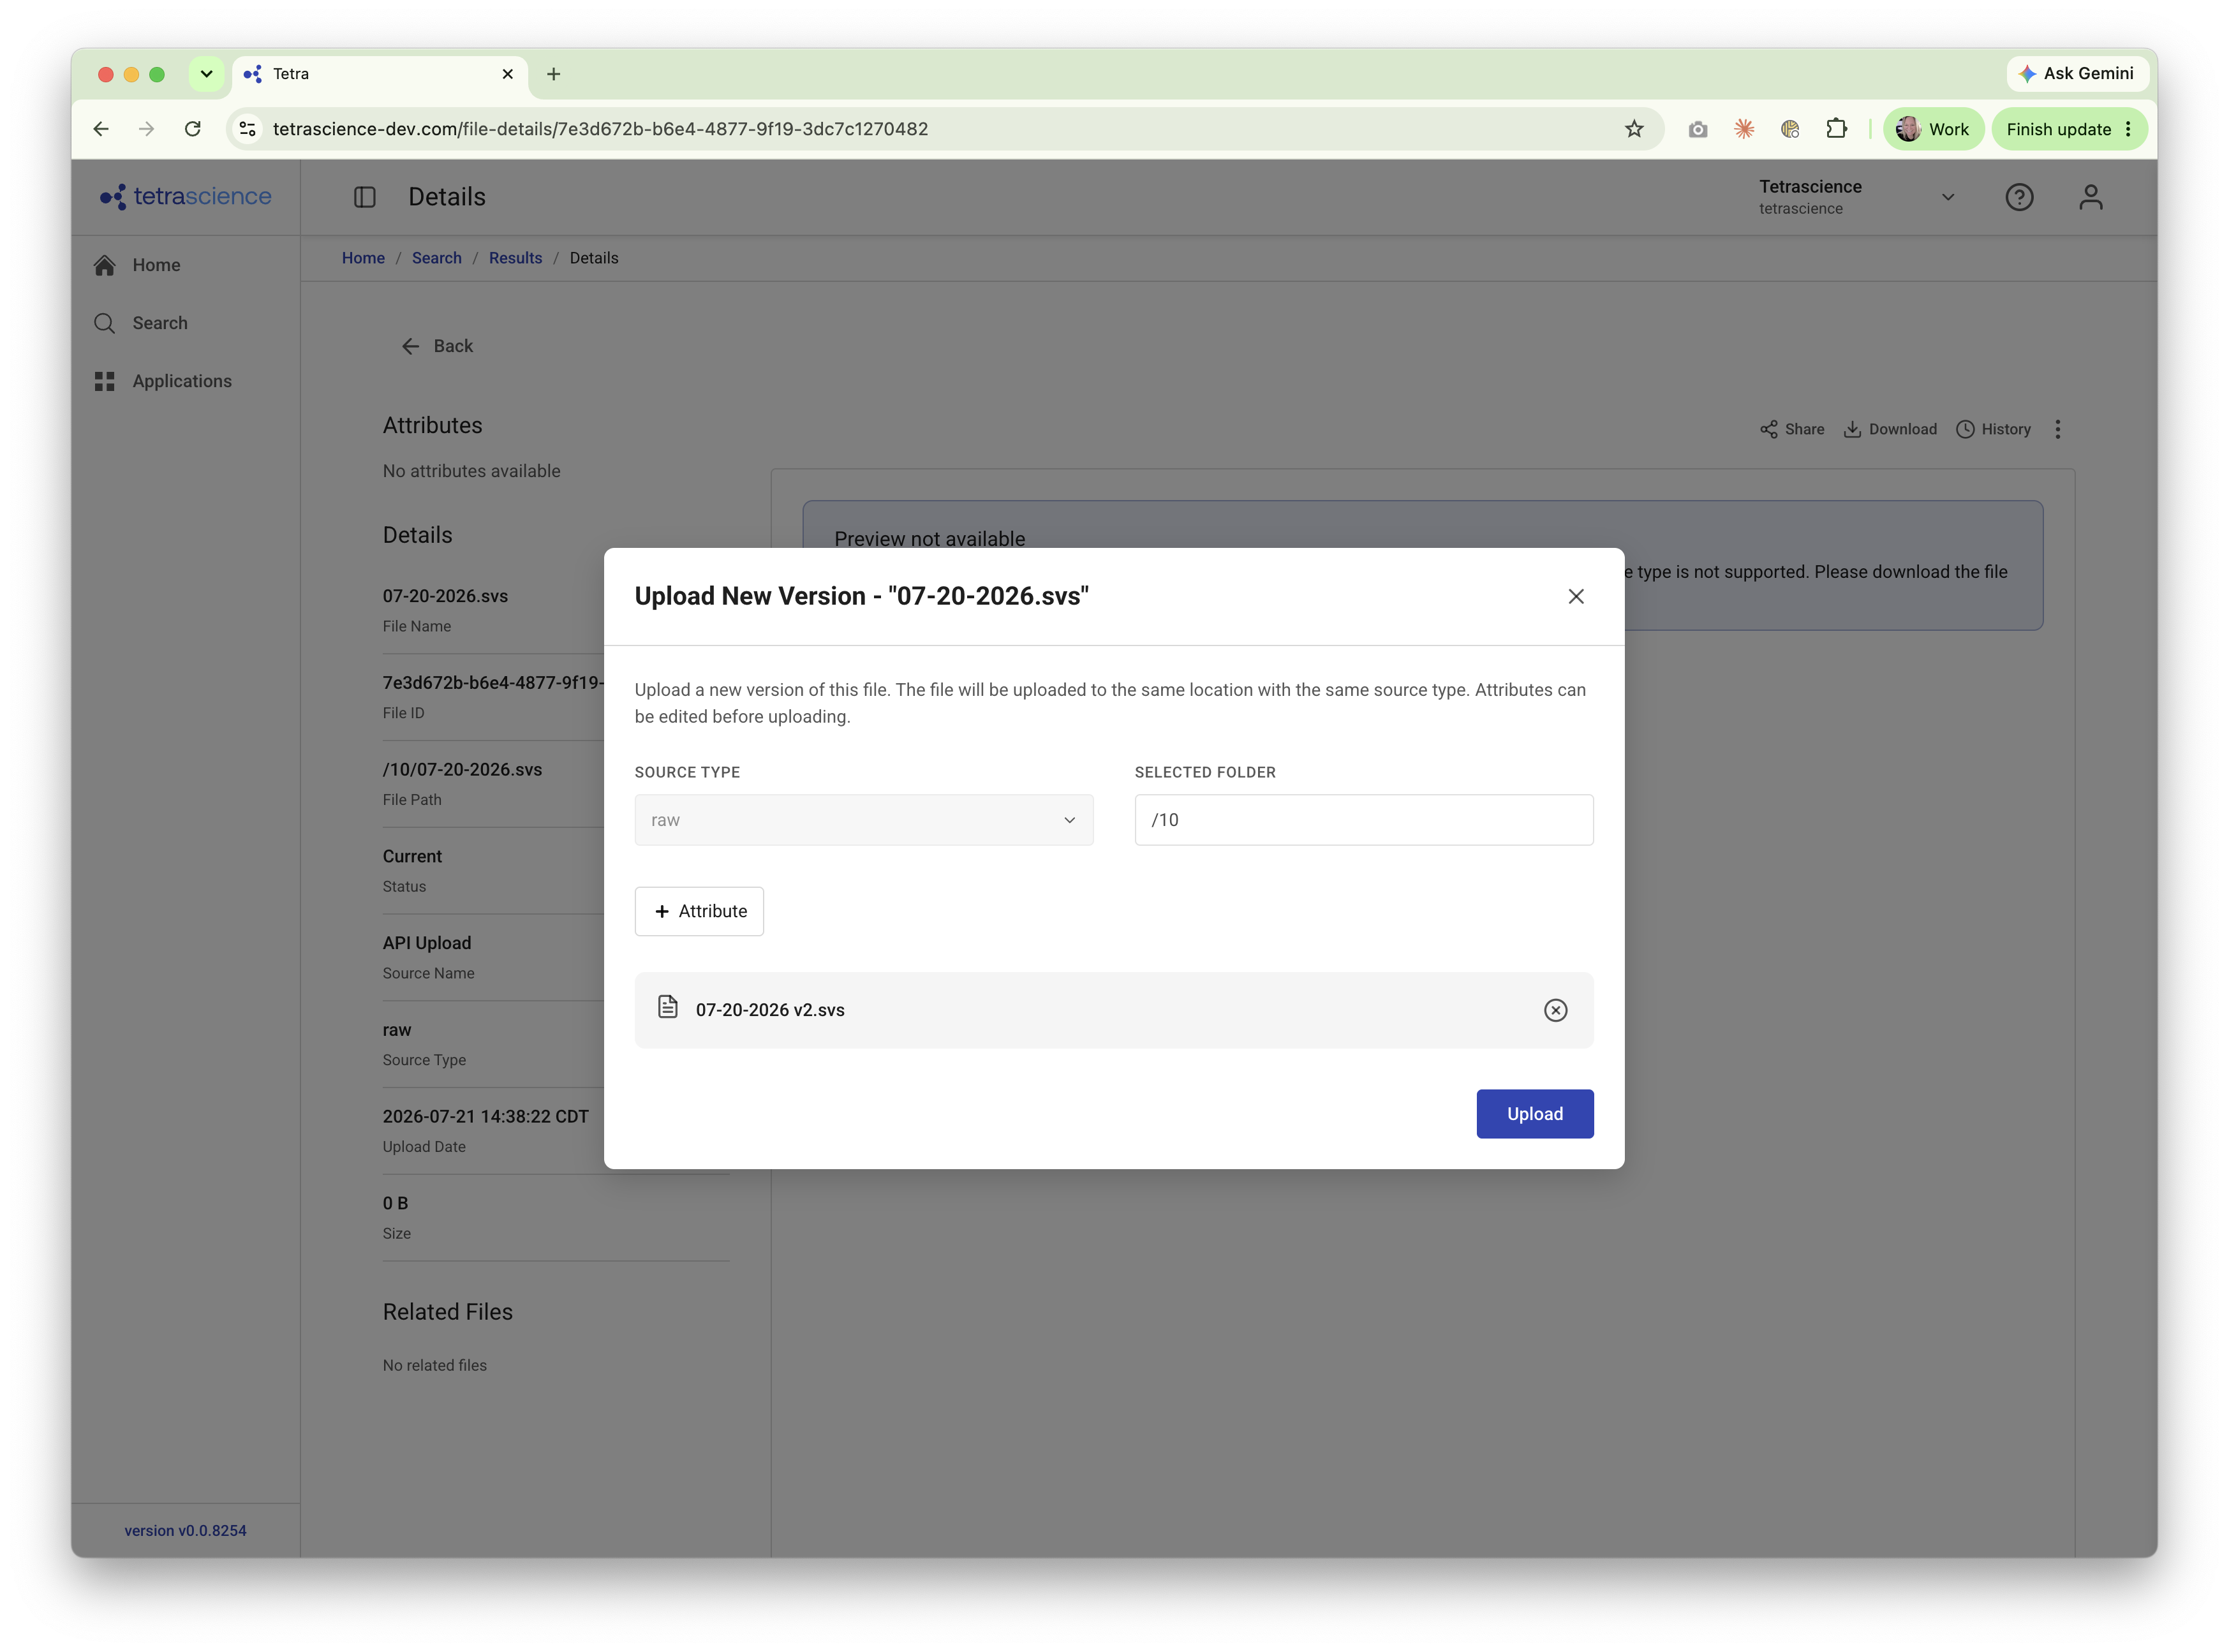
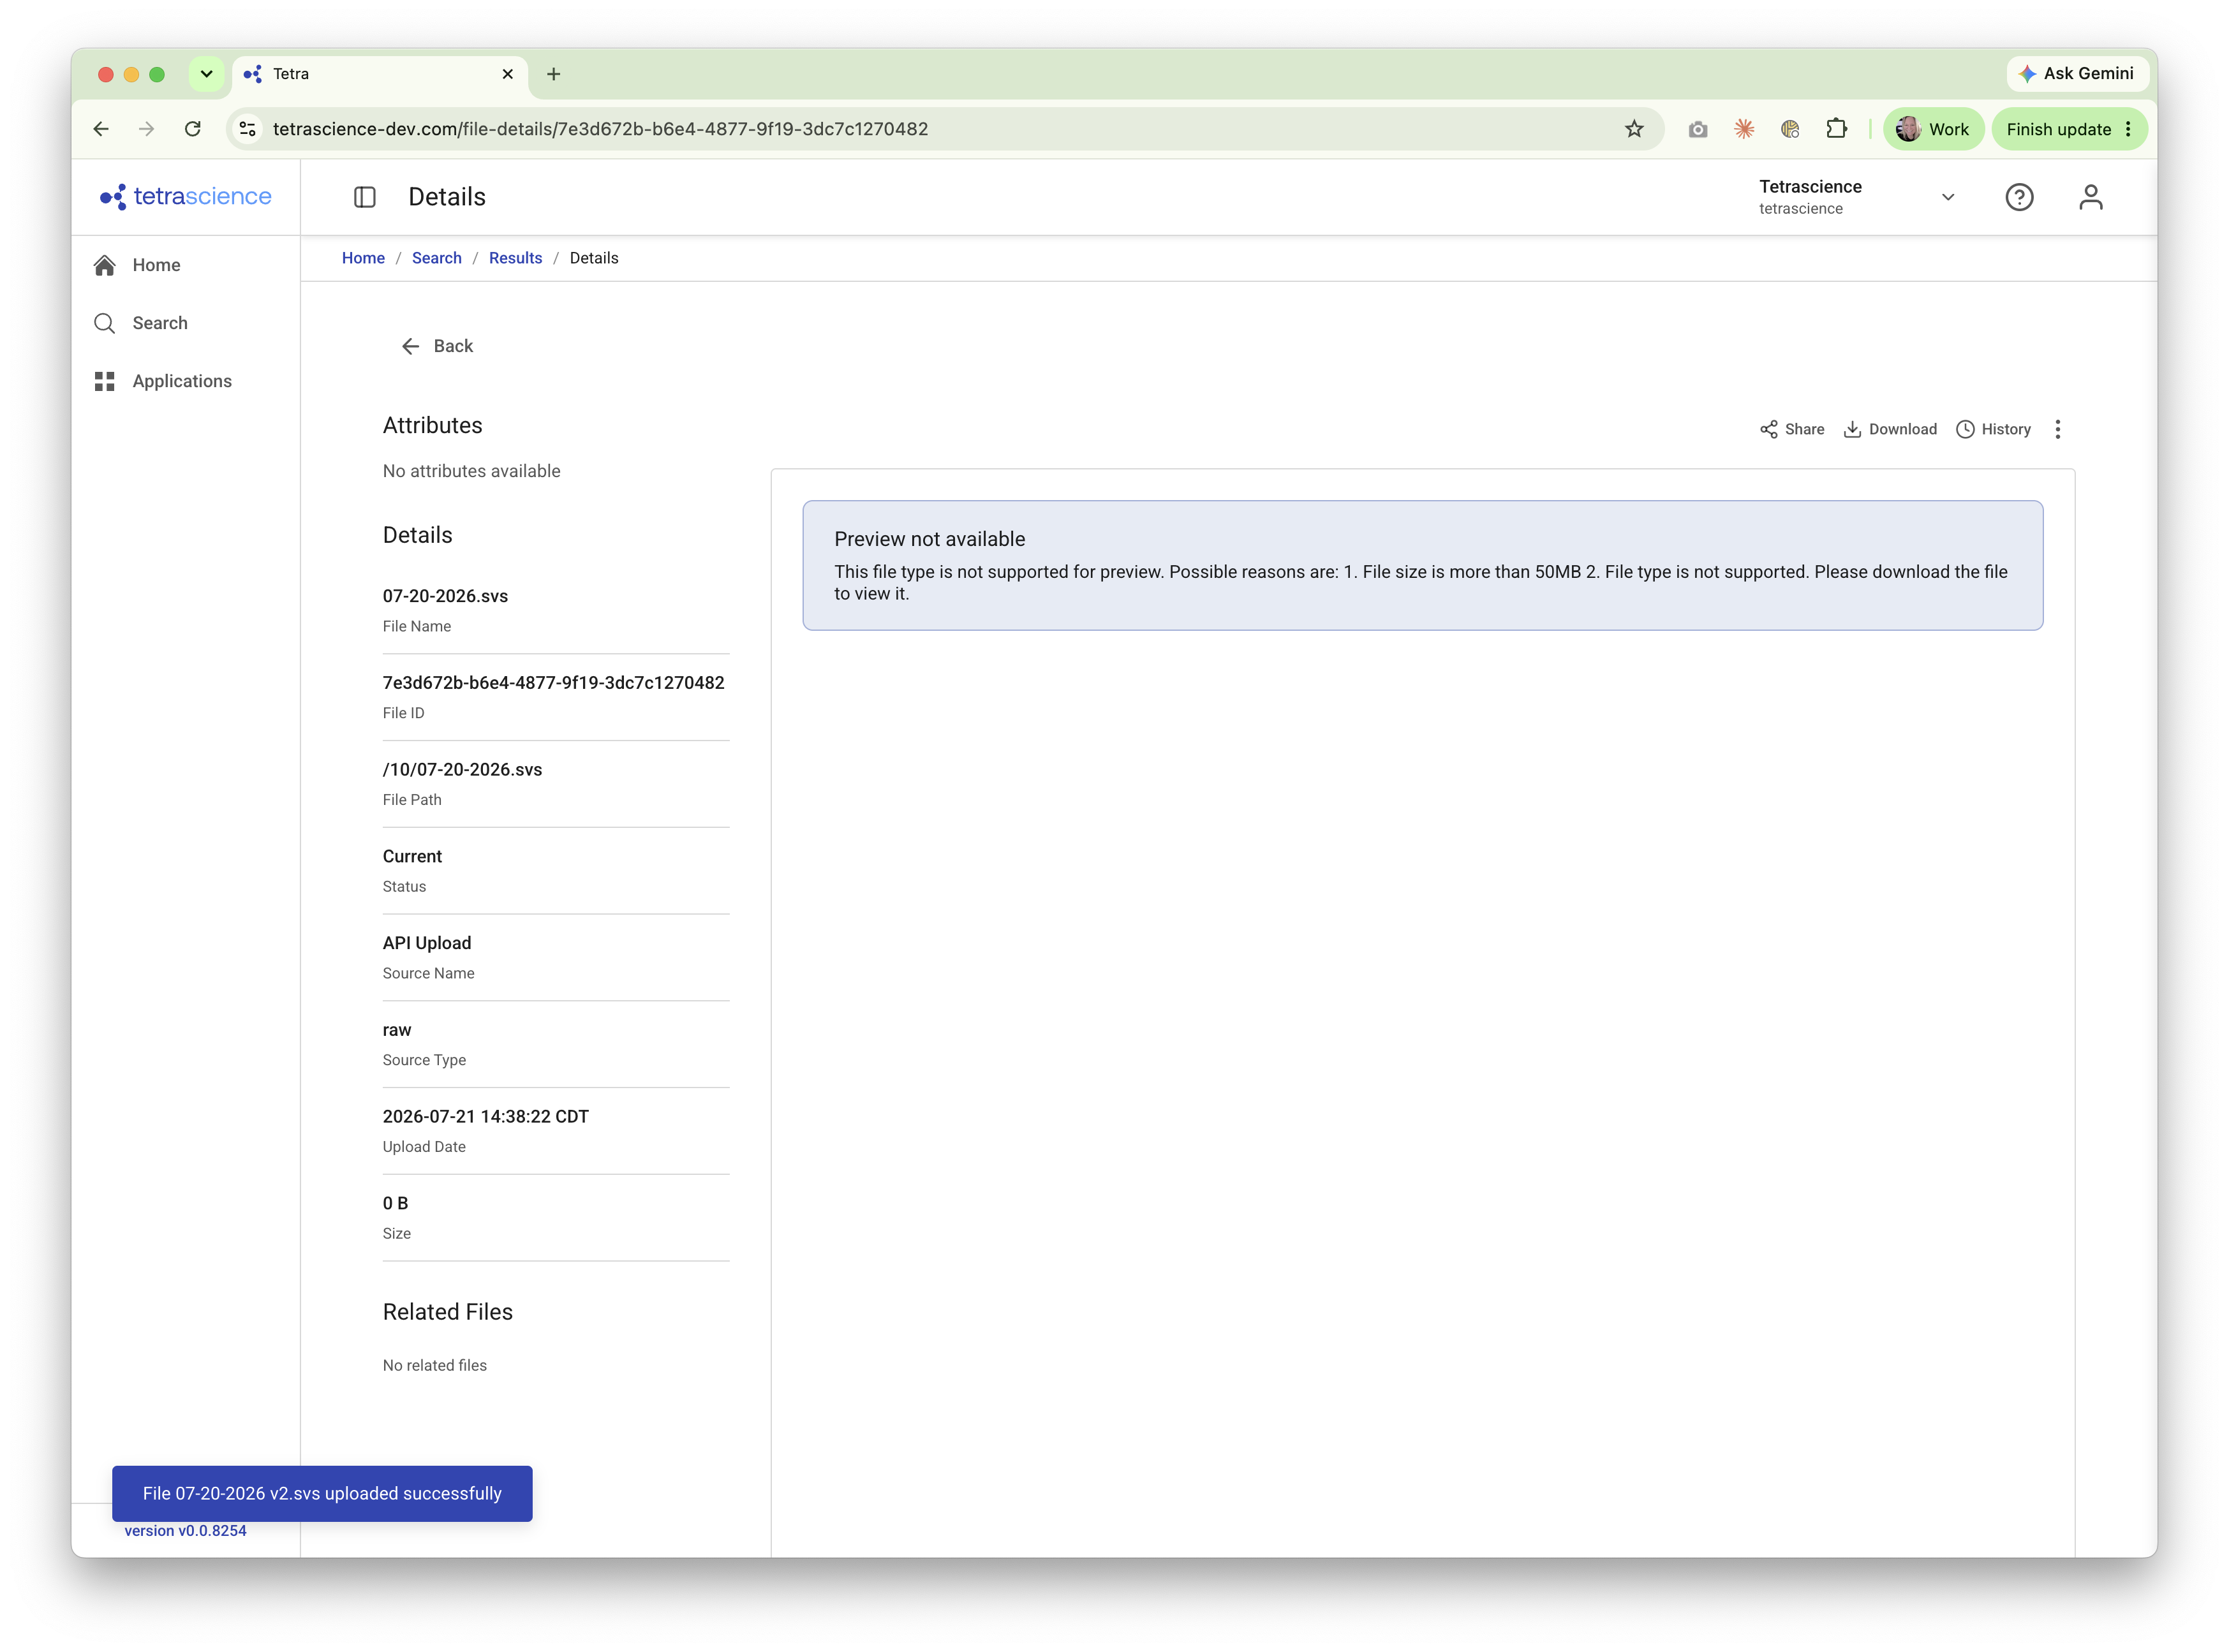
The Upload New Version dialog appears.
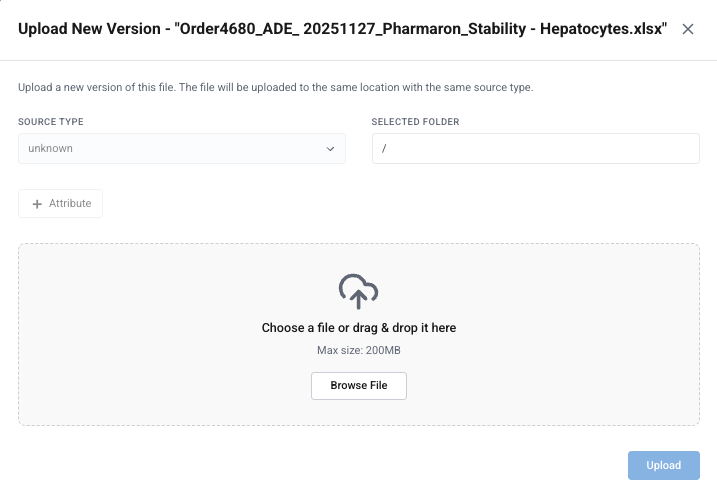
- Choose a file or drag and drop it into the dialog.
- Select the file's Source Type and Selected Folder.
- Choose Upload. The new version replaces the previous version as the Current version, and the file's version history is updated.
Download Files
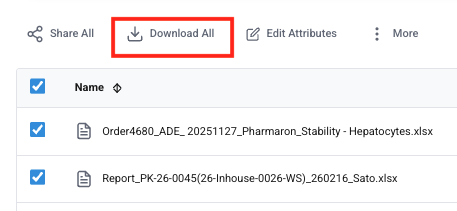
To download multiple files, do the following:
- In the search results, select the checkboxes next to the files that you want to download. To select all files in the search results, select the top check box.
- Choose Download All. The files download to your local machine.
/- or -
To download a single file, go to that file's Details page and select the Download option.

Delete Files
IMPORTANTDeleted file versions are unavailable through search or SQL queries. It is a soft delete within the system, which means that the deleted file versions remain in the Data Lake, still display with a UUID on the File Details page, and remain available through the TetraScience API. However, restoring deleted files to an active state requires manual steps that must be done in conjunction with TetraScience, and should be done only in business critical situations. Please contact your customer account leader if you need to restore deleted files.
To delete multiple files, do the following:
- In the search results, select the checkboxes next to the files that you want to delete. To select all files in the search results, select the top check box.
- Choose the three-dot More menu icon. Then, select Delete All.
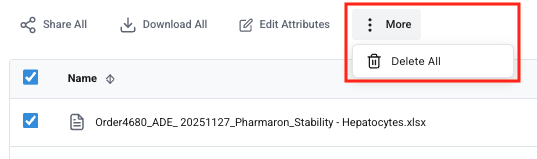
A Delete dialog appears, asking you to confirm that you want to delete the files. Choose Delete to delete the files.
/- or -
To delete a single file, select the file's three-dot menu icon. Then, select Delete.
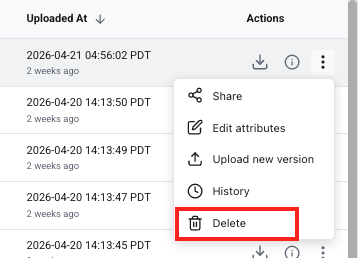
A Delete dialog appears, asking you to confirm that you want to delete the file. Choose Delete to delete the file.
Change Reason for Audit Trail
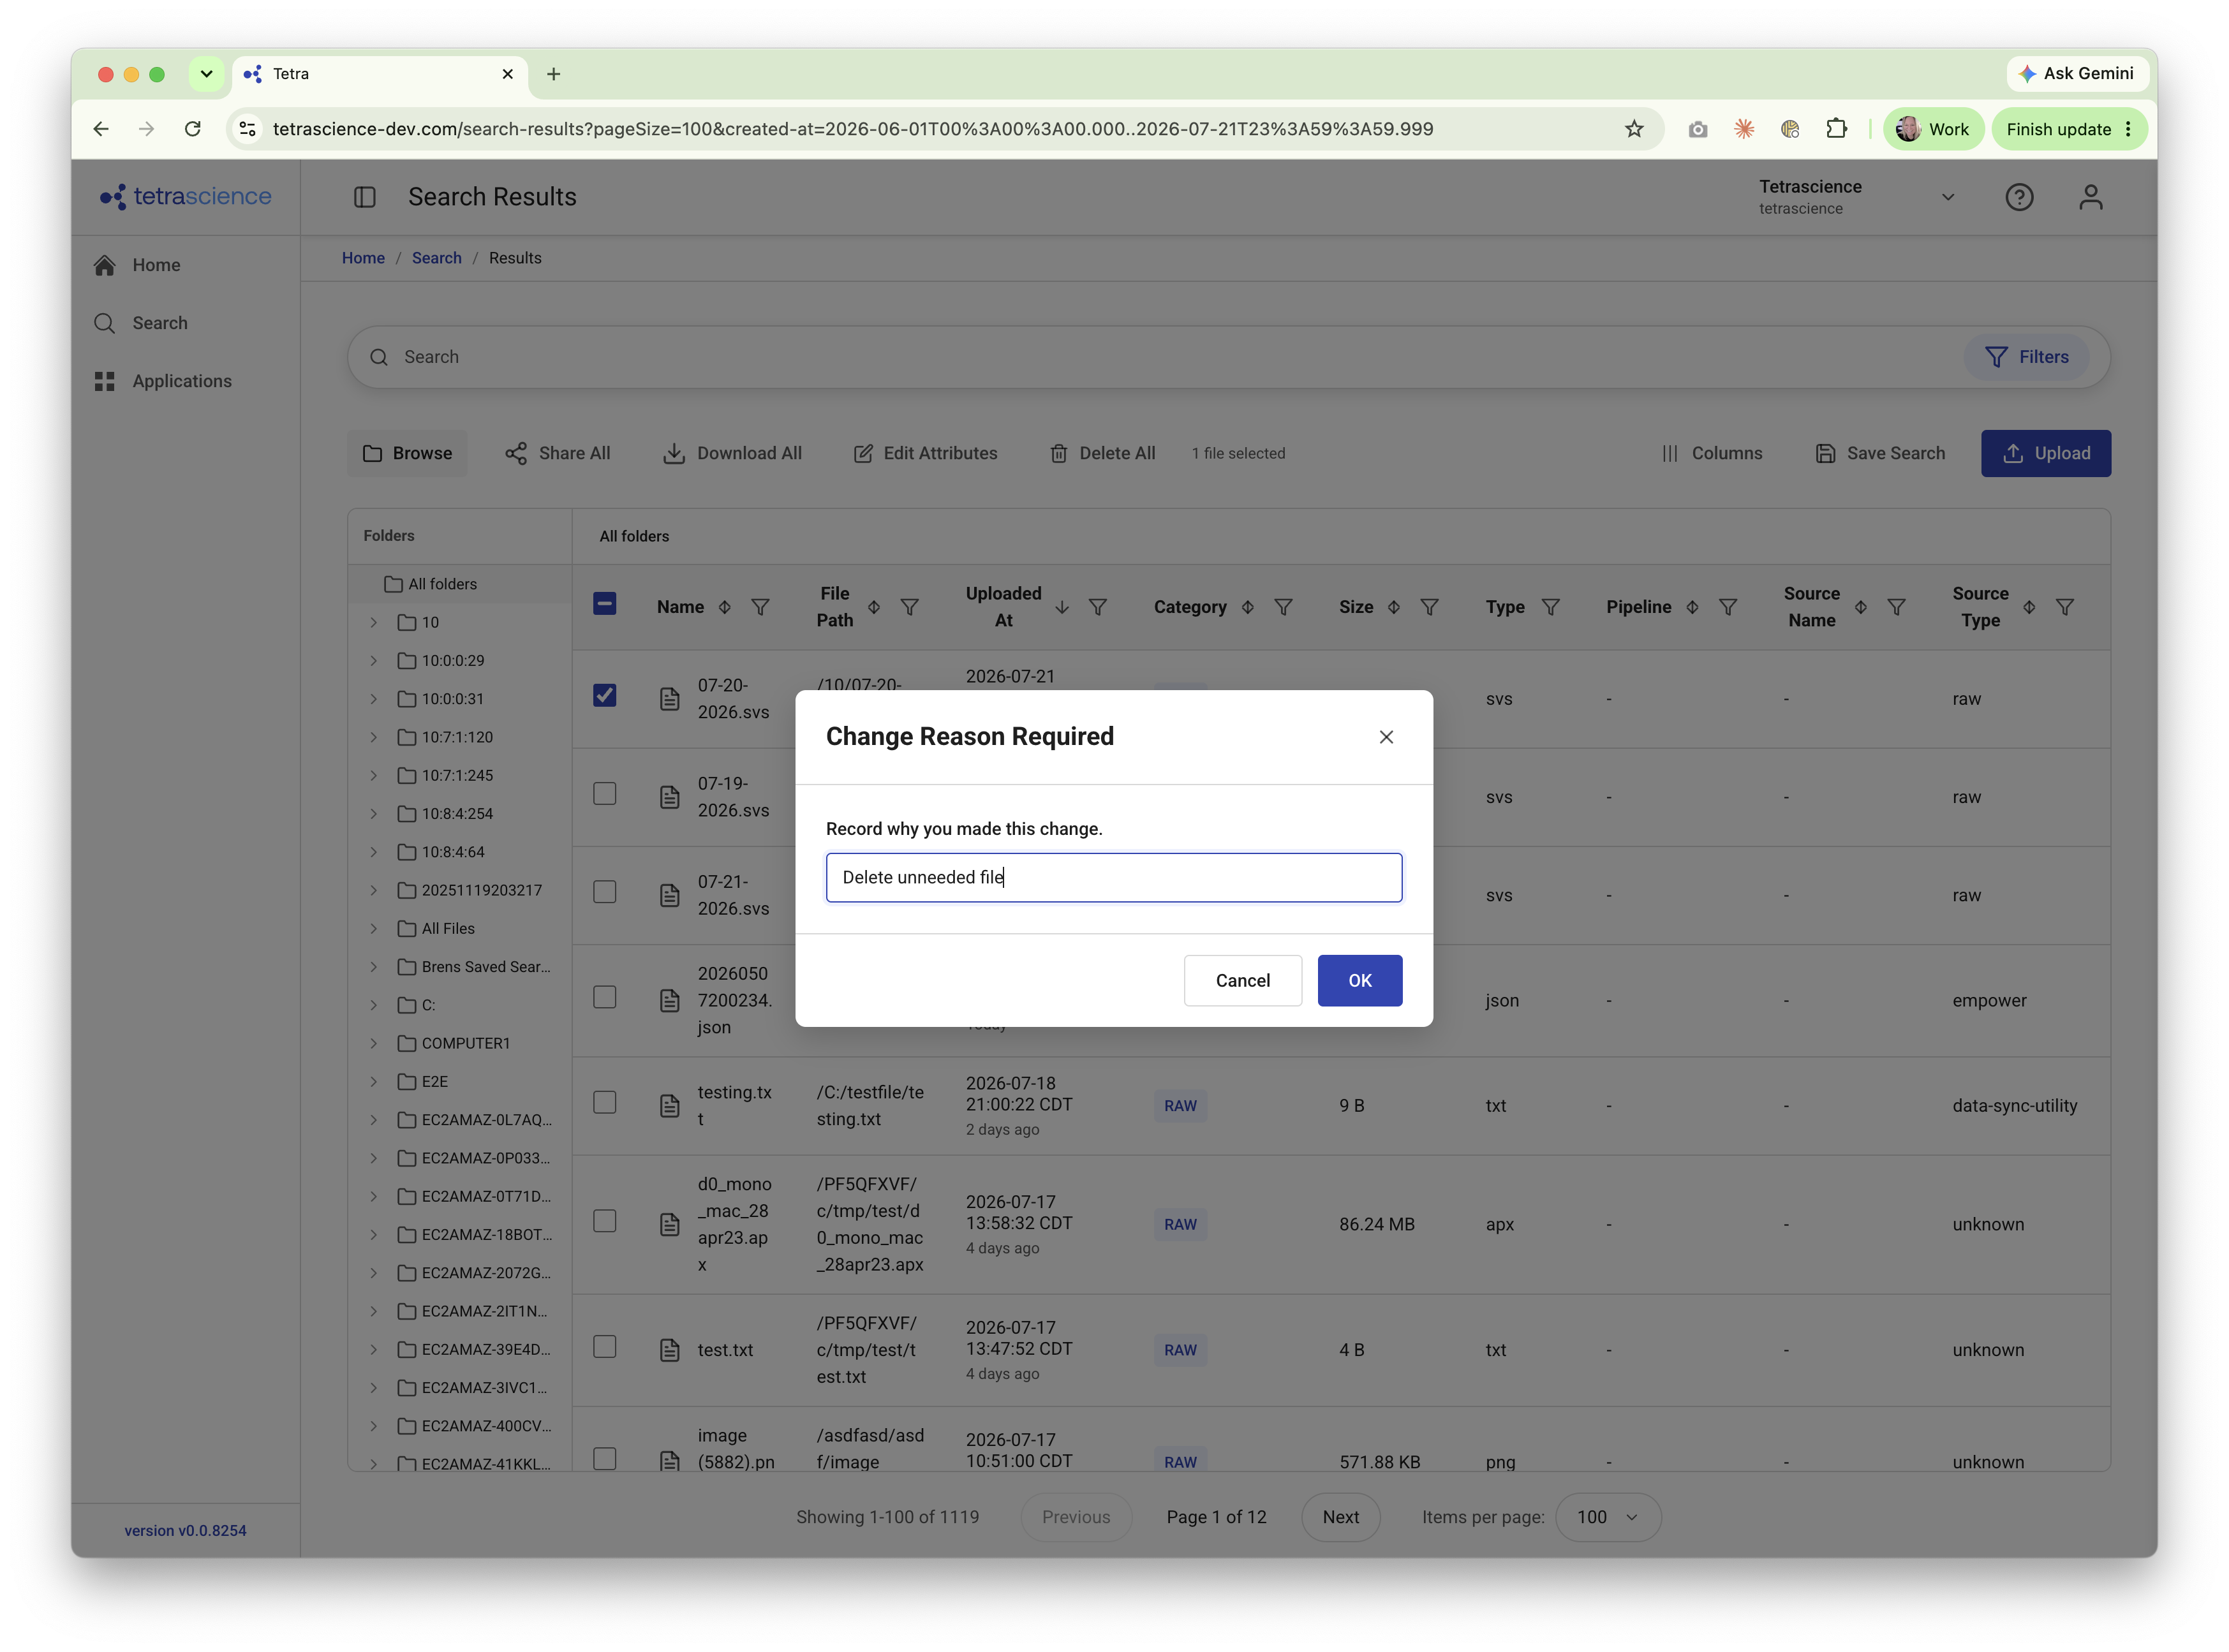
If your organization enforces audit-trail change reasons, you are prompted to enter a change reason when you delete or otherwise modify files. The change reason is recorded in the audit trail for that action.
- Perform the action (for example, delete a file or edit attributes).
- In the dialog, enter a change reason.
- Confirm the action. The change reason is captured in the audit trail.
Analyze and Visualize Data
Tetra Data Apps enable Analytics and AI on your scientific data. Once Data Apps are configured for your organization, users can access the apps through the Scientist Experience or the Tetra Data & AI Workspace.
To view Tetra Data Apps using the Scientist Experience, do the following:
- In the left the navigation menu, choose Applications. The Applications page appears and displays a list of available apps.
- (Optional) Use the category filters to narrow the list of apps.
- Select an app to open it and start analyzing data. User guides for apps are available on the Details page for each app.
IMPORTANTApps that you want to have displayed in the Scientist Experience must have the
scientific_app_categorylabel applied to them. Apps without this label won't appear in the Scientist Experience. To apply labels to apps, see Activate an Embedded Data App to update labels in the UI, or Update Data App labels for access control in the TetraScience API Reference to update labels programmatically.
Updated 5 days ago